How To Make Photo Frames With Ice Cream Sticks At Home
Nov. 27, 2018
You Will Need:
Fevicryl Acrylic Colours Pearl White 301, Fevicryl Water Based Glass Colours Kit (Tomato Red, Brown, Crystal Green), Fevicryl 3 D Outliner Glitter Silver 402, Fevicryl Fabric Glue, Fine Art Brushes, Candy Sticks, Scissors, Cotton, Colour Palette, Water Container.
Description :
Christmas is all about the spirit of giving! Spread some joy by making these super cute Santa photo frames using ice cream sticks. Aren’t they really cute and they can make for a nice Christmas décor as well as Xmas tree danglers! Learn how to make this super easy ice cream stick photo frame with step by step guide which is a stunning best out of waste DIY.If you like turning waste material into something pretty then you must definitely check How to Make Photo Frame At Home, How to Make Pumpkin Tealight Holder, Easy Miniature Painting On Bamboo Glass and many more at Hobby Ideas.
For more ideas on Christmas décor check out this unique DIYs How to Make Reindeer Party Mask, Handmade Christmas Tree Making At Home and DIY Hanging Snowflake Decorations.
You can check out the art & craft products offered by us in the Catalogue section of the page. This DIY is mainly made using Fevicryl Acrylic Colours, Fevicryl Water Based Glass Colours Kit, Fevicryl Fabric Glue, Fine Art Brushes & Candy Sticks.
STEP 1 : Making the Popsicle stick frame
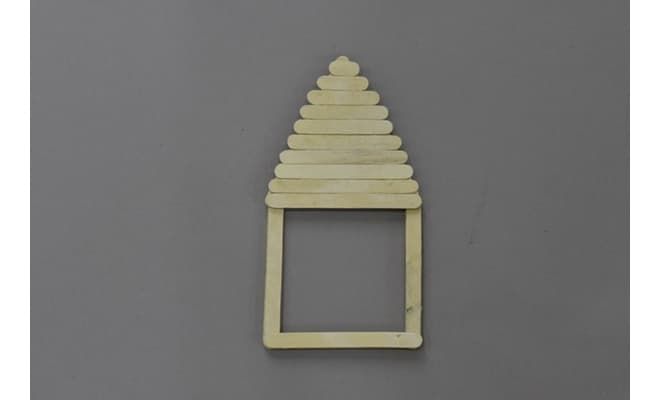
• Cut candy sticks in decreasing size to make a cap of Santa for the frame.
• Join the sticks together to make the triangular cap of the Santa, and a square frame for the photo using Fabric Glue. Let it dry.
• Join the square frame and the cap together with Fabric Glue. Let it dry.
• Make 3 such frames.
STEP 2 : Painting the Ice cream stick photo frame
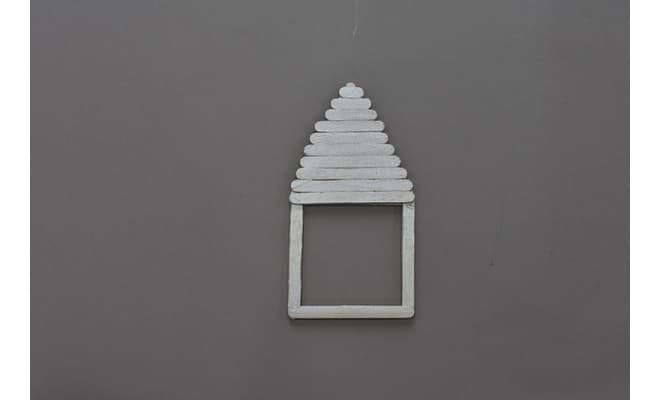
• Paint the frames with the base coat of Acrylic Colour Pearl White 301.
• Let it dry.
STEP 3 : Colouring the ice cream stick photo frame

• Draw few hollies on the cap of the Santa.
• Paint the outline of the hollies and the cap with 3 d outliner Glitter Silver 402. Let it dry.
• Paint the cap, the hollies and the Square frame with water Based Glass Colours. Tomato Red, Brown and Crystal Green.
• Let it dry.
STEP 4 : Sticking cotton on ice cream stick photo frame
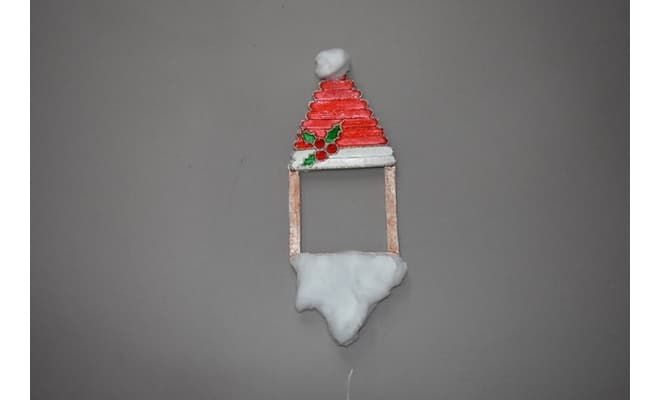
• Take some cotton to make the beard and the pom- poms of the Santa cap.
• Stick the cotton beard and the pom- poms of the cap appropriately with Fabric Glue.
• Let it dry
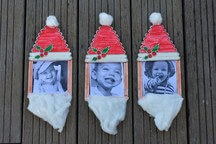
STEP 5 : Giving final touches to ice cream stick photo frames

• Take the photographs and stick it from the rear side of the frame with Fabric Glue.
• Let it dry.
• You can dangle these Santa photo frames in your kid’s room to decorate it for the X’mas.


 +91 99676 55545