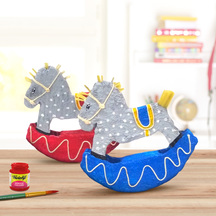
Rocking Horse
You Will Need:
Fevicryl Acrylic Colours Black 02, Chrome Yellow 03, Crimson 04, White 27, Cerulean Blue 32 Fabric Glue, Fevicol A+, Fine Art Brushes, Tissue Paper, Corrugated Box Flap, Pencil, Scissors, Paper Cutter, Cobbler Thread, Colour Palette, Water Container
Description :
This DIY takes you to your childhood. Make these cute little rocking horses to add a touch of nostalgia in your décor.
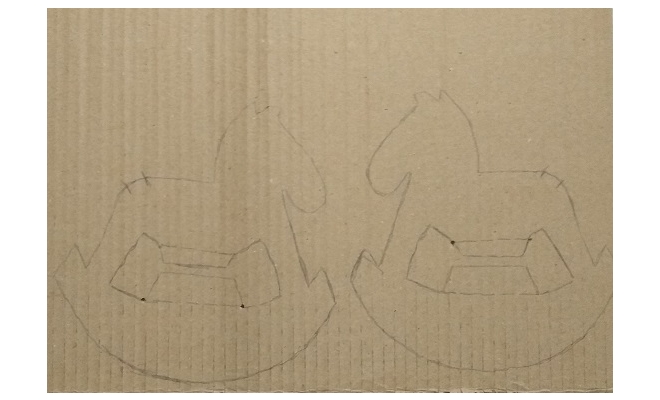
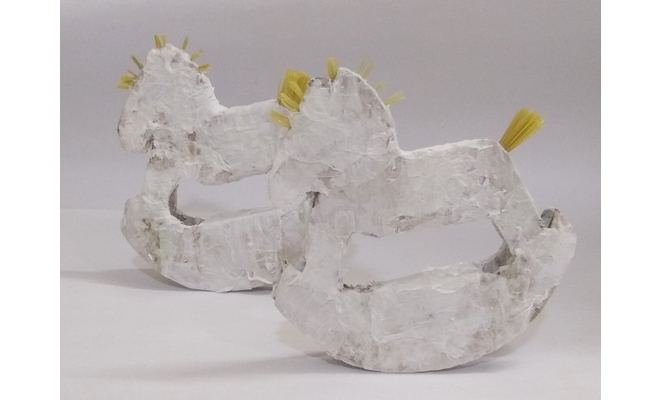
• We are going to make a rocking horse out of the waste material like corrugated box flap, tissue paper. • Take the corrugated box flap. • Draw the basic shape of the horse out of it with crescent moon shape below the legs of the horse to give the rocking base to the structure.
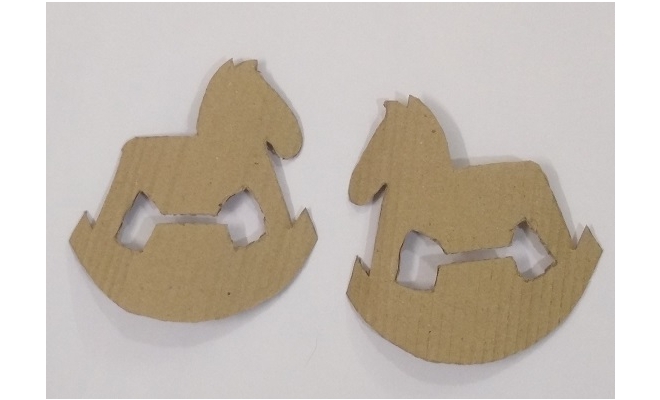
• Cut the basic shape of the horse out of it with the crescent moon shape below the legs of the horse to give the rocking base to the structure. • Cut about 4 such horse shapes. • Refer to the image.
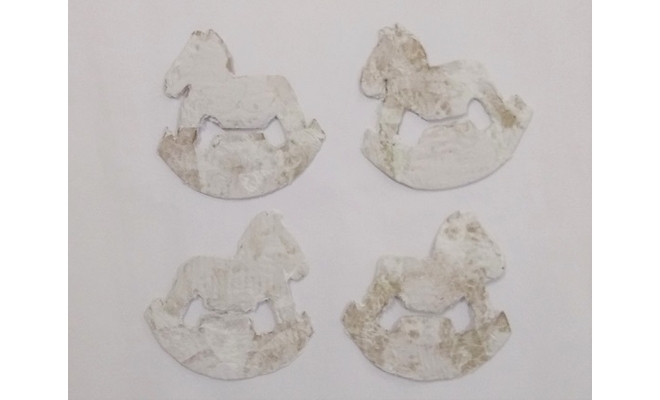
• Cover the cutouts by sticking tissue paper using Fevicol A+. • Let it dry completely.
• Attach the two shapes using Fabric Glue. • Let it dry. • Take the bristles of the brush and stick it on the neck to depict the mane of the horse using Fabric Glue. • Let it dry.
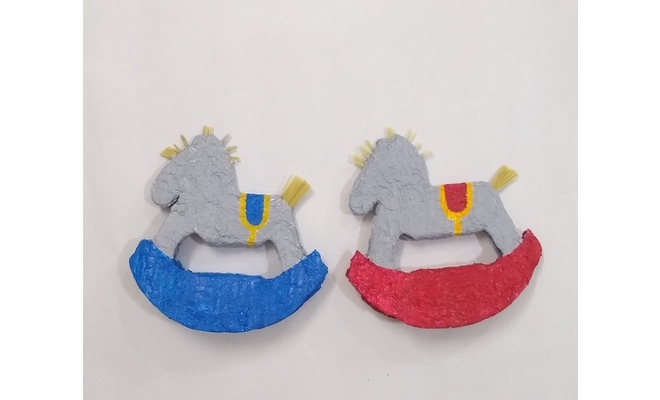
• Paint the horses with a base coat of Acrylic Colours white 27. • Let it dry. • Paint the horse and saddle using Acrylic Colours Black 02, Chrome Yellow 03, Crimson 04, Cerulean Blue 32 and White 27. • Leave it to dry completely.
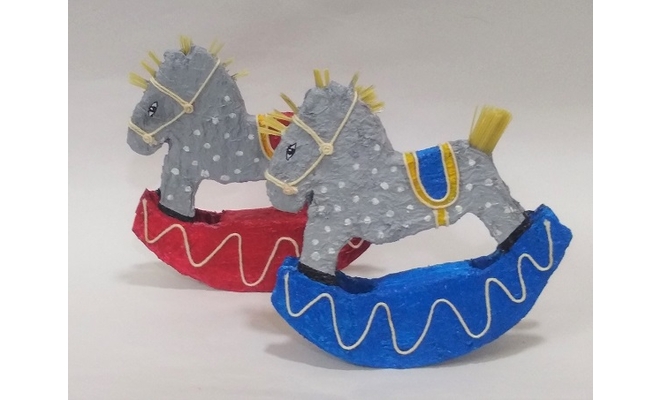
• Take the cobbler thread. • Attach and stick to make the nosebands and reins of the horse using fabric Glue. • Leave it to dry completely.


 +91 99676 55545