How To Make Wind Chime At Home
You Will Need:
Fevicryl Acrylic Colours - Black 02, Violet 25, Prussian Blue 19, Ultramarine Blue 23, Fevicryl Mouldit, Fevicryl Fabric Glue, Fine Art Brushes, Colour Palette, Leaves, Sticks, Paper Cutter, Silver Cotton Thread, Water Container, Clay Carving Tools, Pencil, , Rolling Pin, Wooden Beads, Wooden Ring, Brass bells
Description :
How to make a wind chime at home: Let us remind ourselves on this Environment day that the nature gives to us in abundance, free of cost and the resources are limited. Let us make use of what nature gives to us in the form it gives to us for our consumption. Here is a project based on the same principle. We have used leaves and wooden sticks so make a gorgeous DIY wind chime! This will remind us all through the year to take care of Mother Earth as we take care of ourselves. Making wind chime is an easy craft. Follow this step-by-step tutorial to make a beautiful DIY wind chime using clay modelling craft.STEP 1
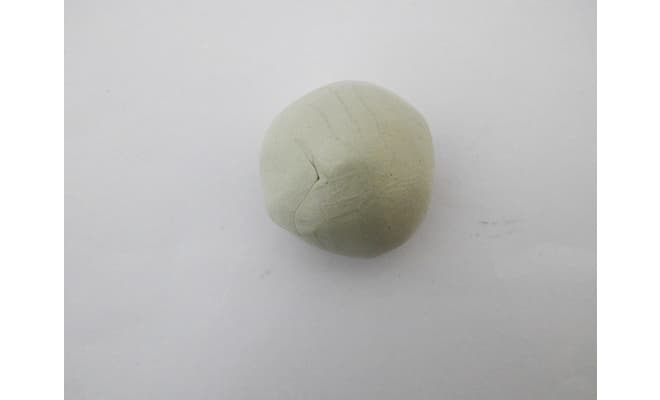
Take Fevicryl Mouldit – resin base and hardener, mix it thoroughly to make an even dough. You will need about 4- 5 packs of Mouldit to make this. Leave it aside for some time.
STEP 2
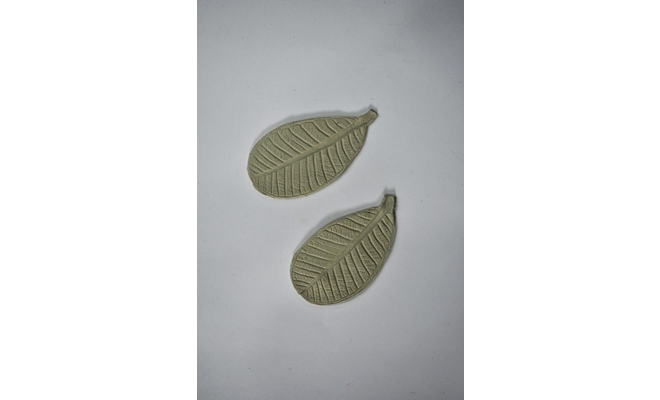
Take the dough, roll it to make a slab with a rolling pin. Then take different sizes of leaves and stamp them out on the slab. Ensure that the inverse size of the leaf is used for stamping to get deeper impression.
STEP 3
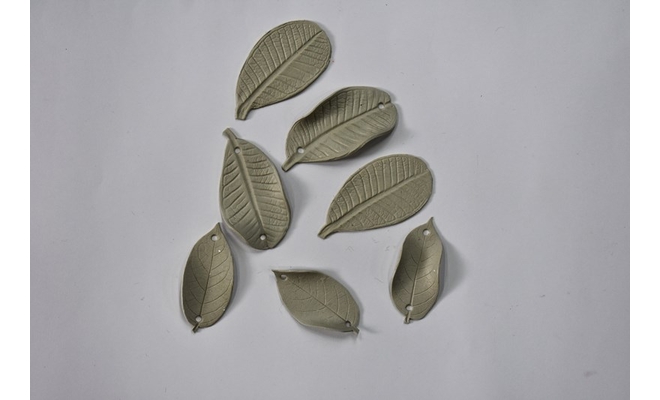
Make holes on the opposite sides of each cutout leaf for dangling. Make about 16 – 20 such leaves. Leave it to dry.
STEP 4
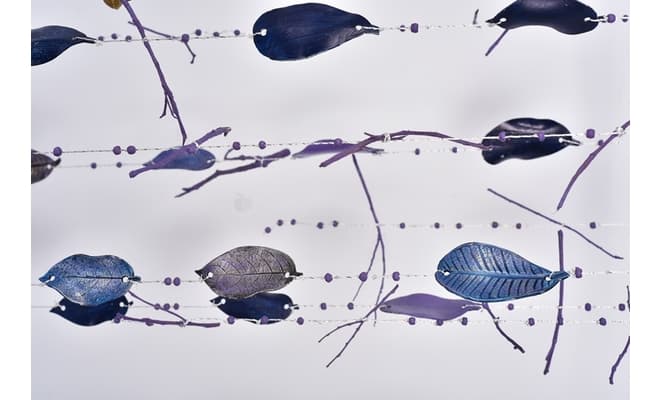
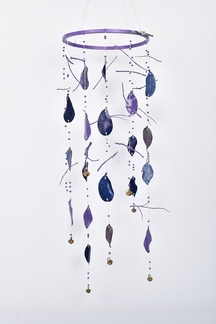
Then take some twigs and the clay leave and paint them with Fevicryl Acrylic Colour – Violet mixed with Prussian Blue and Cerulean Blue. Paint the wooden beads and the embroidery loop with Fevicryl Acrylic Colour Violet. String them together with a silver thread and attach brass bells at the end as shown in the image.
STEP 5
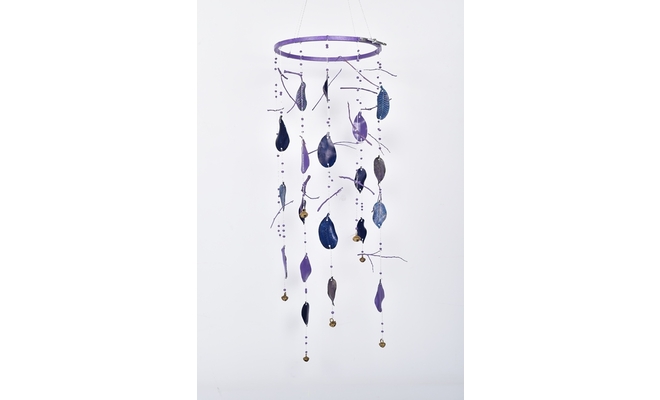
Attach a string on the top for hanging and our nature chime is ready!


 +91 99676 55545