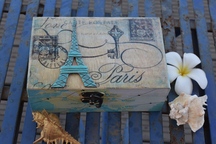
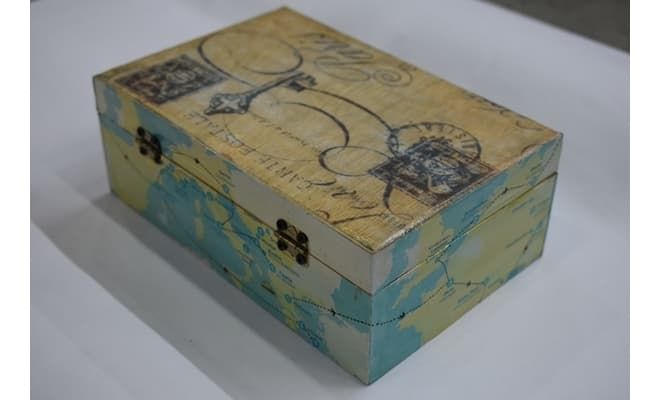
Decoupage Box With Clay Eiffel Tower
Feb. 6, 2019
You Will Need:
Fevicryl Acrylic Colours Burnt Sienna 01, Black 02, Dark Brown 05, Prussian Blue 19, Teal Blue 68, Fevicryl Modge Podge Gloss, Fevicryl Fabric Glue, Fevicryl Mouldit, Fine Art Brushes, Wooden Box, Colour Prints of Maps (Europe), Vintage Postcard (Paris City), Colour Palette, Water Container, Artistry Ink (Ocean Reef), Ruler, Scissors, Paper Cutter, Rolling Pin.
Description :
Decoupage glue or Modge Podge provides you with immense opportunity to transform plain into gorgeous like this box. Made using photo transfer method this box there is a clay Eiffel tower as an enhancement too.STEP 1 : Photo transfer using Fevicryl Modge Podge
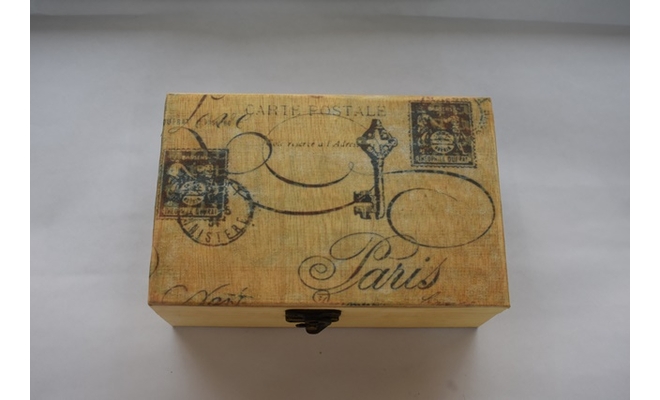
• Take the photo print of the vintage postcard of the city Paris in reverse in the size of the wooden box.
• Cut the print in the size of the box and remove excess paper.
• Apply Fevicryl Modge Podge Gloss generously on the box and then place the print over the glue. Remove any air vacuoles gently with a tissue or a soft roll of fabric.
• Leave it to dry.
• Make sure that you have to keep 24 hours for drying.
• Gently rub off the white layer/ reverse side of the paper with a wet fabric or tissue. Allow it to dry completely.
• You will get to see the print on the box like this – Refer to the image.
STEP 2 : Decoupage on the sides of the box
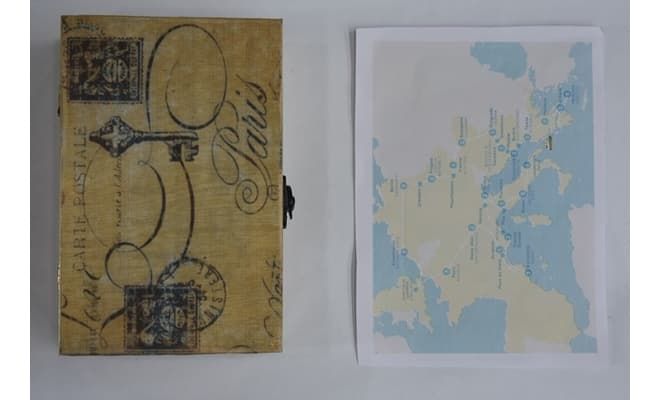
• Take a print of the city map of Paris, mark and cut the map in the size of the walls of the box.
STEP 3 : Sticking the map on the sides.
• Stick the cut out of the maps neatly on the walls of the box by removing the air pockets using Fevicryl Modge Podge Gloss.
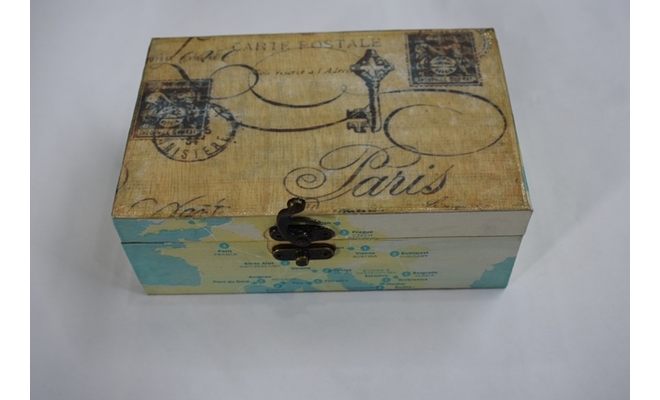
• Let it dry.
• Seal the print by applying 2-3 coats of Fevicryl Modge Podge. Let it dry.
STEP 4 : Enhancing the print
• Paint the doted lines along with the tiny planes to depict the travel guideline using Acrylic Colour Black 02.
• Let it dry.
STEP 5 : Mixing Mouldit clay
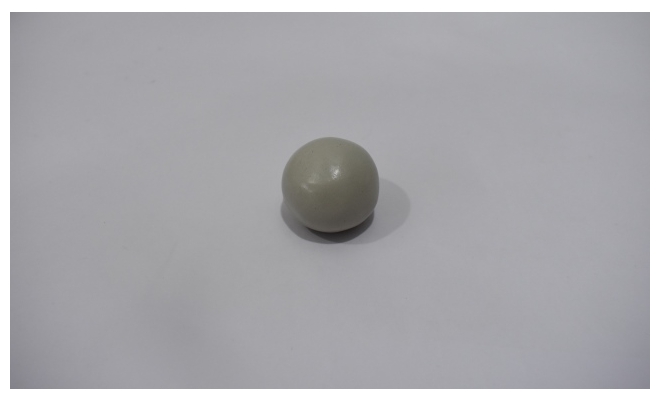
• Take Mouldit resin base and hardener; mix it thoroughly to make even dough.
STEP 6 : Rolling the clay
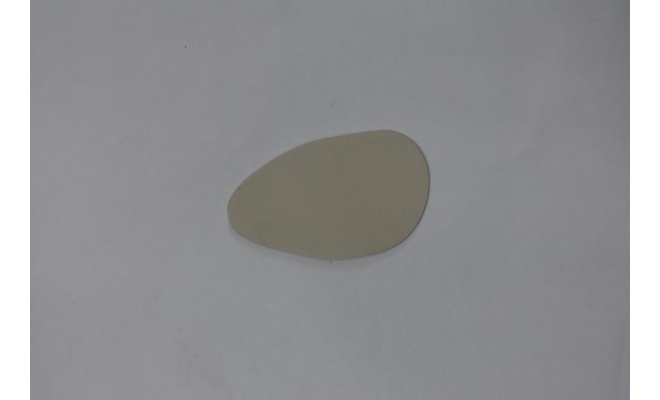
• Take the dough; roll it to make the medium thin slab with rolling pin.
• Leave it till semi dry.
STEP 7 : Drawing and cutting the clay
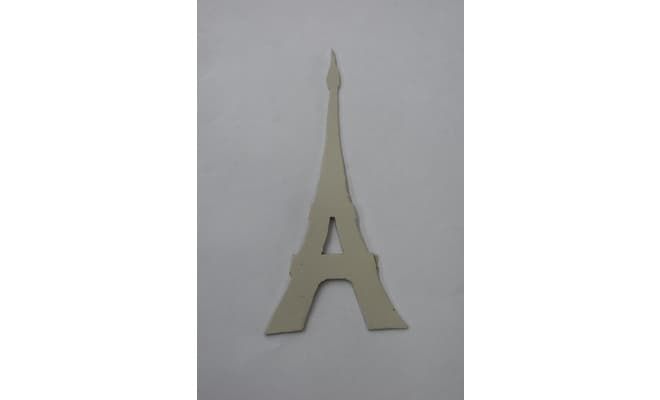
• Draw the outline of the Eiffel tower on it.
• Cut the outline neatly with paper cutter.
STEP 8 : Engraving on the tower
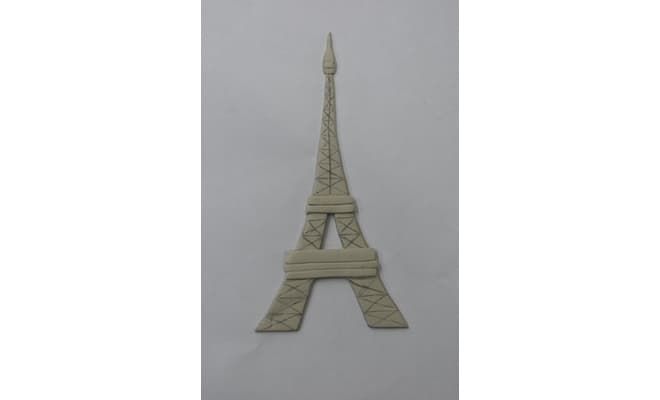
• Engrave the cross lines to depict the iron bars and the detailing of the Eiffel tower on the cutout.
• Let it dry.
STEP 9 : Assembly
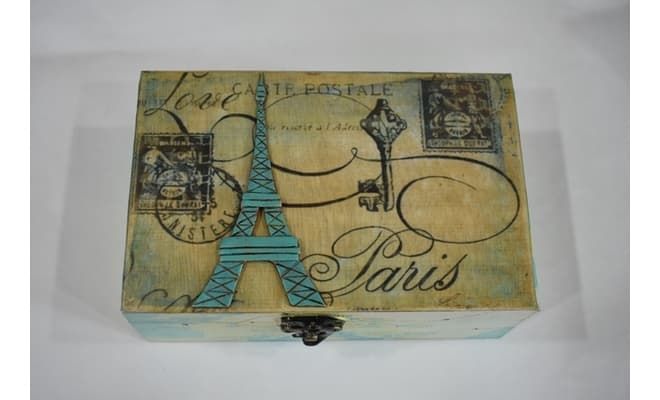
• Paint the Eiffel tower with Acrylic Colours Burnt Sienna 01, Black 02, Dark Brown 05 and Teal Blue 68.
• Stick the Eiffel tower on the box with Fabric Glue.
• Let it dry.
• Highlight the postcard print on the box using Acrylic Colours Burnt Sienna 01, Black 02, Dark Brown 05 and Prussian Blue 19. Let it dry.
STEP 10 : Finishing the box
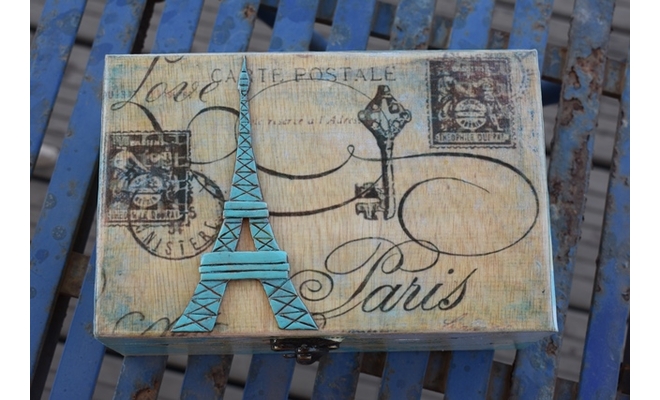
• Apply 2 to 3 coats of Modge Podge Gloss on the box evenly.
• Leave it to dry completely.


 +91 99676 55545