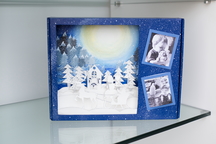
Diy Xmas Photo Frame
You Will Need:
Fevicryl Acrylic Colours - Black 02, Lemon Yellow 11, Prussian Blue 19, Ultramarine Blue 23, White 27, Fevicryl 3D Outliners Glitter - Silver 502, Fevicol MR, Recycled Corrugated Box - 13”X 10”X 1.5”, Toothbrush, Colour Palette, Water Container, Pencil, Ruler, Paper Cutter, A3 Sized White Paper, A4 Sized Blue Card Paper, Half Imperial Sheet Of White Card Paper.
Description :
Kirigami as a craft is a very interesting hobby to inculcate. A paper craft that involves folding and cutting paper to create beautiful forms and shapes. Here we have made a wintery X'mas thematic photoframe in a very festive kirigami pattern. Make these kinds of frames for special occasions and display them proudly in your home spaces. Make your own picture frame and personalize it according to your fancy. This is a good project to learn that helps you make a diy photoframe to gift on special occasions.STEP 1
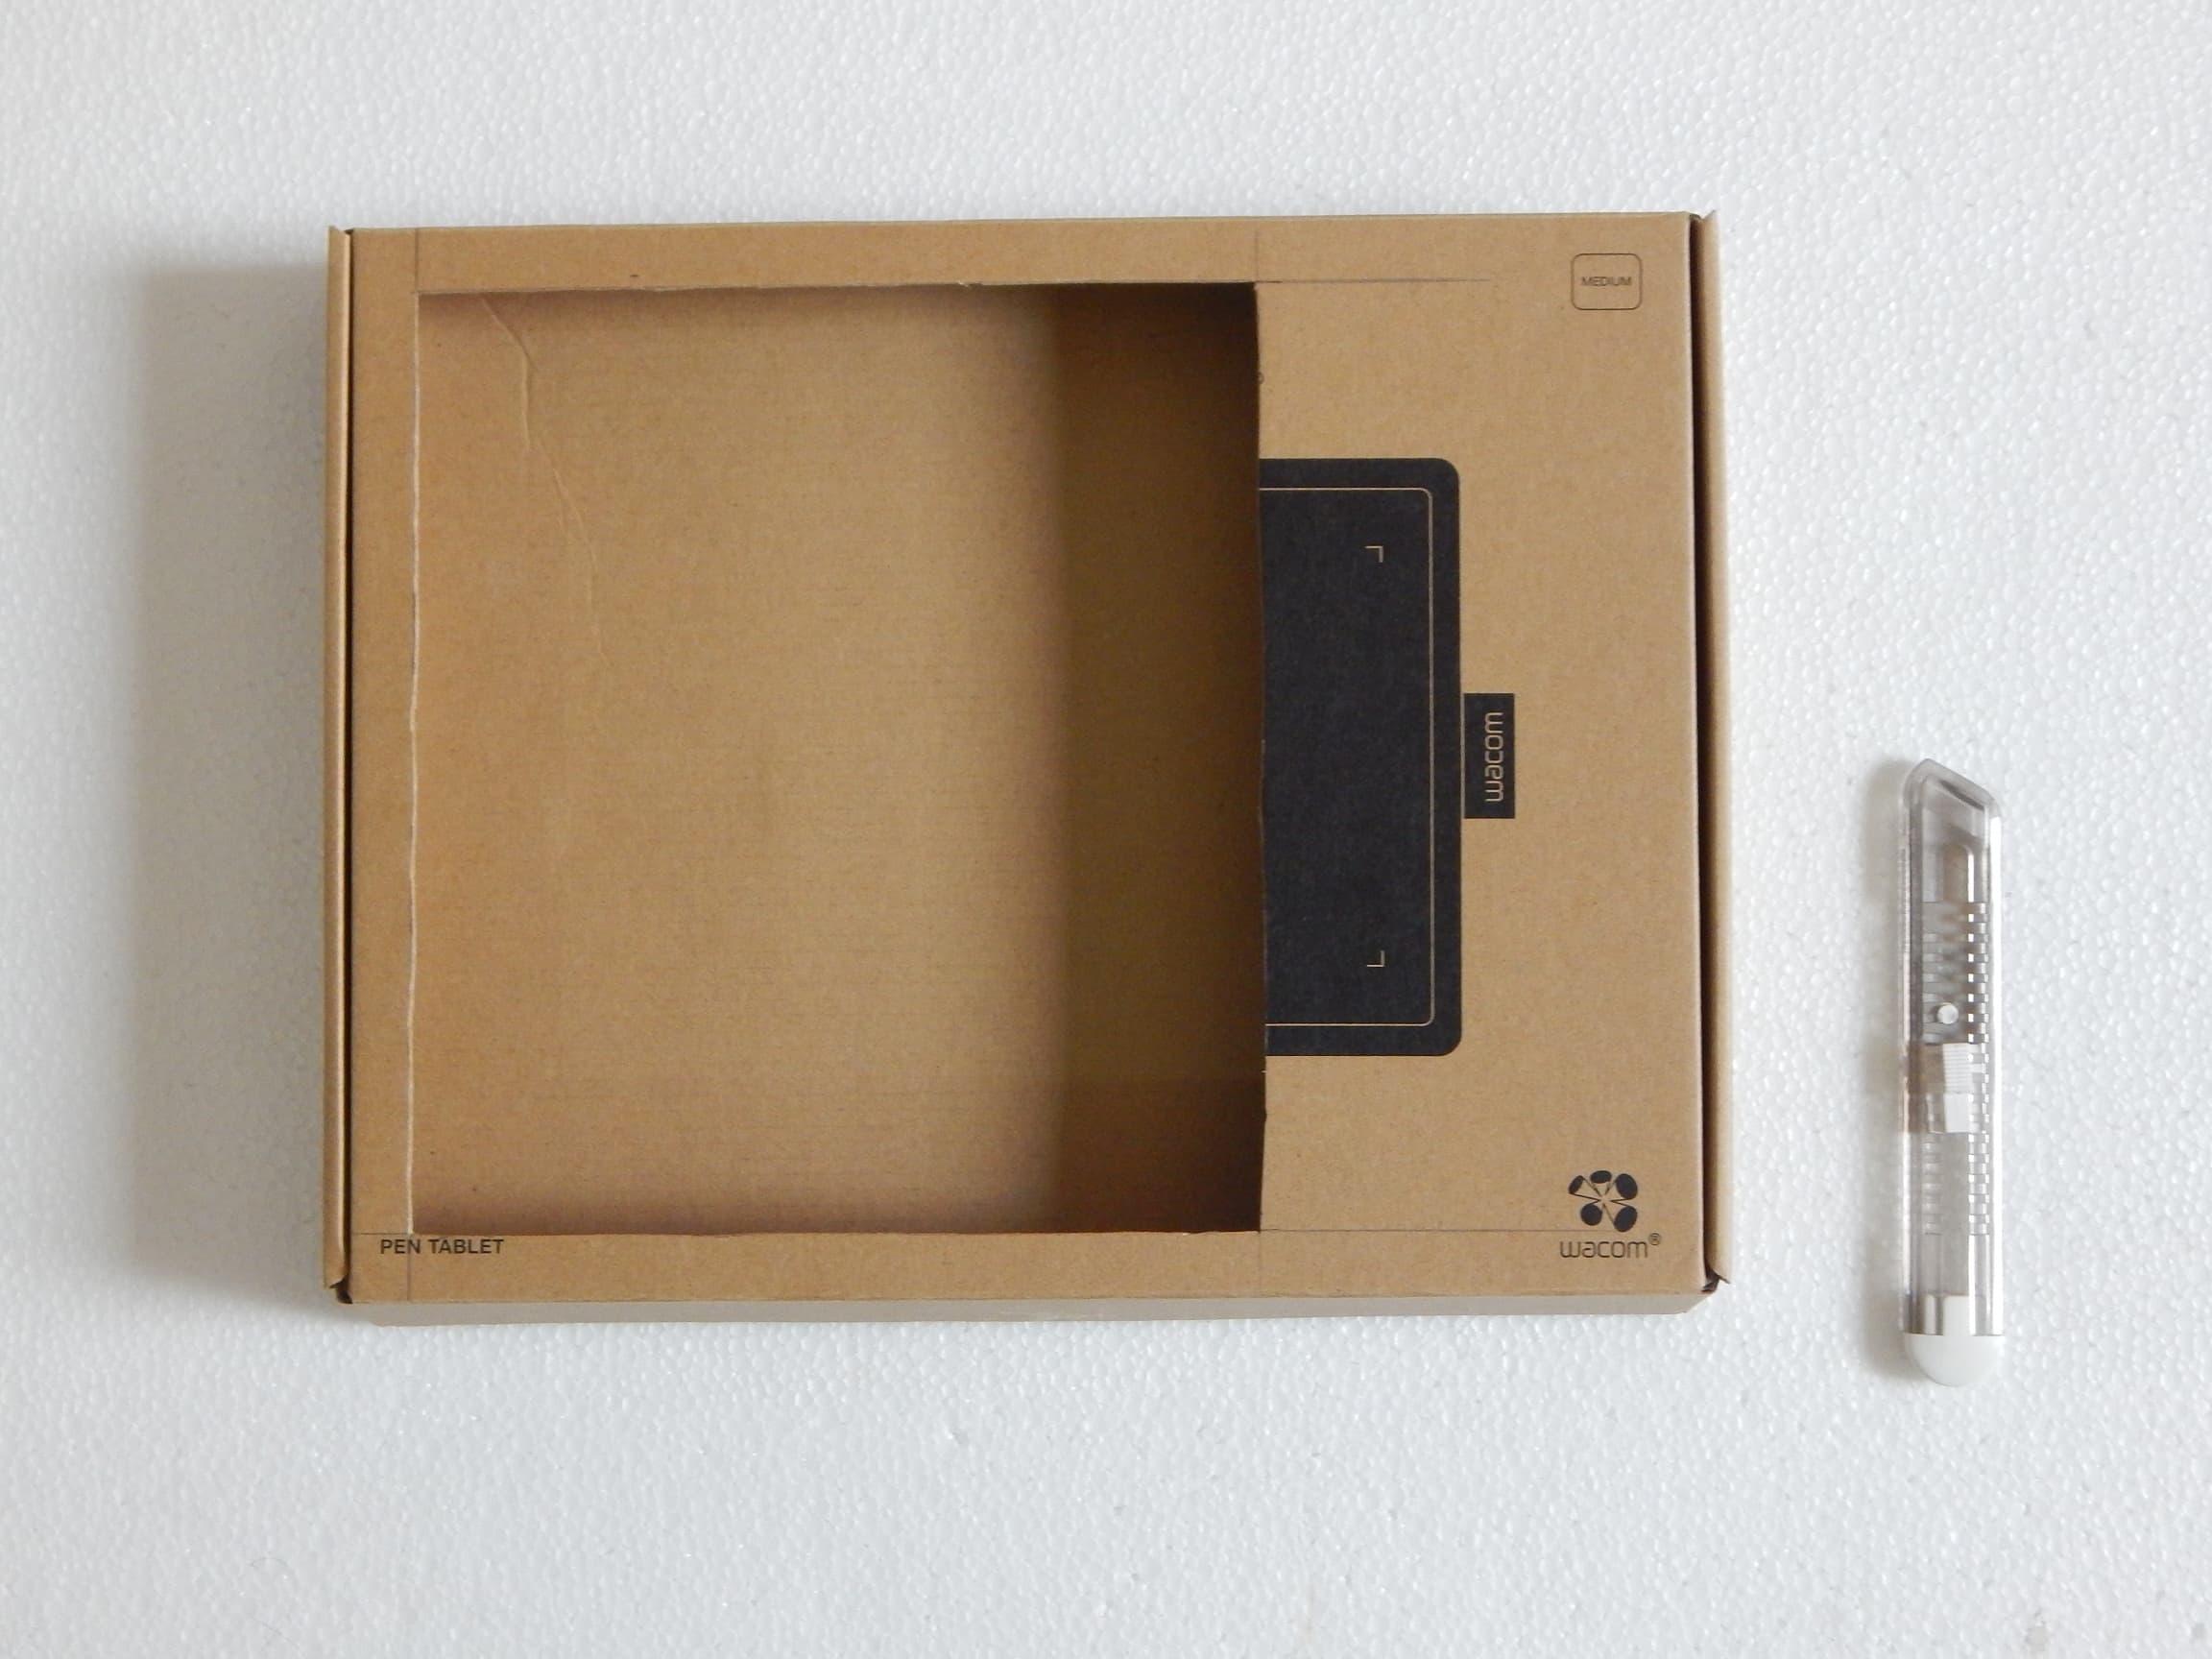
We need to make the basic infrastructure for the photoframe. For that take a recycled corrugated box that measures 13” x 10” x 1.5” (length, height and width) in size. Make sure to mark the window on one side of the box measuring 8” x 9” in size. With a paper cutter neatly cut out the window.
STEP 2
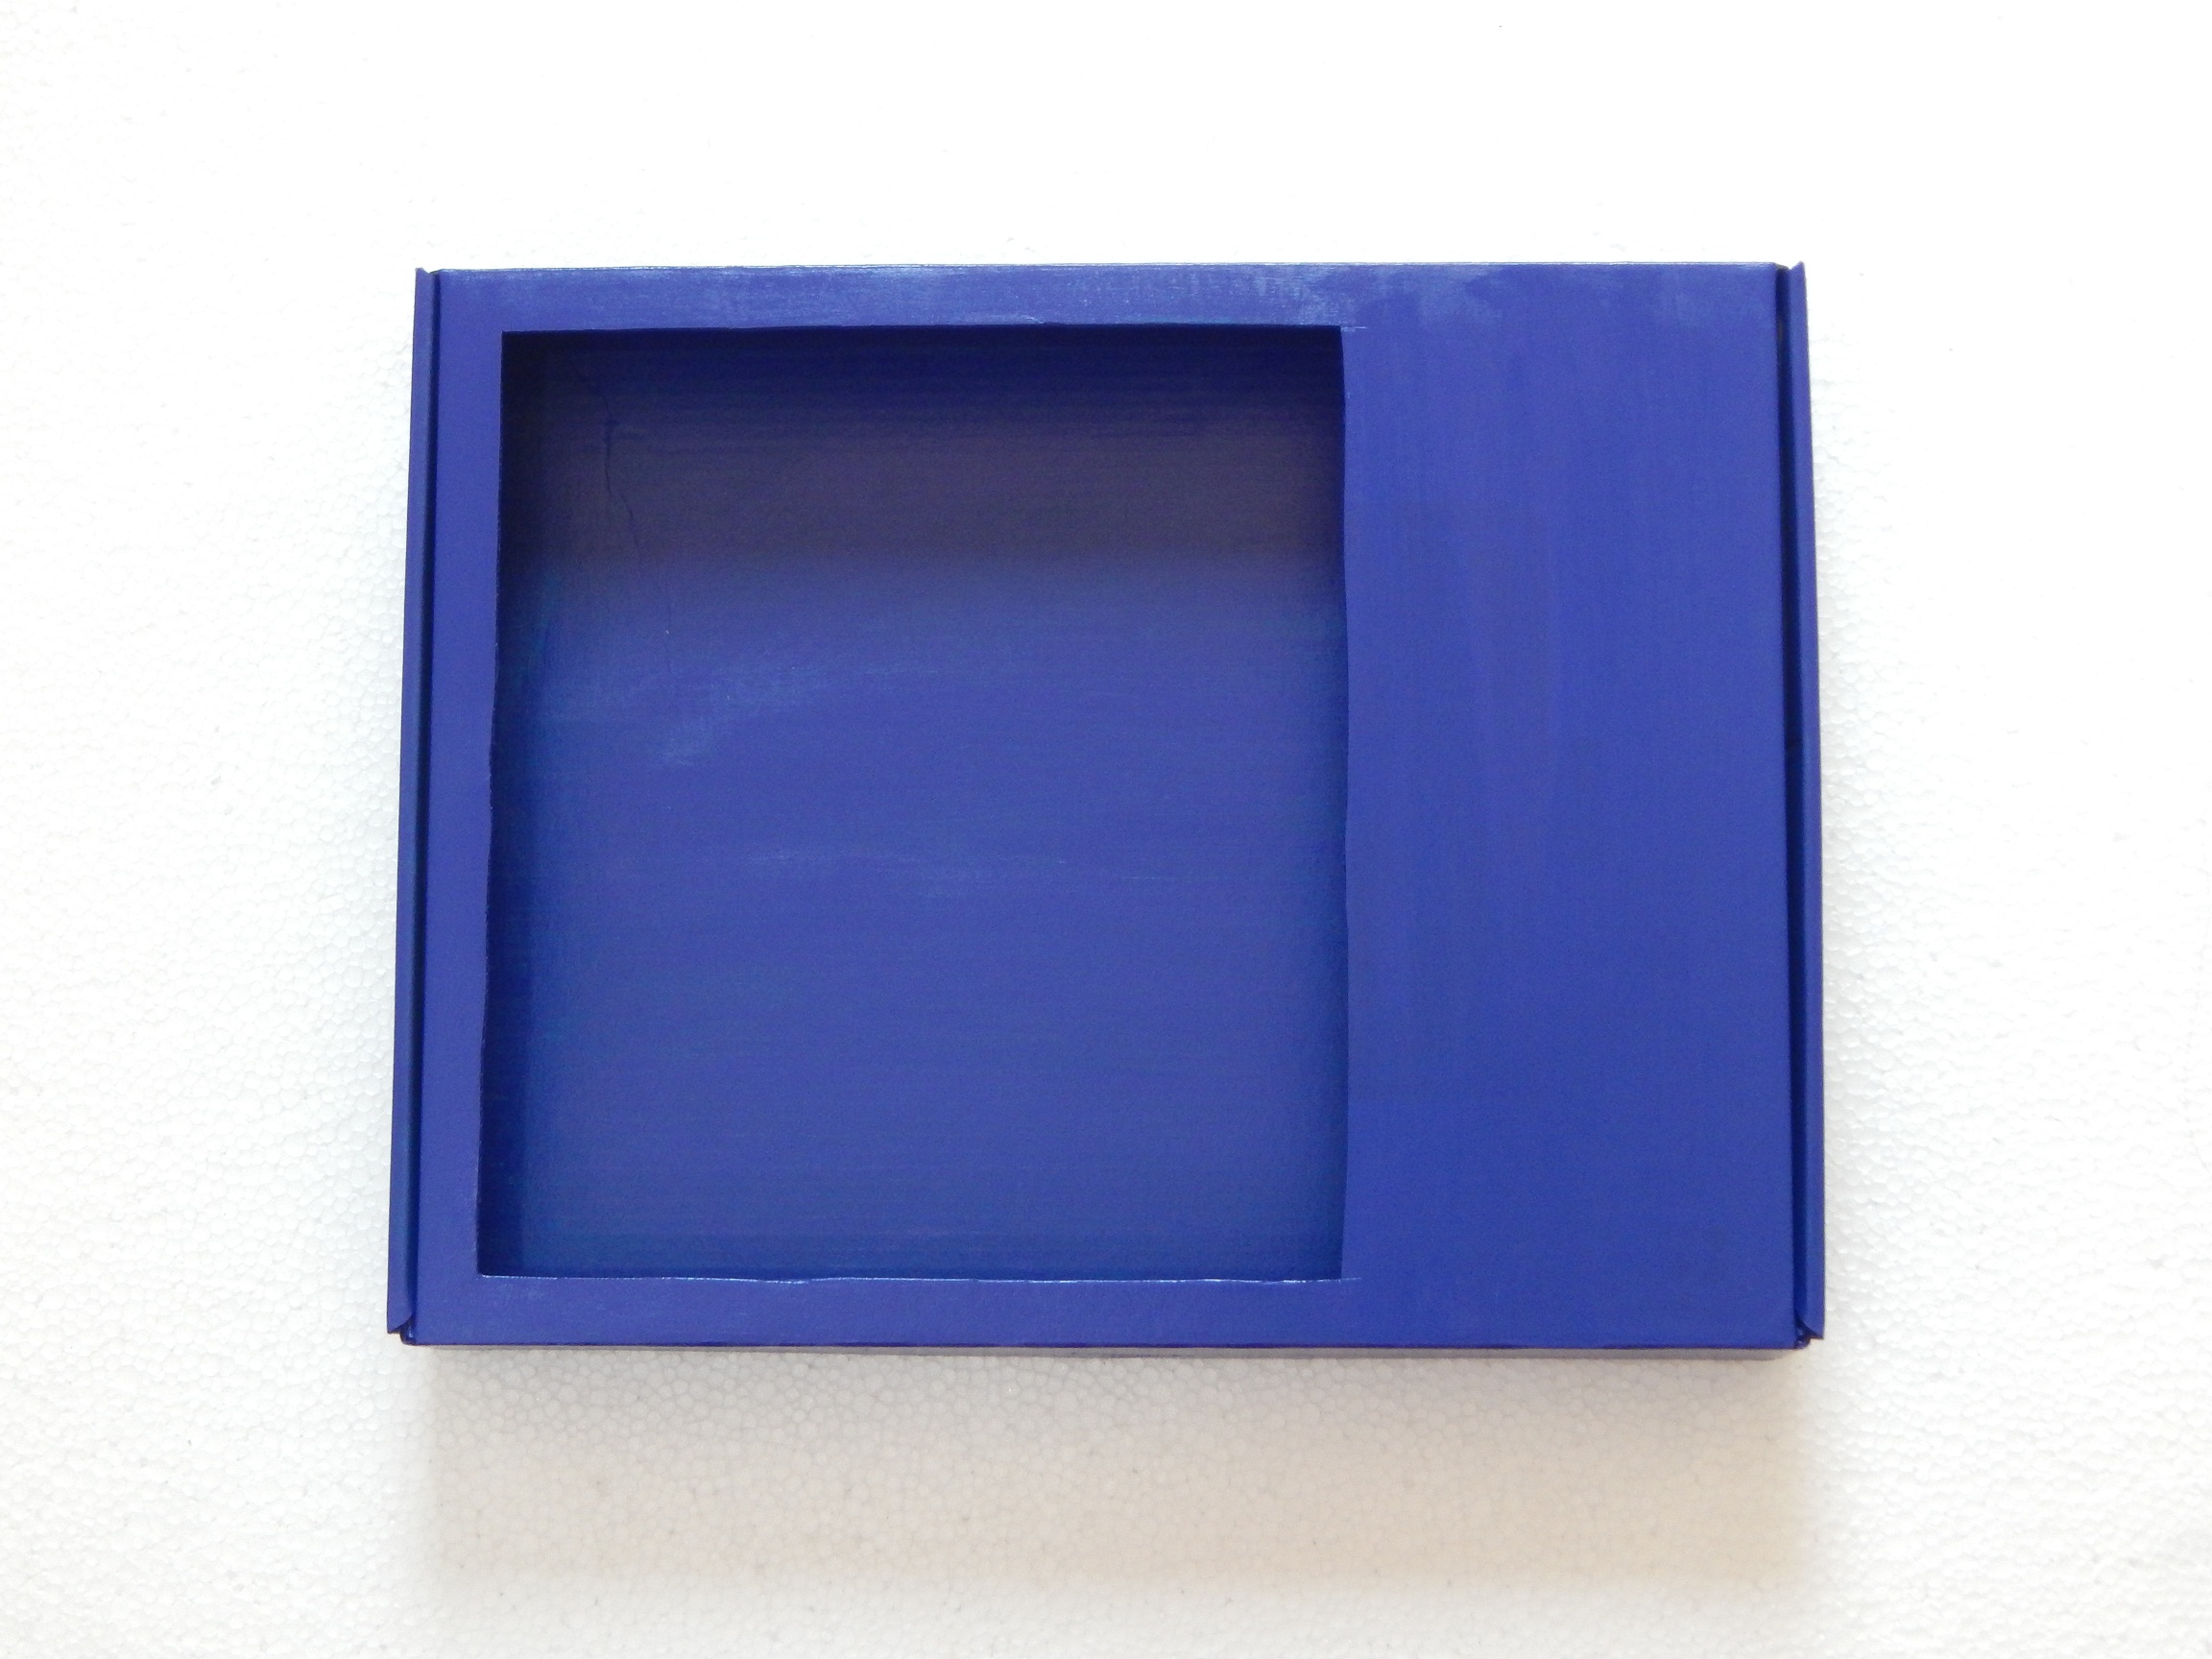
Paint the box in a bright colour of your choice, we have used Prussian Blue and Ultramarine Blue. Leave it to dry completely.
STEP 3
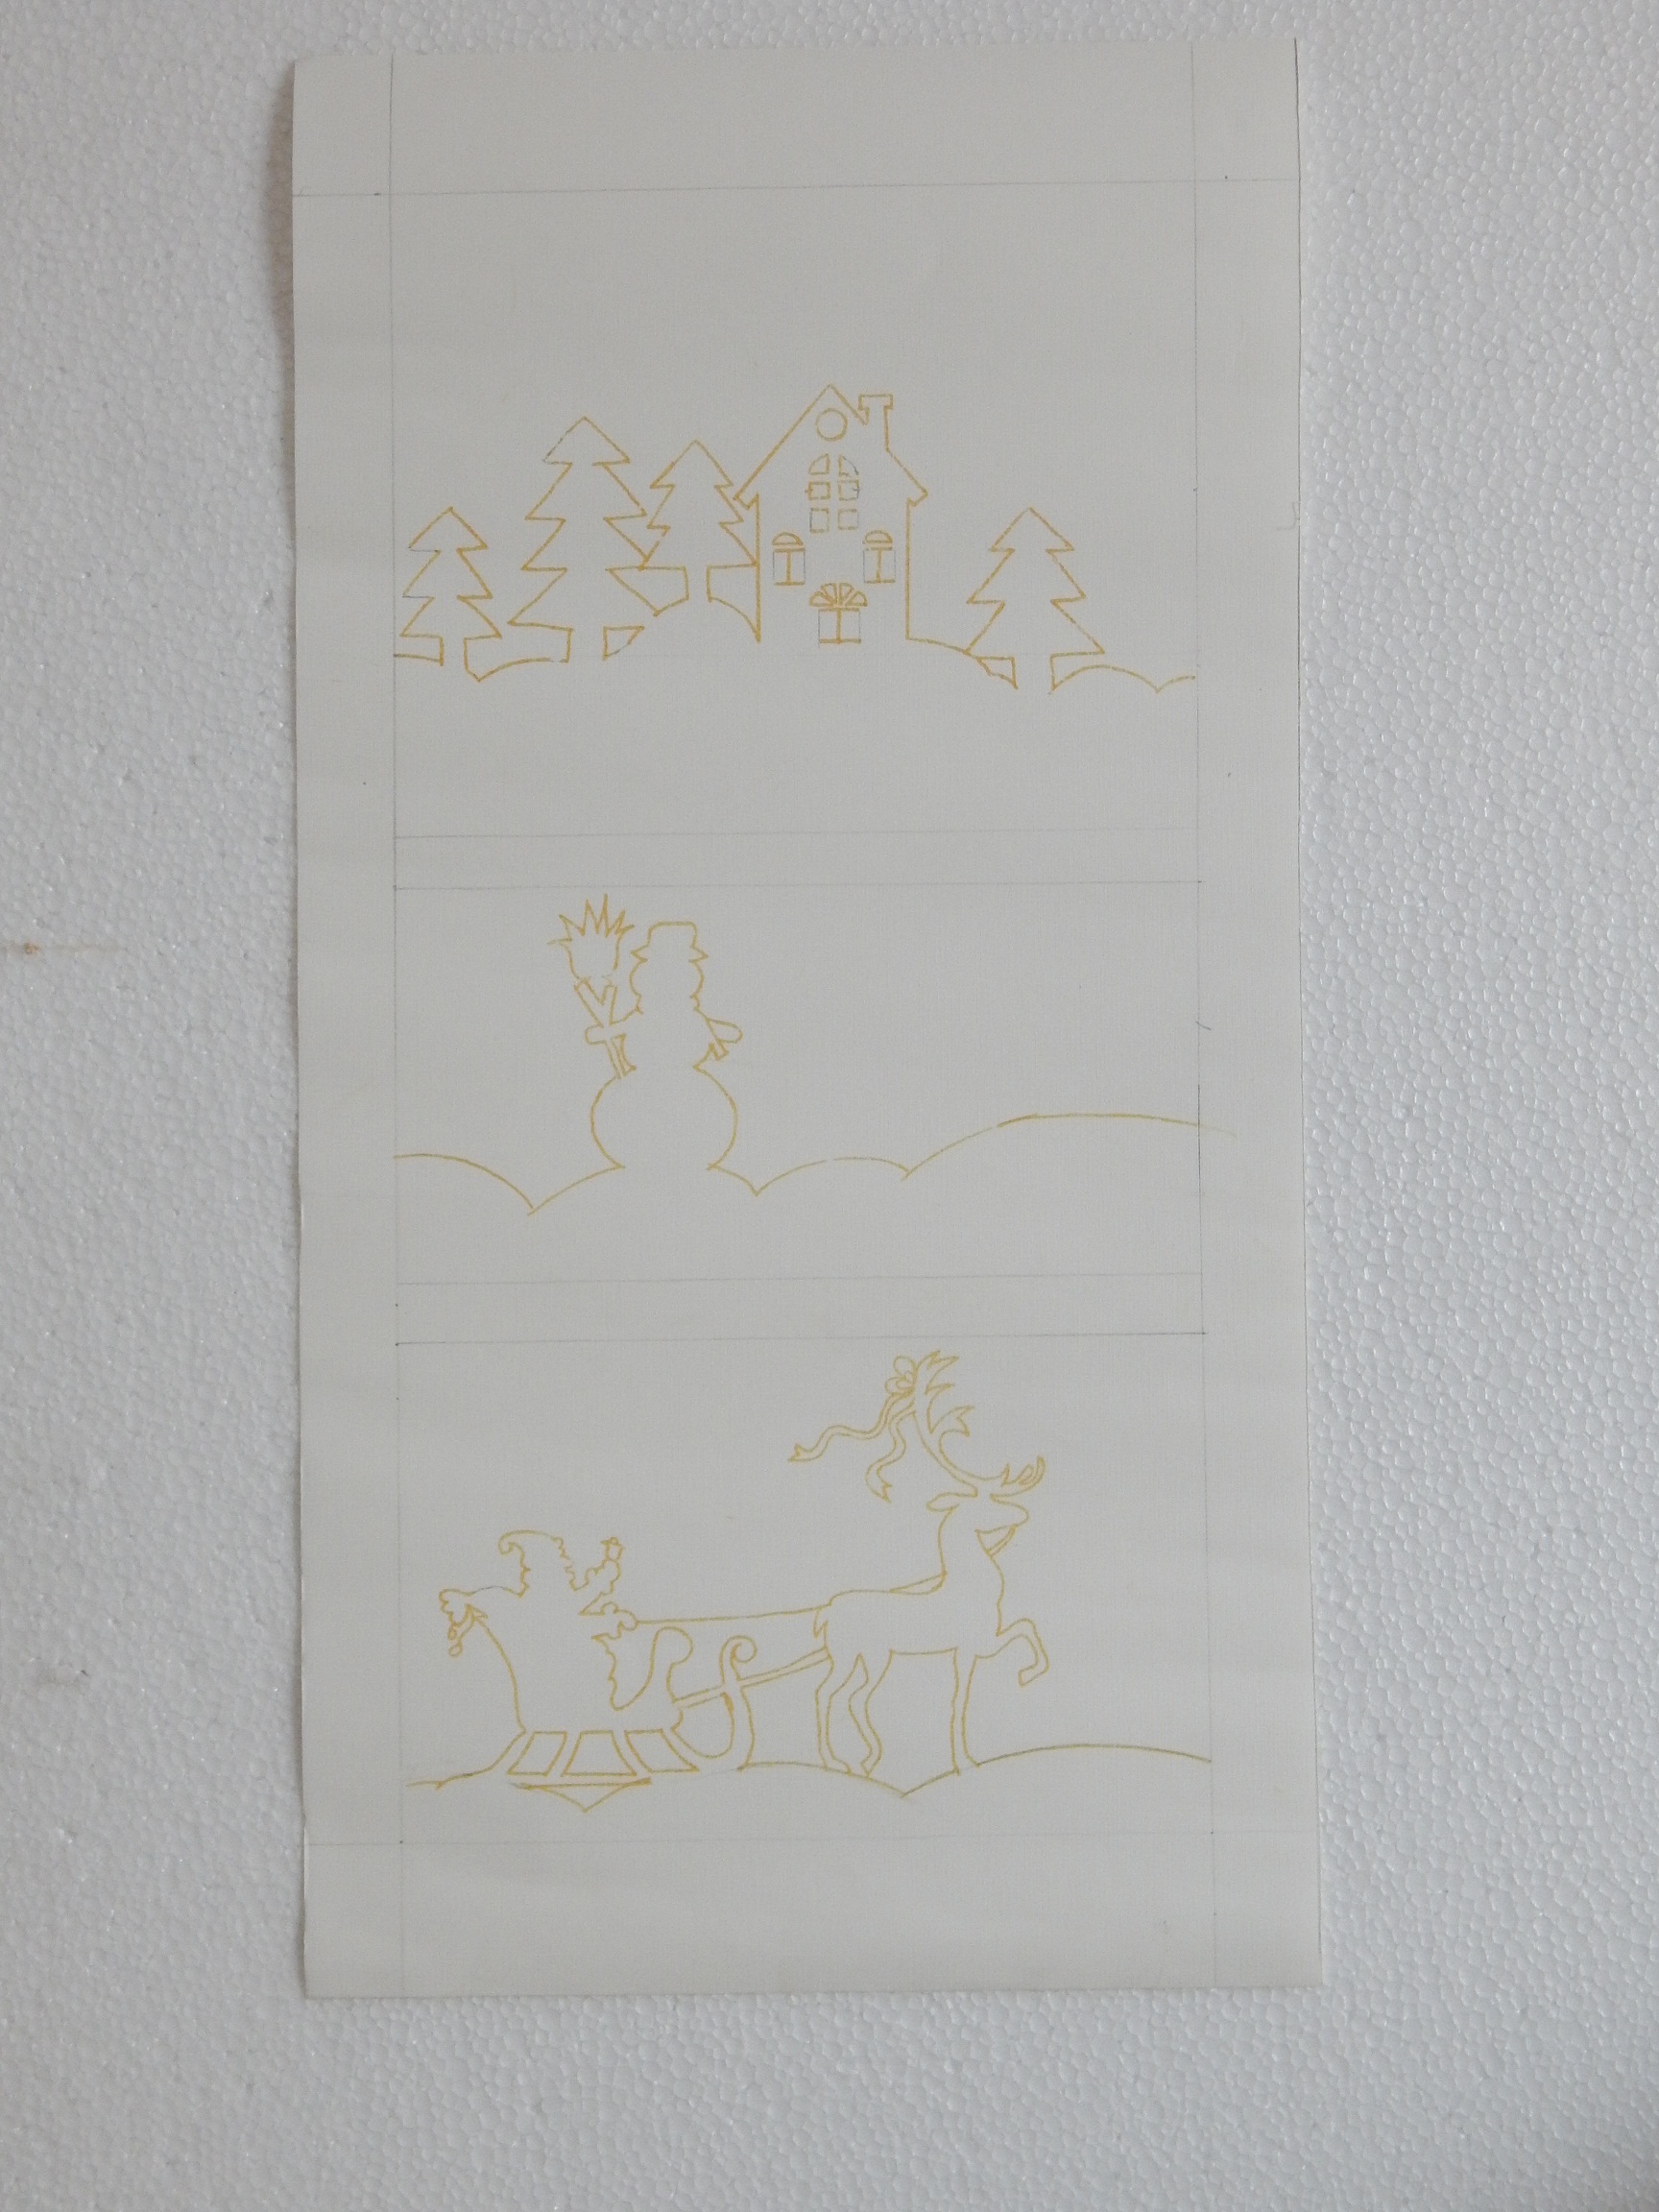
We have taken scenic inspirations from Christmas and the season of winter. A sleigh with a reindeer, a typical snowman, lots of fir trees and a house / hut that is surrounded by fir trees, all these images are quite appropriate and synonymous with Christmas. Draw each of the above scenic descriptions on an A3 sized white paper.
The photoframe will have each set depiction one behind the other, so for that each paper on which each depiction is made will be in an ascending order. You will need to take half an imperial sheet of paper and draw a rectangle that measures 10” x 18.5” in size making sure to leave 1/2” from all sides for the border.
The rectangle needs to be divided into four parts for the scenic depictions to appear in an ascending order. For that divide the rectangle into four parts measuring 5” x 10”, 4” x 10” 3 ½ ” x 10” and 3” x 10”. Trace each depiction on each of the four sections.
STEP 4
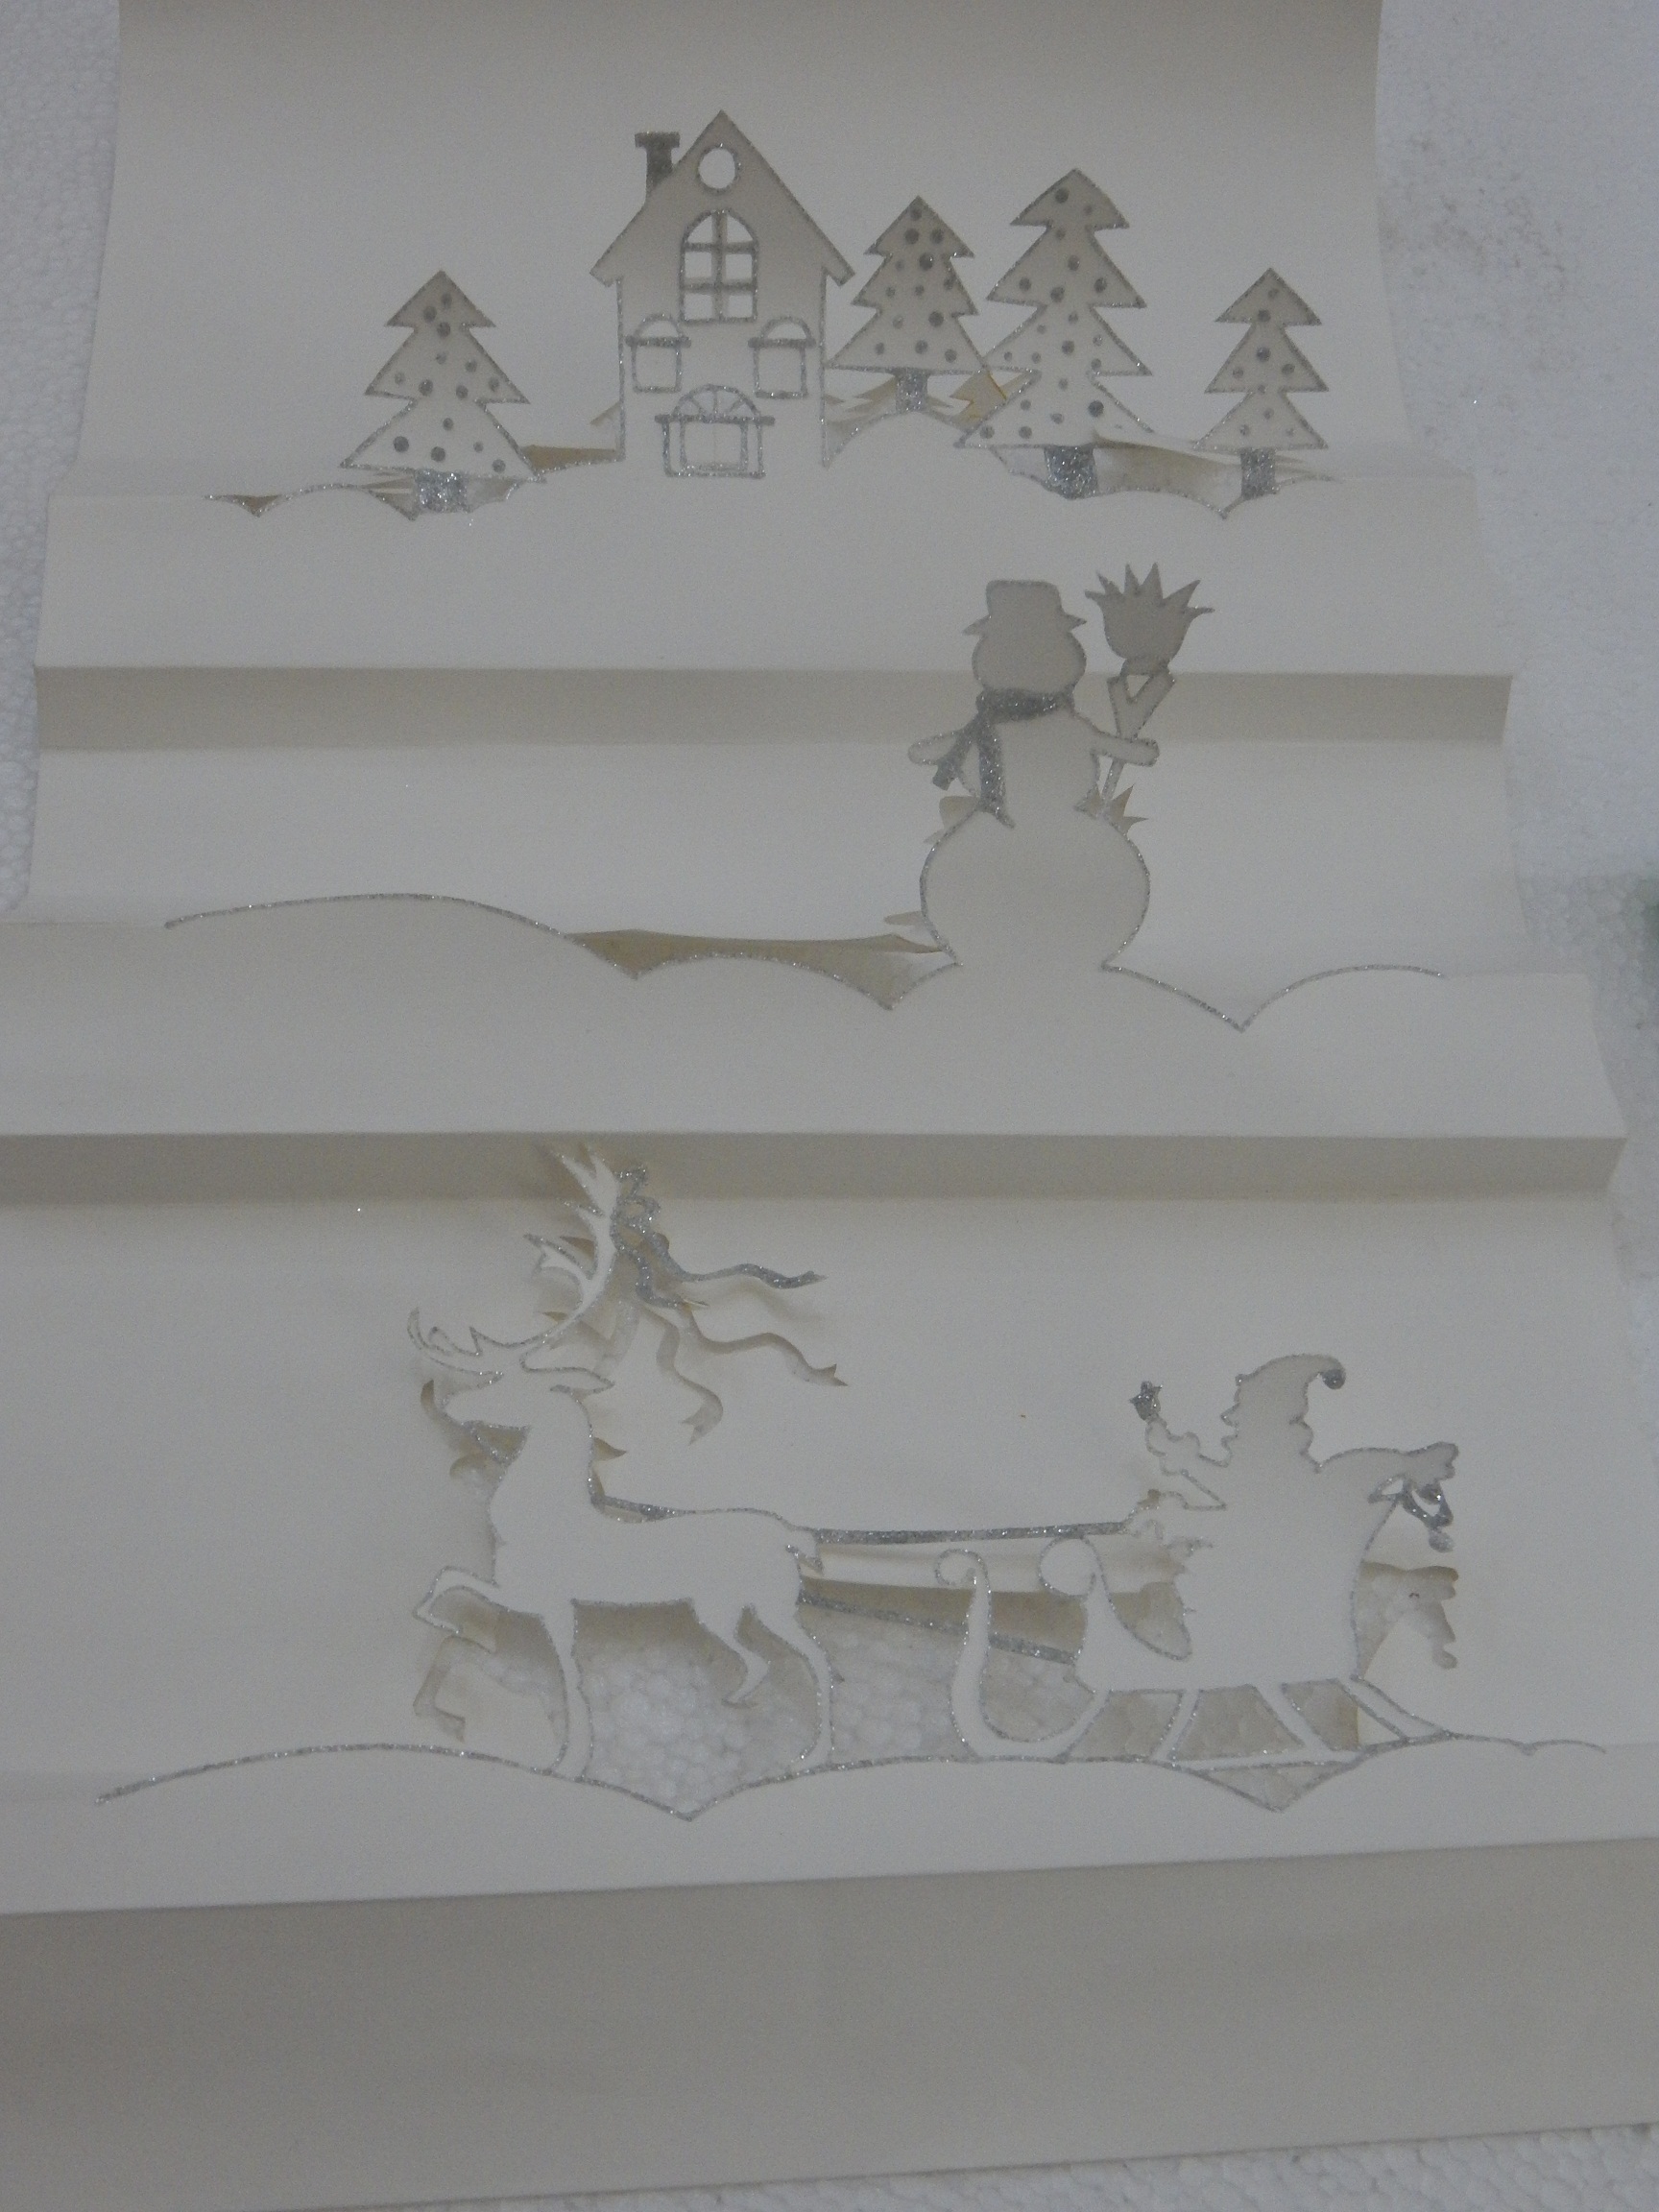
The next step is to cut out each of X'mas motifs with a paper cutter. Fanfold the paper so as to create the three dimensional effect that is needed with a simple kirigami technique. Use Glitter Silver to outline the motifs beautifully and leave it to dry thoroughly. With this step your cutout scenic depictions in the ascending order are ready.
STEP 5
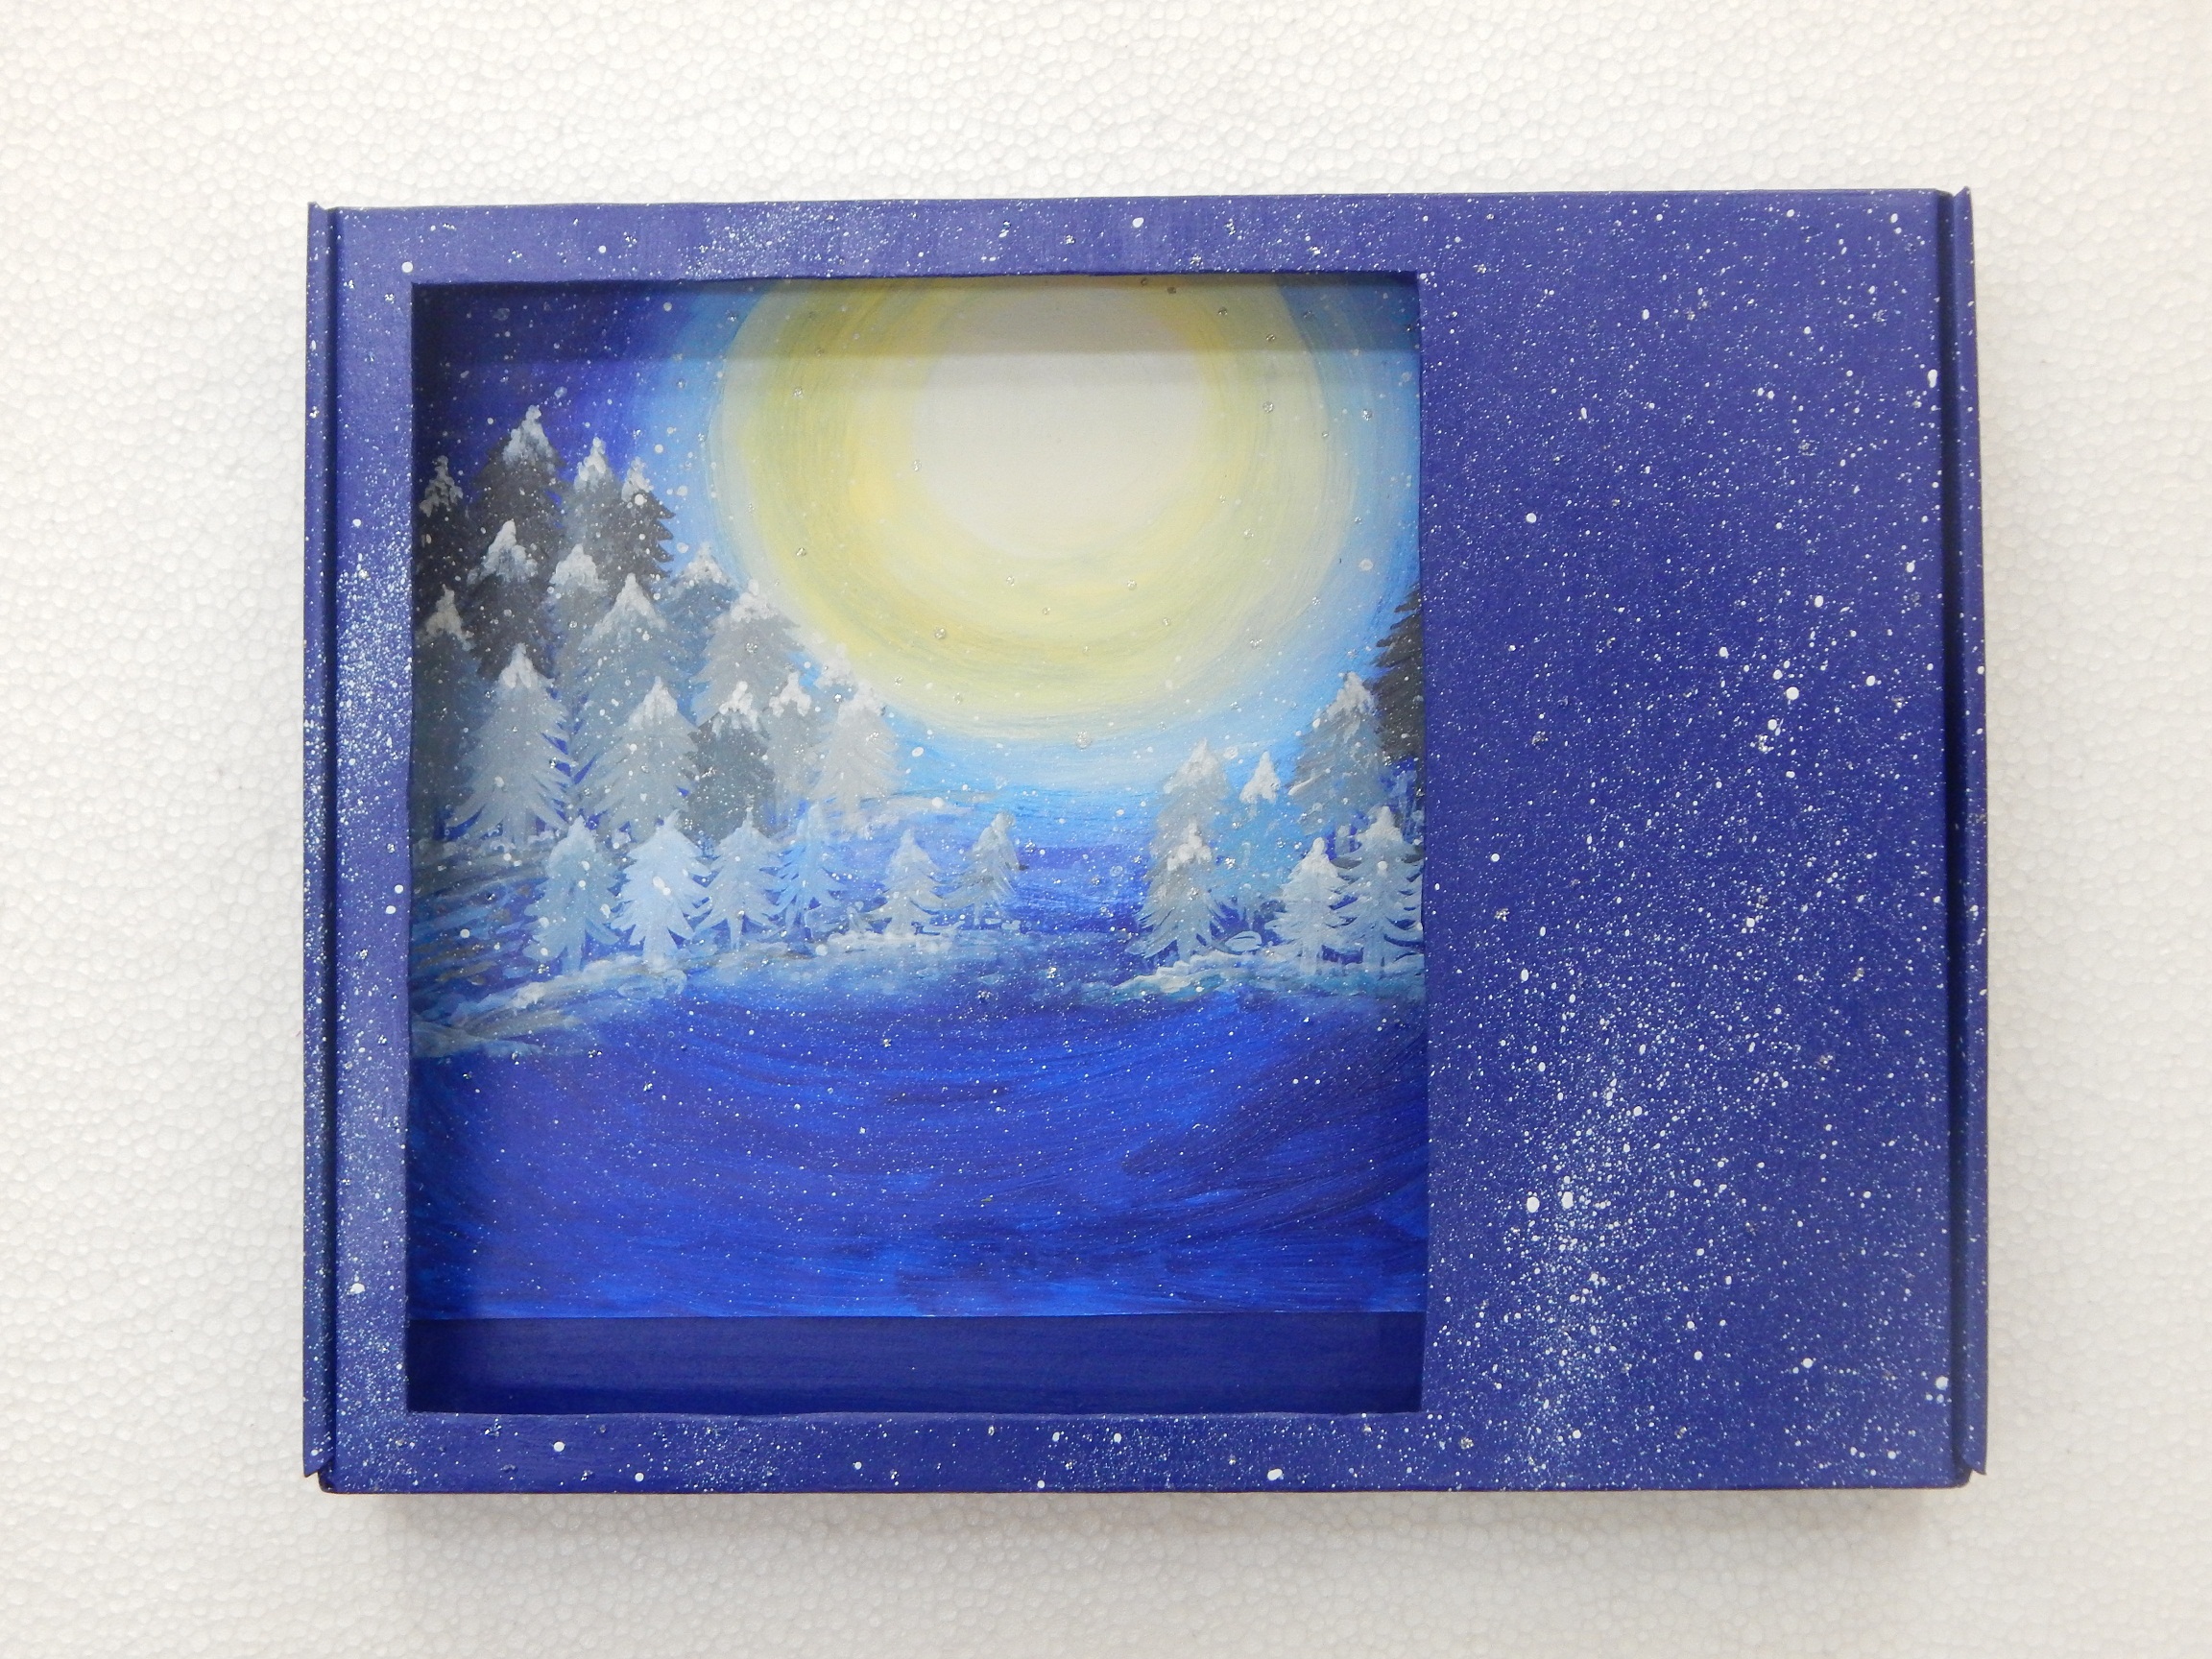
For the paper cutouts to be place on the photoframe it's backdrop needs to be made prettily. For that take a card paper that measures 8” x 9” in size. We have chosen a moonlit night theme with fir trees in the midst of snow, you could choose any theme that comes to mind. We used Acrylic Colours - Black 02, Lemon Yellow 11, Prussian Blue 19, Ultramarine Blue 23 and White 27 in a shading manner. Once it's ready stick the painted theme into the frame. For a more realistic feel of winter and snowfall merely spray paint with Acrylic Colour - White and Glitter – Silver on the borders of the photoframe.
STEP 6

The photoframe has been treated differently as we made two more frames that were smaller in size that were stuck at angles on the main photoframe. Insert family pictures in the frames and see how wonderfully it stands out especially knowing it's all handmade.
STEP 7
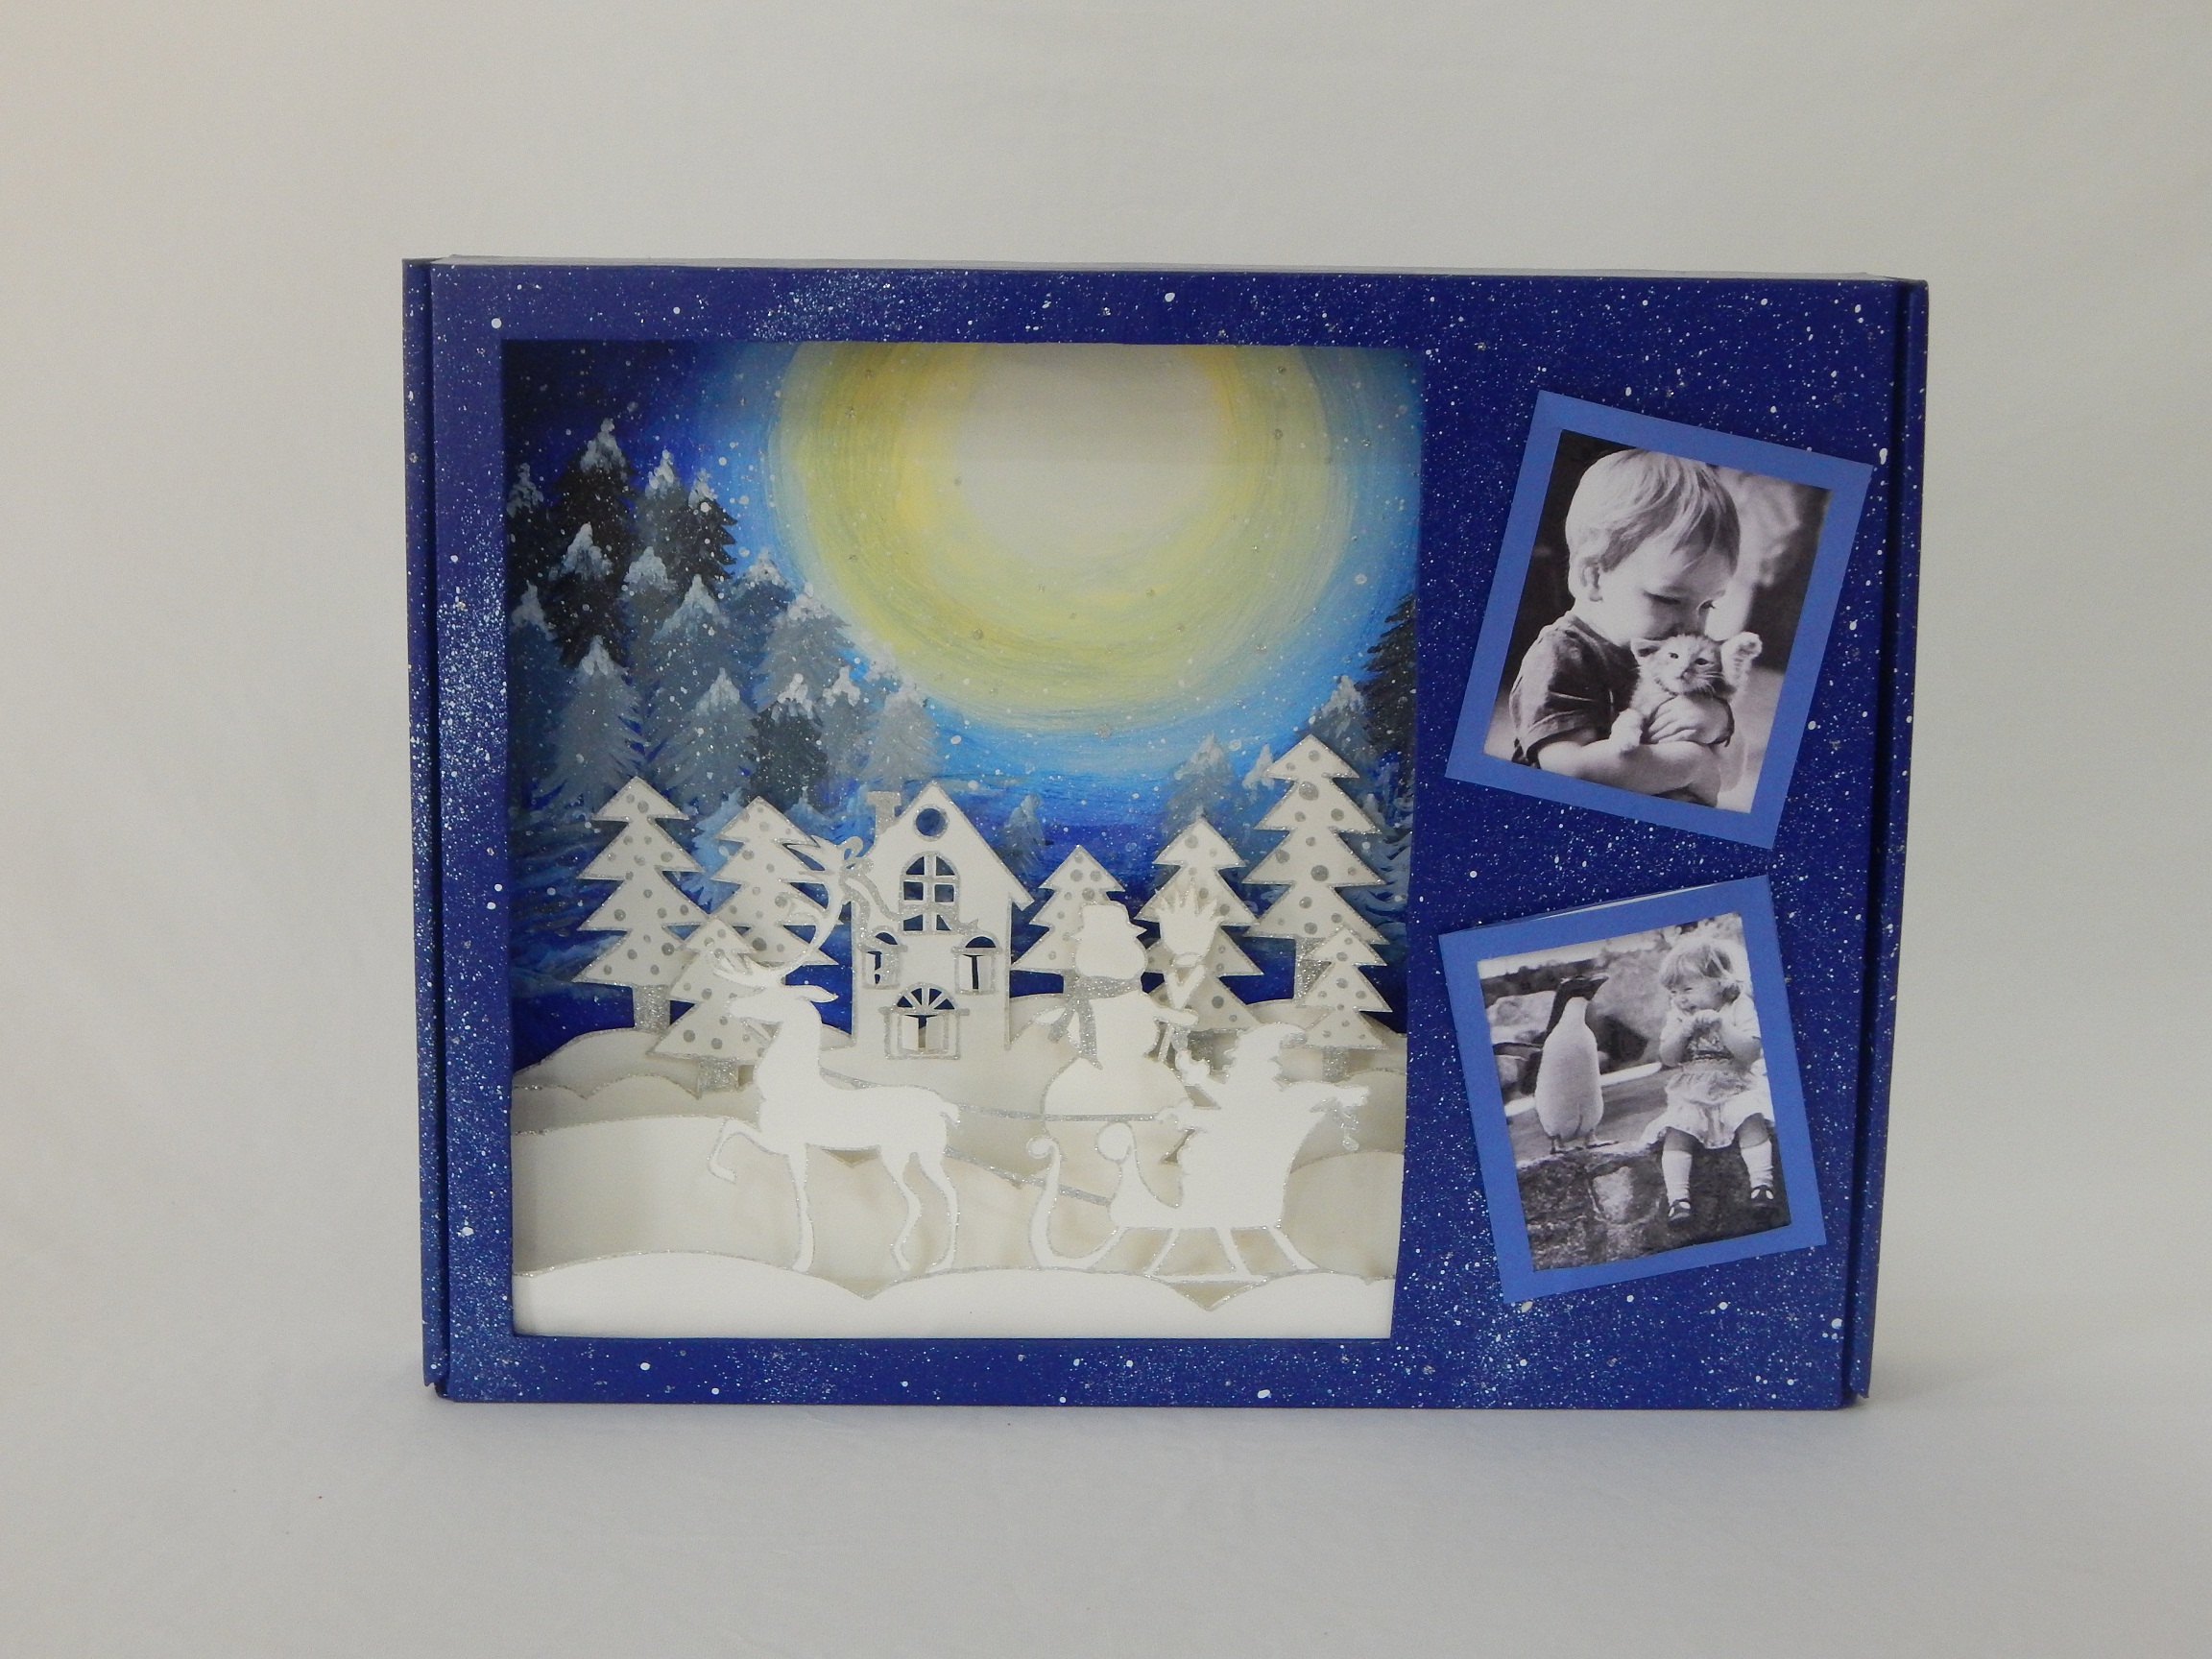
To now complete the photoframe assemble and appropriately stick the paper cutouts in an ascending manner with Fevicol MR. It looks pretty and very Christmasy to gift to someone special or just use it in your home.
Having said that, we chose a X'mas theme and a winters' night you could make these kinds of cards with any theme that you might envisage. Use the colour combinations that you love, make motifs that fancy you, get creative and customise and personalise your own photoframes.
Your Xmas photoframe is ready to be
You could use different kirigami patterns or themes to suit the occasion.
Make several other projects using this technique of kirigami.


 +91 99676 55545