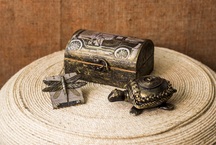
Decoupage Box With A Stone Turtle And A Pendant
You Will Need:
Fevicryl Acrylic Colour - Black 02, Fevicryl Acrylic Colour Pearl Metallic - Gold 352, Fevicryl Fabric Glue, Fine Art Brushes, Fevicryl Non Sticky Shilpkar,, Modge Podge, Wooden Jewellery Box, A4 Sized print out of a vintage car, Tissue Paper, Scissors, Colour Palette, Water Container, Rolling Pin, Clay Carving Tools, Round Pebble. MDF Wooden Rectangle 2 ½” x 3 ½”, 2 ½” x 3 ½” Vintage printout of the letter, Pendant Attachments, Clay Carving Tools.
Description :
For the decoupage box - A treasure box enhanced using an antique decoupage printed paper to retain the old times touch. It is something that is handmade and can be gifted as a house warming gift.For the stone turtle - A cute little turtle to be kept on your work table or your shelf with curios. It's painted in an antique metallic rustic way rendering a look that could well look distinguishing. Since it has a pebble over which Shilpkar has been overlapped it would well as a paper weight too.
For the pendant - A pendant with a difference rendering a rustic and antique look is this dragonfly pendant. Worn on a plain chic garment it will highlight your entire outfit. We have used Shilpkar and given it hues and shades of metal for a realistic look and feel.
STEP 1

We are going to do decoupage on a wooden jewellery box.
STEP 2
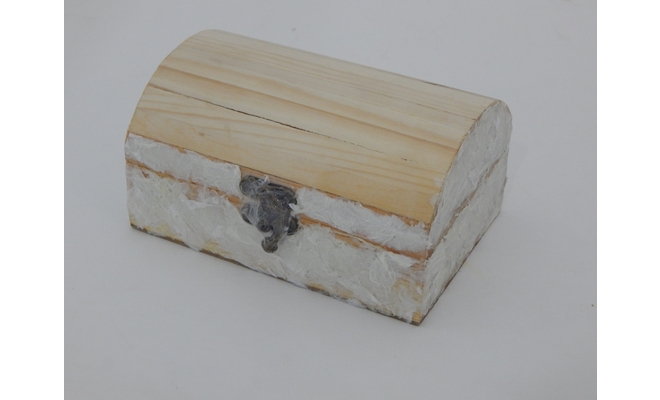
Take a plain tissue paper.
Stick the tissue paper on the walls of the jewellery box using Fabric Glue.
Leave it to dry.
STEP 3
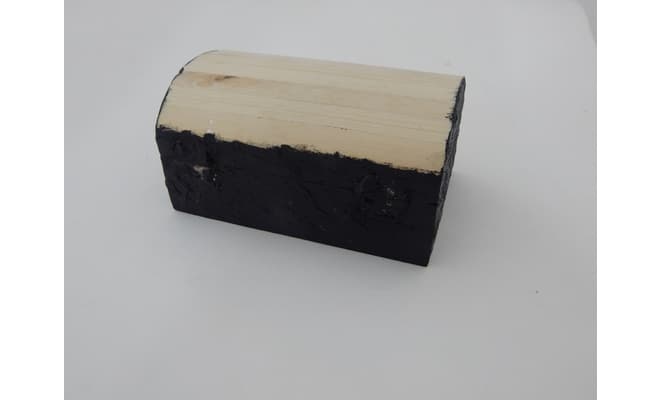
Paint the walls of the box using Acrylic Colour - Black 02.
Let it dry.
STEP 4
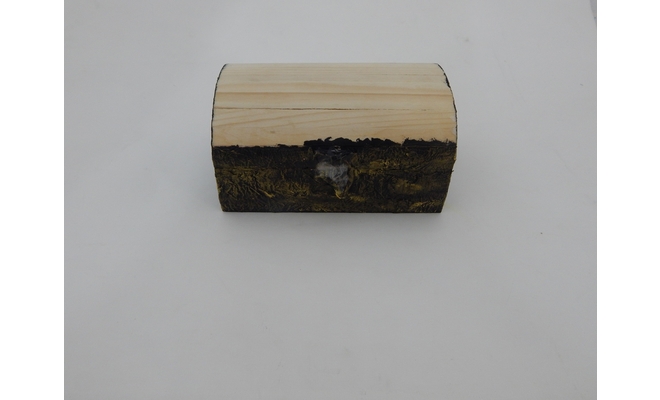
Paint the second coat giving a dry brush stroke effect to get an antique look using Acrylic Colour Pearl Metallic - Gold 352.
Leave it to dry.
STEP 5
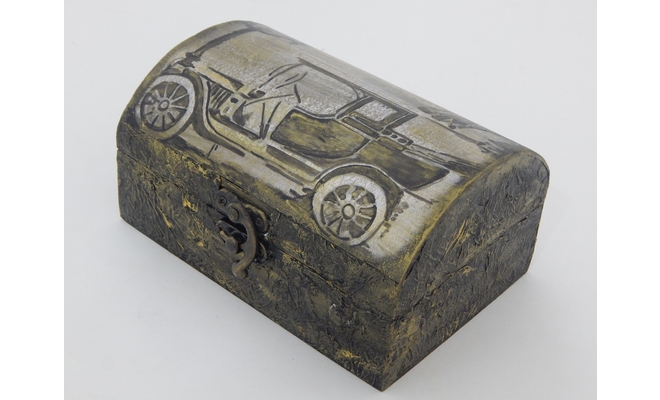
Take an A4 sized printout of a vintage car.
Cut the printout of the vintage car as per the size of the lid of the box.
Apply modge podge on the rear side of the paper and stick it on the lid of the box properly.
Leave it to dry.
After drying apply a first coat of modge podge horizontally and the second coat vertically on the printout to seal it neatly.
Apply dry strokes of Acrylic Colour Pearl Metallic - Gold 353 on the printout to give of an antique look.
Leave it to dry.
STONE TURTLE:
STEP 6
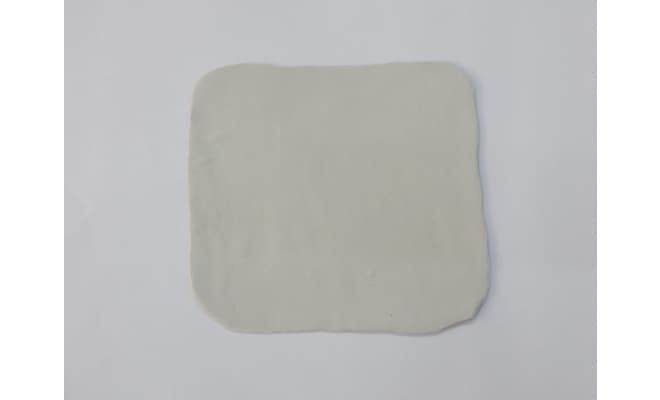
Take the Shilpkar - resin base and hardener, mix it thoroughly to make an even dough.
Take the ball of dough, roll it to make a slab.
STEP 7
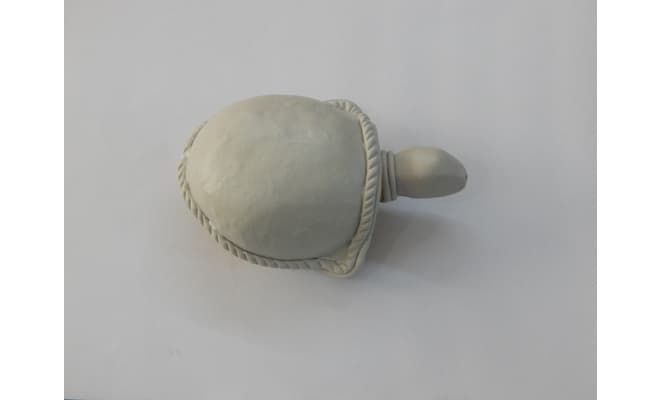
Take the pebble and place the rolled slab on it, cut the edges properly.
Take some dough, shape it to make the neck and head of the turtle.
Stick the head of the turtle to the pebble using some of the dough.
Let it dry.
Take some dough, roll it to make coils.
Create slanting lines on the coil using clay carving tools.
Border the hump of the turtle by sticking the coils on it in a circular pattern using Fabric Glue.
Let it dry.
STEP 8
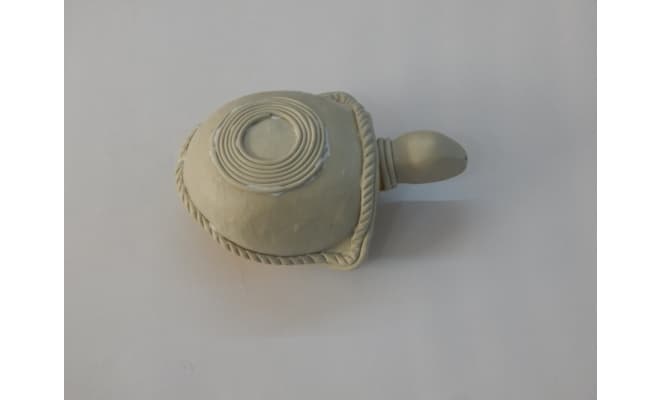
Take some dough, roll it to make a thin coil.
Stick the coil in the centre of the hump of the turtle using Fabric Glue.
Let it dry.
STEP 9
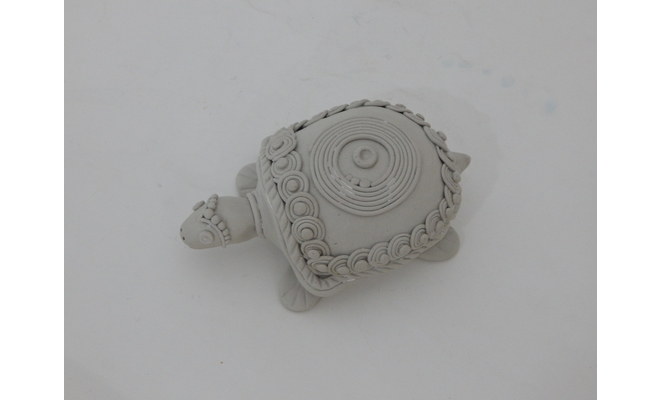
Similarly, create and stick the border design on the turtle's back using thin coils with Fabric Glue.
Take some dough and make small sized balls.
Stick the balls on the head of the turtle and on each coil with Fabric Glue.
STEP 10
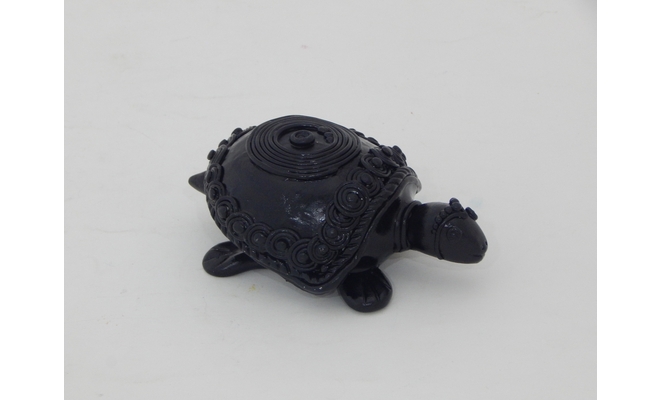
Paint the turtle with a base coat of Acrylic Colour - Black 02.
Leave it to dry.
STEP 11
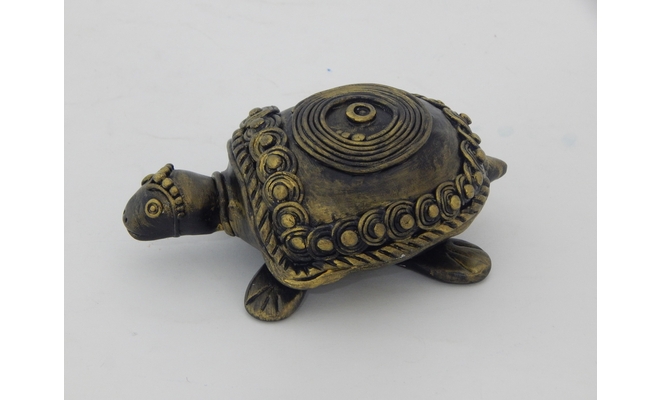
Paint the second coat using Acrylic Colour Pearl Metallic - Gold 352 to give antique gold look.
Leave it to dry completely.
PENDANT:
STEP 12

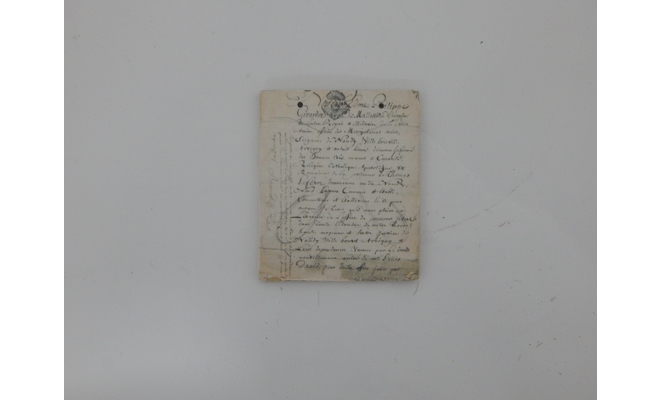
Take a rectangular MDF wooden cut out measuring 2 ½” x 3 ½” in size.
Pierce the holes towards the upper side of the wooden piece, for the attachments of the pendant.
Refer to the image.
STEP 13
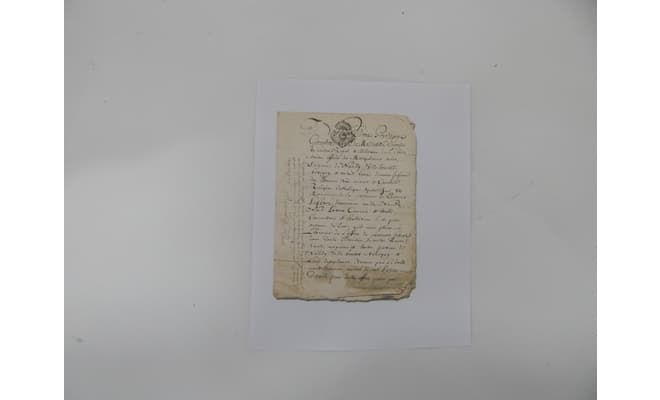
Take a 2 ½” x 3 ½” sized printout of letters in the vintage style
STEP 14
Apply modge podge on the rear side of the printout and stick it on the aooden cut out properly.
Leave it to dry.
After drying, apply a first coat of modge podge horizontally and a second coat vertically on the printout to seal it neatly.
STEP 15

Paint the wooden rectangular piece using Acrylic Colour Pearl Metallic - Gold 352 to give an antique look.
Leave it to dry.
STEP 16

To make the dragonfly we will take Shilpkar - resin base and hardener, mix it thoroughly to make an even dough.
First we will make the body of the dragonfly.
Take the dough, roll it to make a carrot shape. Leave it to semi dry.
Create the horizontal lines on the body to make it look realistic with clay carving tools.
Take some dough and make the wings of the dragonfly, create texture in the form of lines with clay carving tools.
Stick the wings to the body using Fabric Glue.
STEP 17
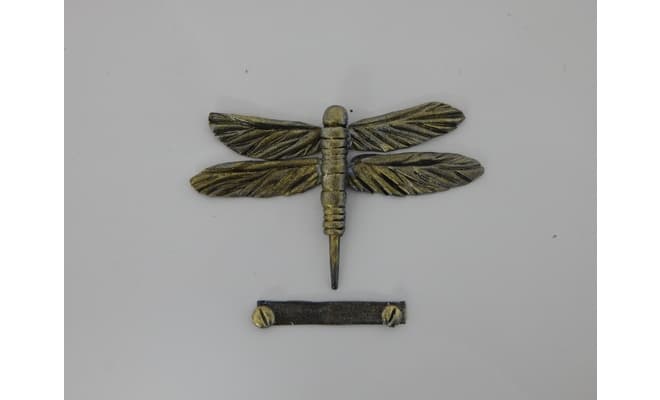
Similarly, create 2 screw and 1 small sized thin slab, further to write “ DRAGONFLY” on it.
Paint the dragonfly, the thin slab with the screws by giving a first coat of Acrylic Colour - Black 02 and another coat with Acrylic Colour Pearl Metallic - Gold 352.
Leave it to dry.
STEP 18
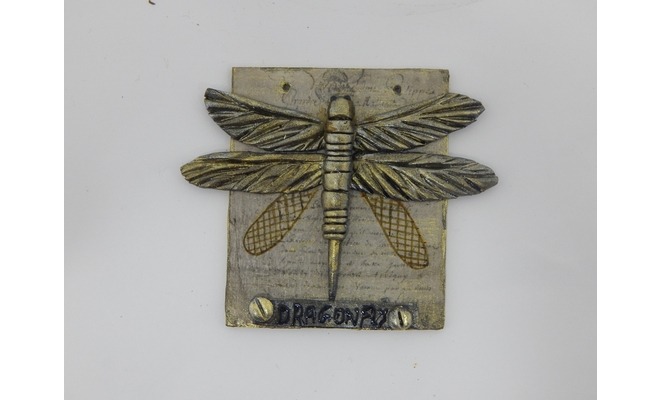
Stick the dragonfly and the thin slab with the screws on the wooden rectangular piece using Fabric Glue.
Paint one more pair of wings below the main wings with Acrylic Colour Pearl Metallic - Gold 352.
Leave it to dry.
STEP 19

Connect the pendant attachments.
Write “ DRAGONFLY” on the thin slab using 3D Cone Outliner Non Sticky - Black 708.
Let it dry completely.


 +91 99676 55545