Aztec Wall Art

You Will Need:
Fevicryl Fabric Glue, Fevicryl Acrylic Sparkling Gold Dust, Fevicryl Acrylic Colour White, Fevicryl Glass Colors (Black, White), Fevicryl Fabric Colours (White, Deep Brilliant Purple, Dark Green, Light Green, Lemon Yellow), Paper, Pencil, Colour Pencil, Scale, Measuring Tape, Cutter, Paper Scissor, Fabric Scissor, Corrugated Sheet (Thick For Base And Thin For Cut Outs), White Cotton Fabric, Beads, Cotton Thread, Brush, Water, Gold Foil
Product Used:


Description :
Here is an amazing DIY of an Aztec wall art with paper and fabric that has been made using Fevicryl Fabric Glue.
STEP 1 : Draw the design
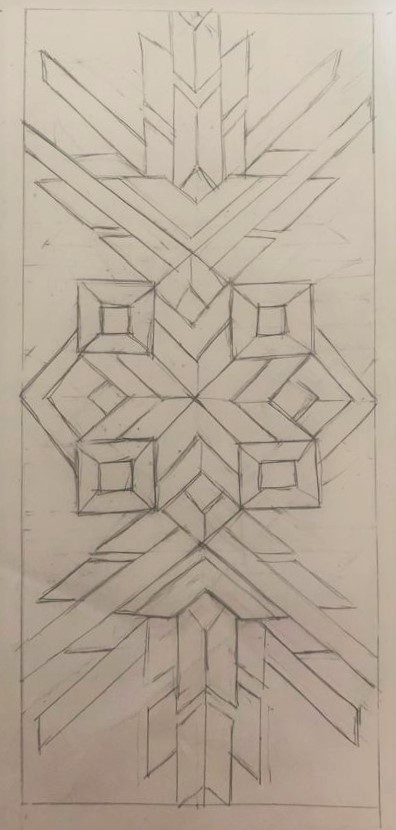
- Draw out an Aztec design on a paper for reference as shown in the image.
STEP 2 : Source the base
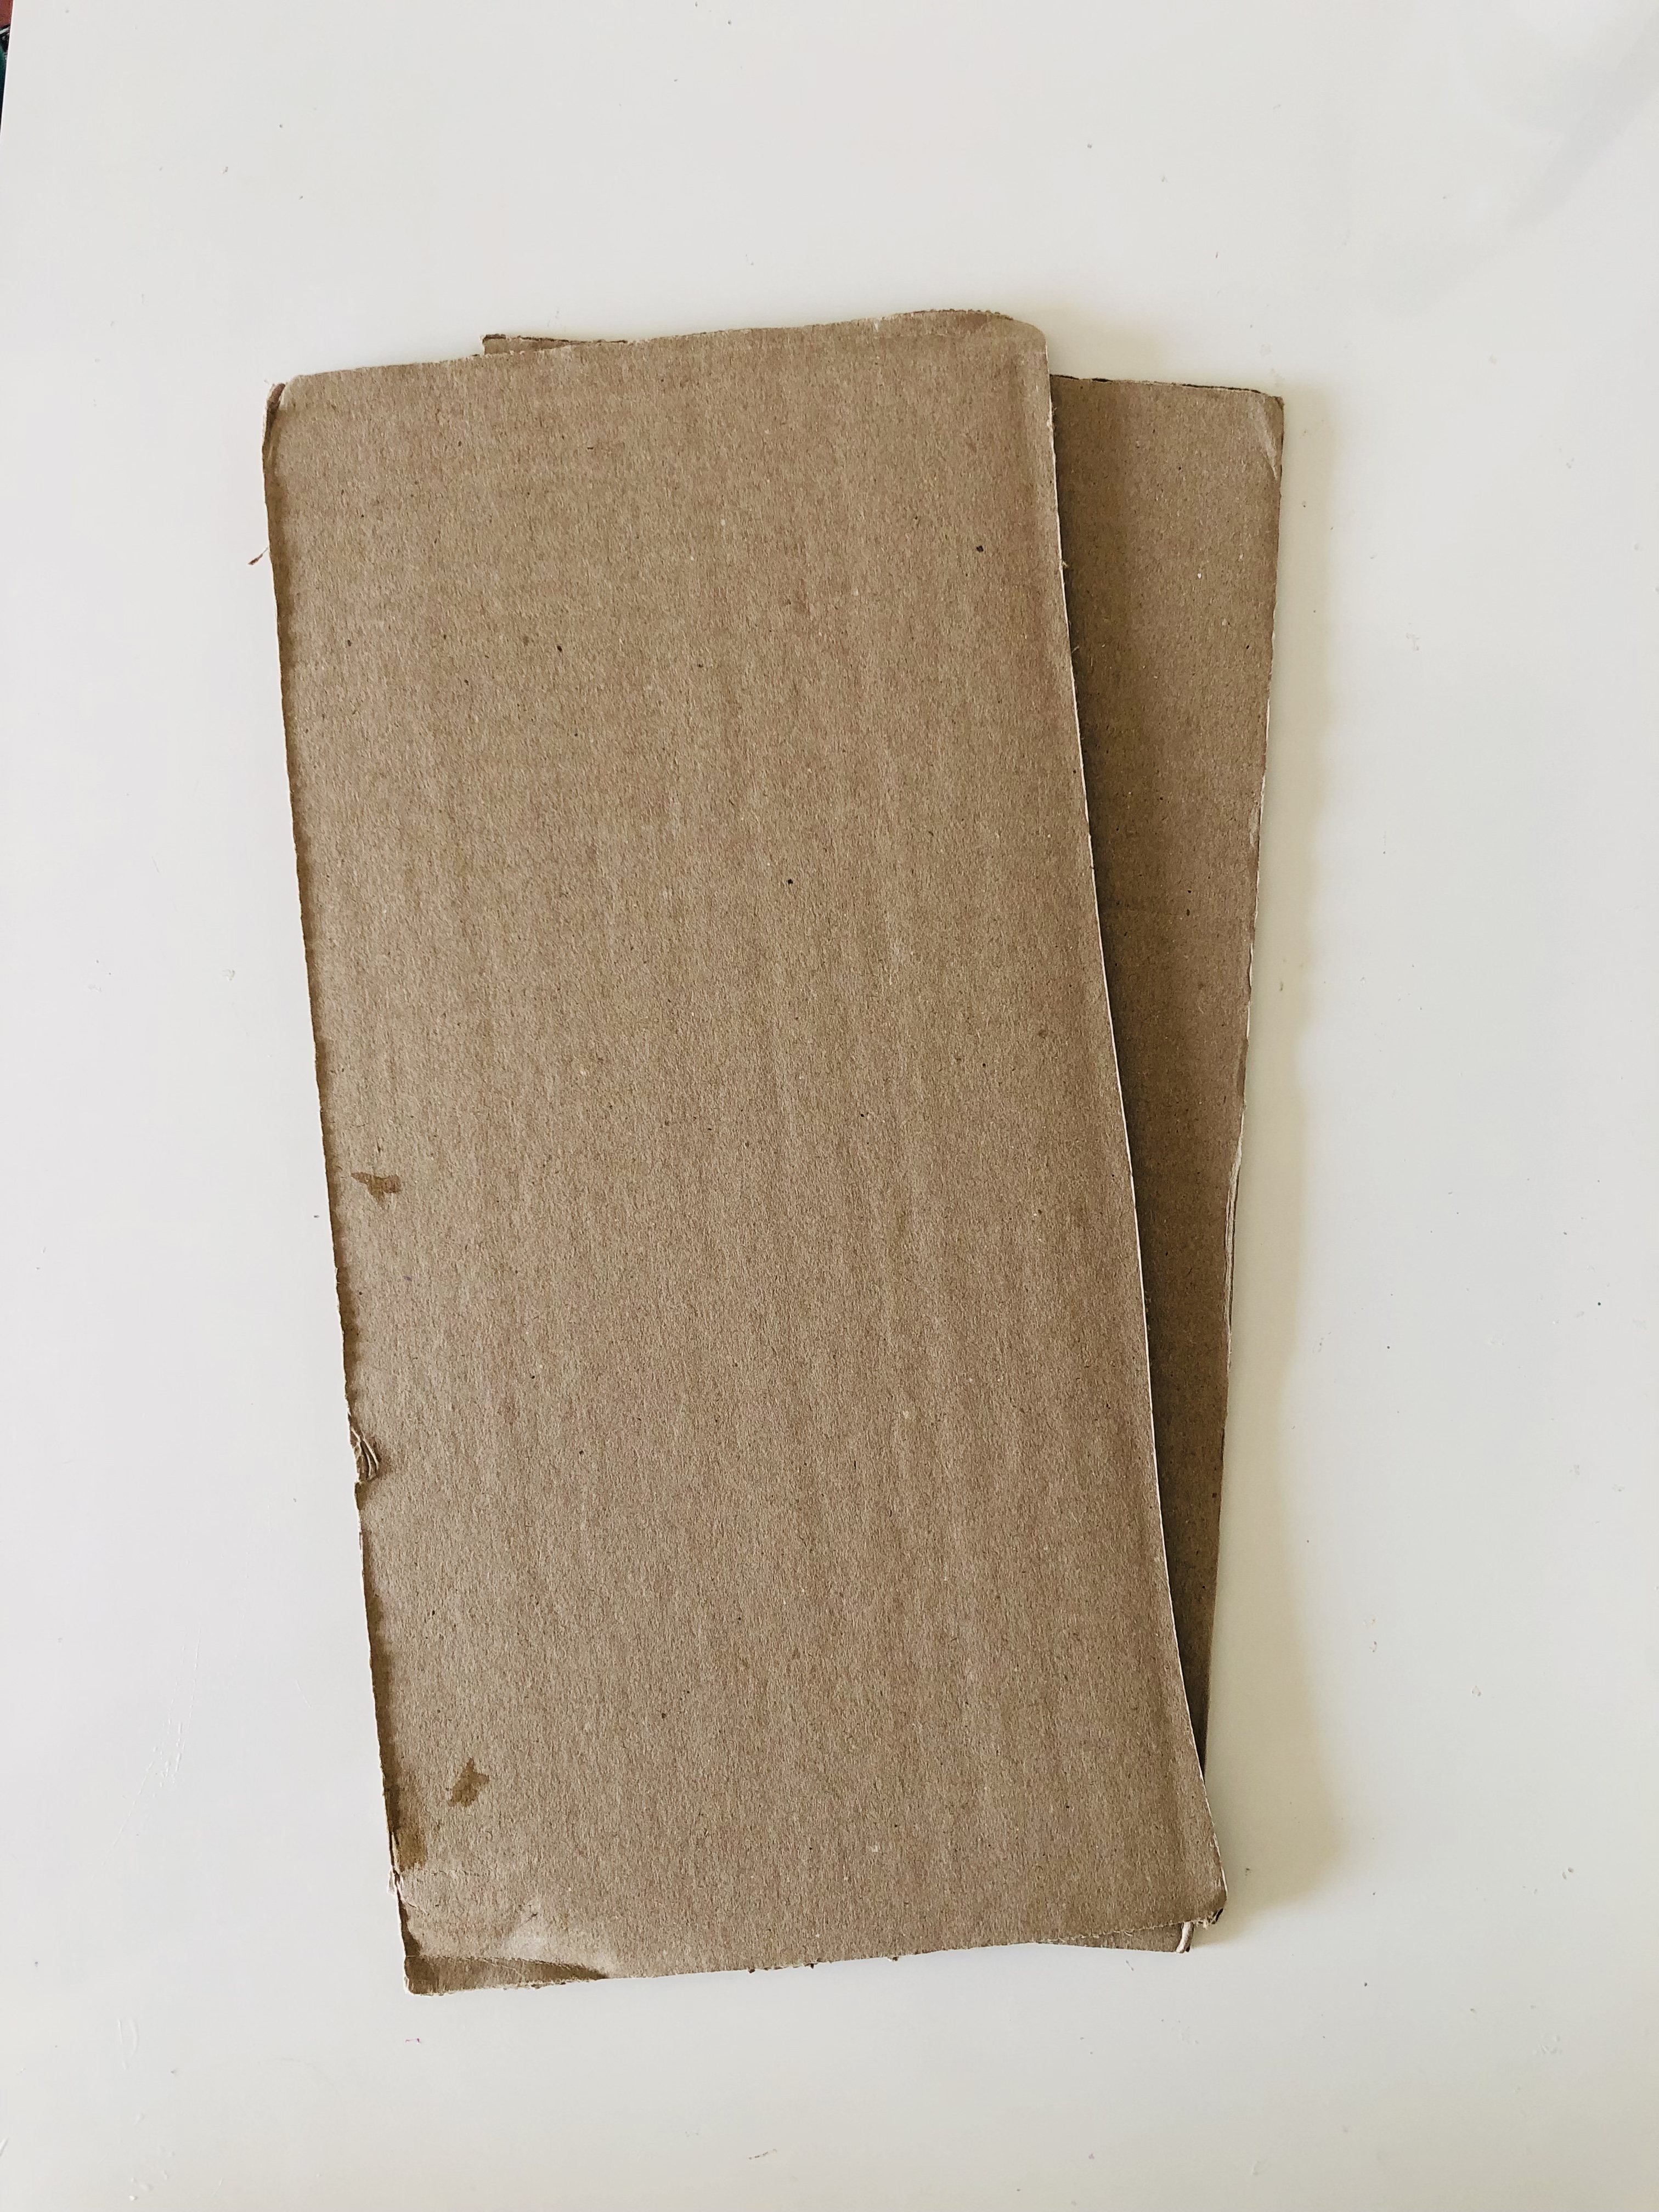
- Take big pieces of thin corrugated sheet as shown in the image
STEP 3 : Cutting of strips
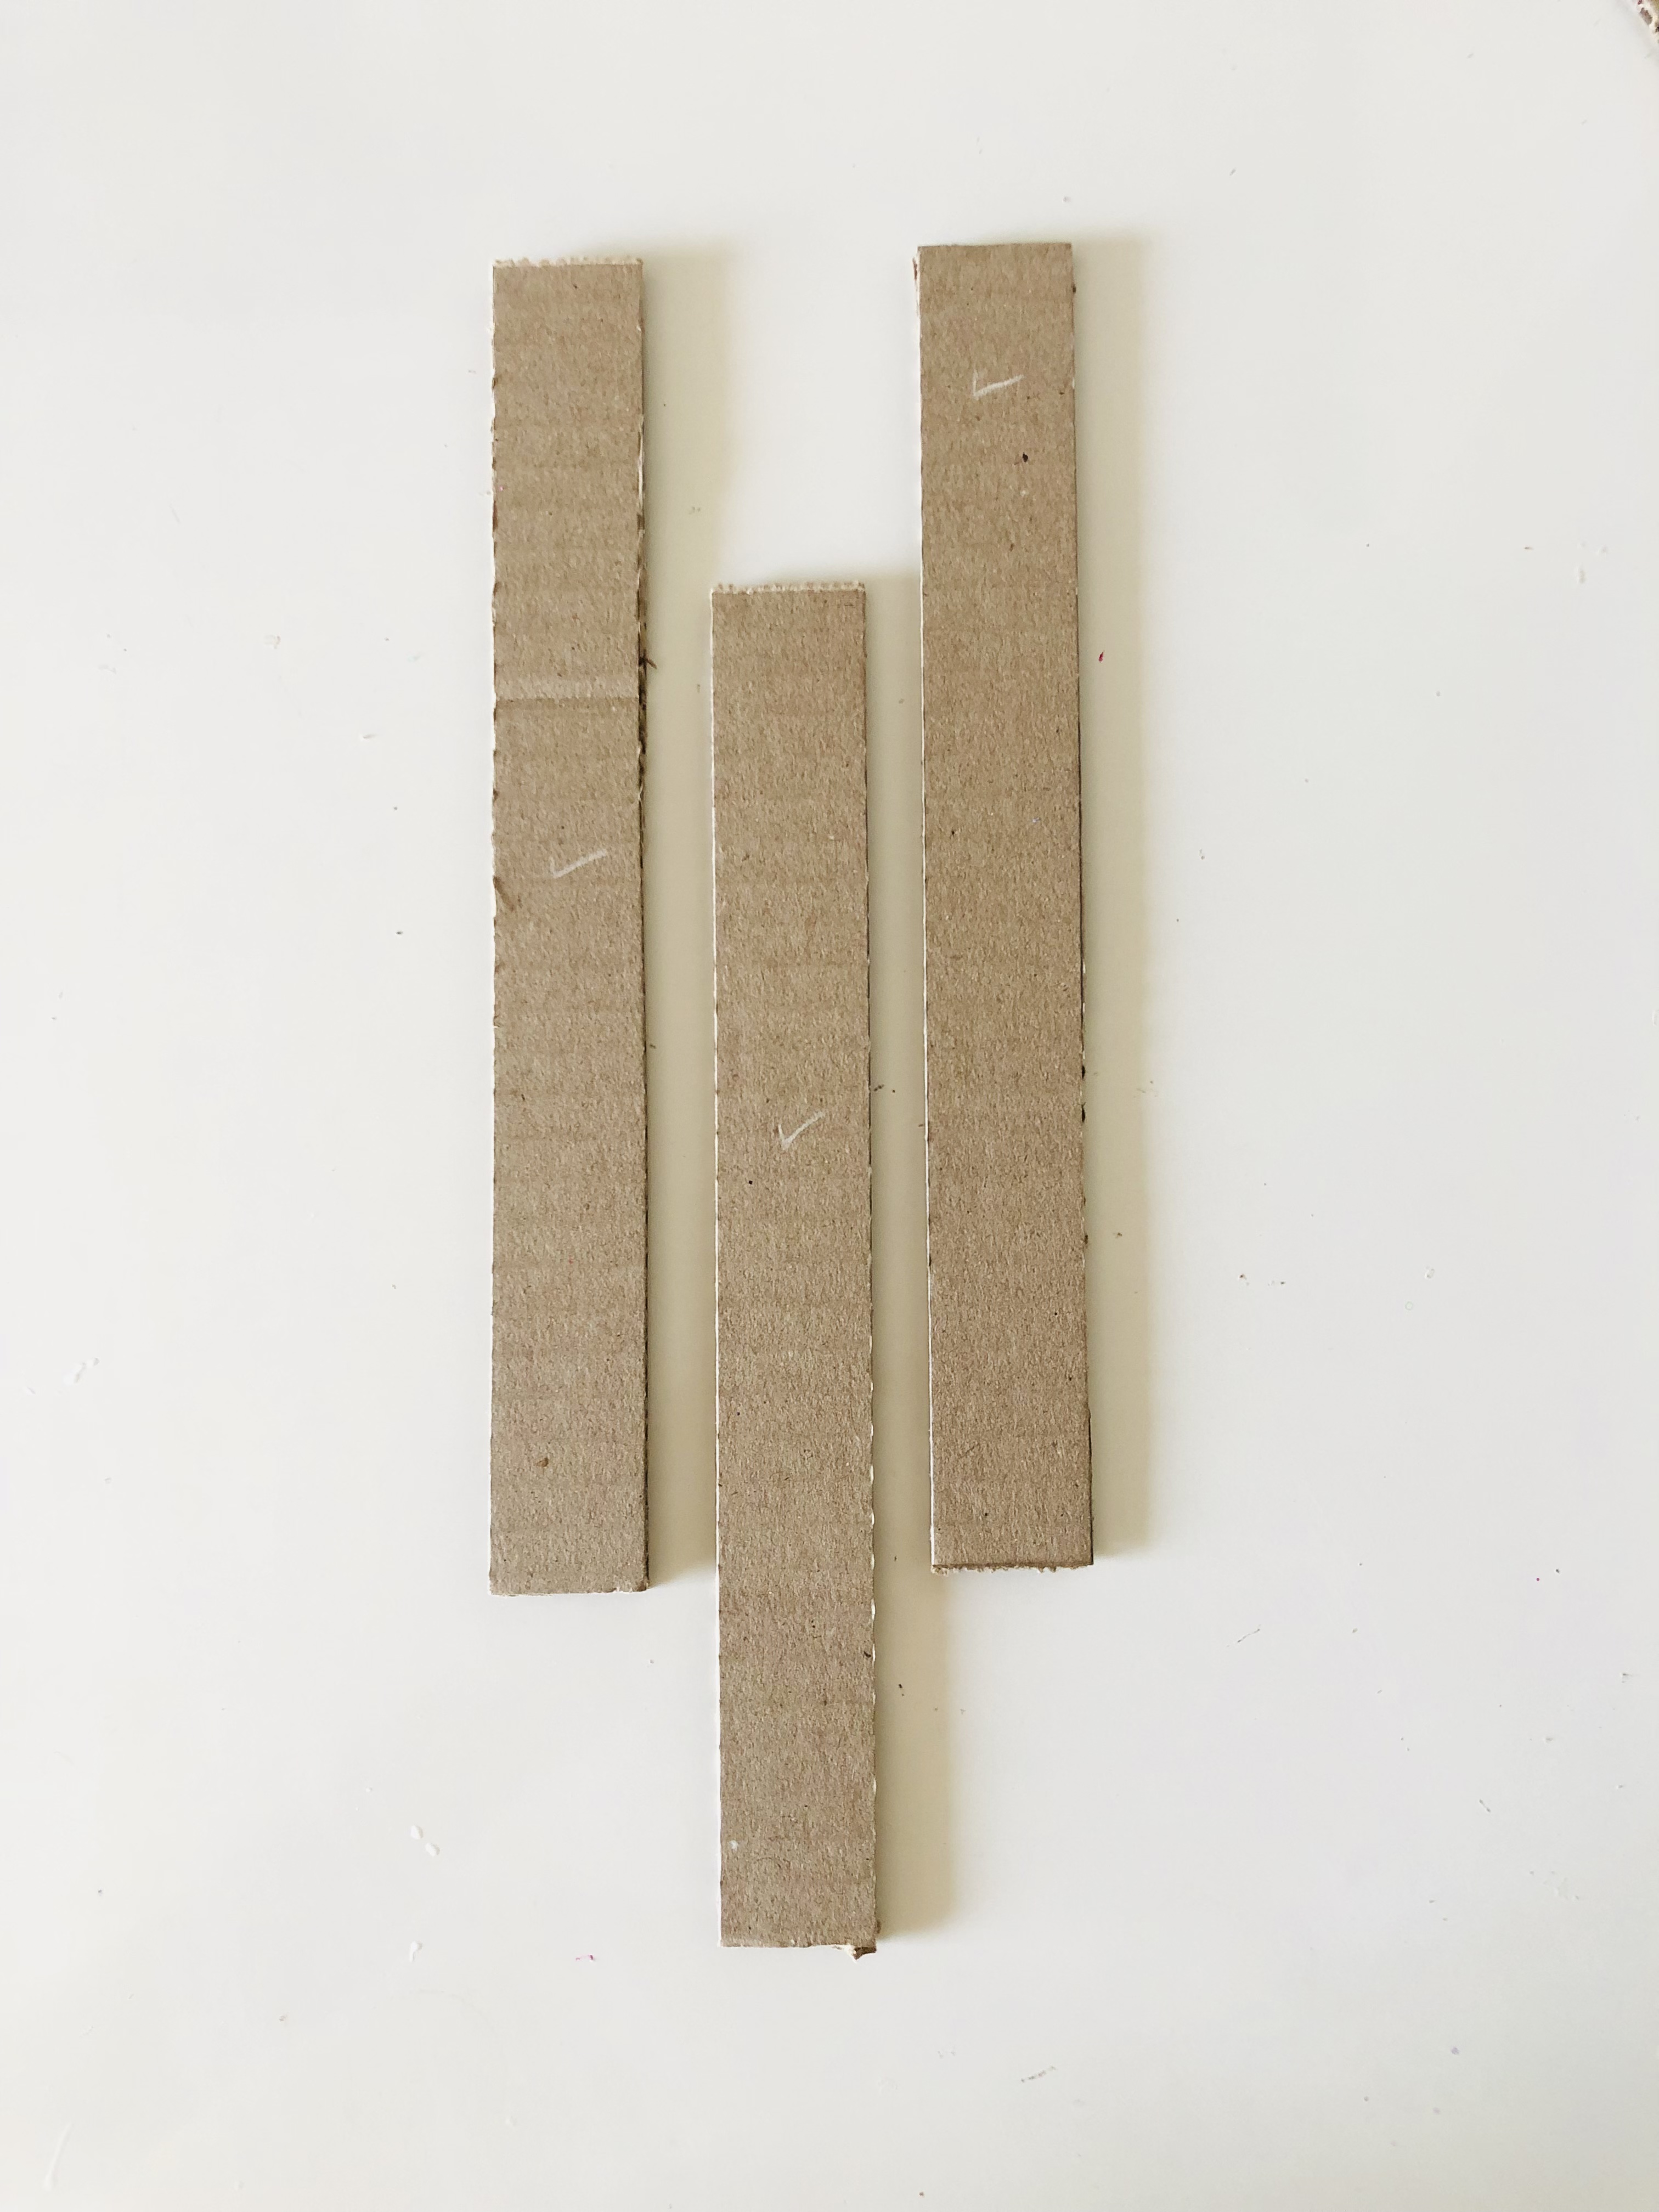
- Cut long strips of 1” as shown.
- Use a cutter to cut them neatly.
STEP 4 : Further cutting
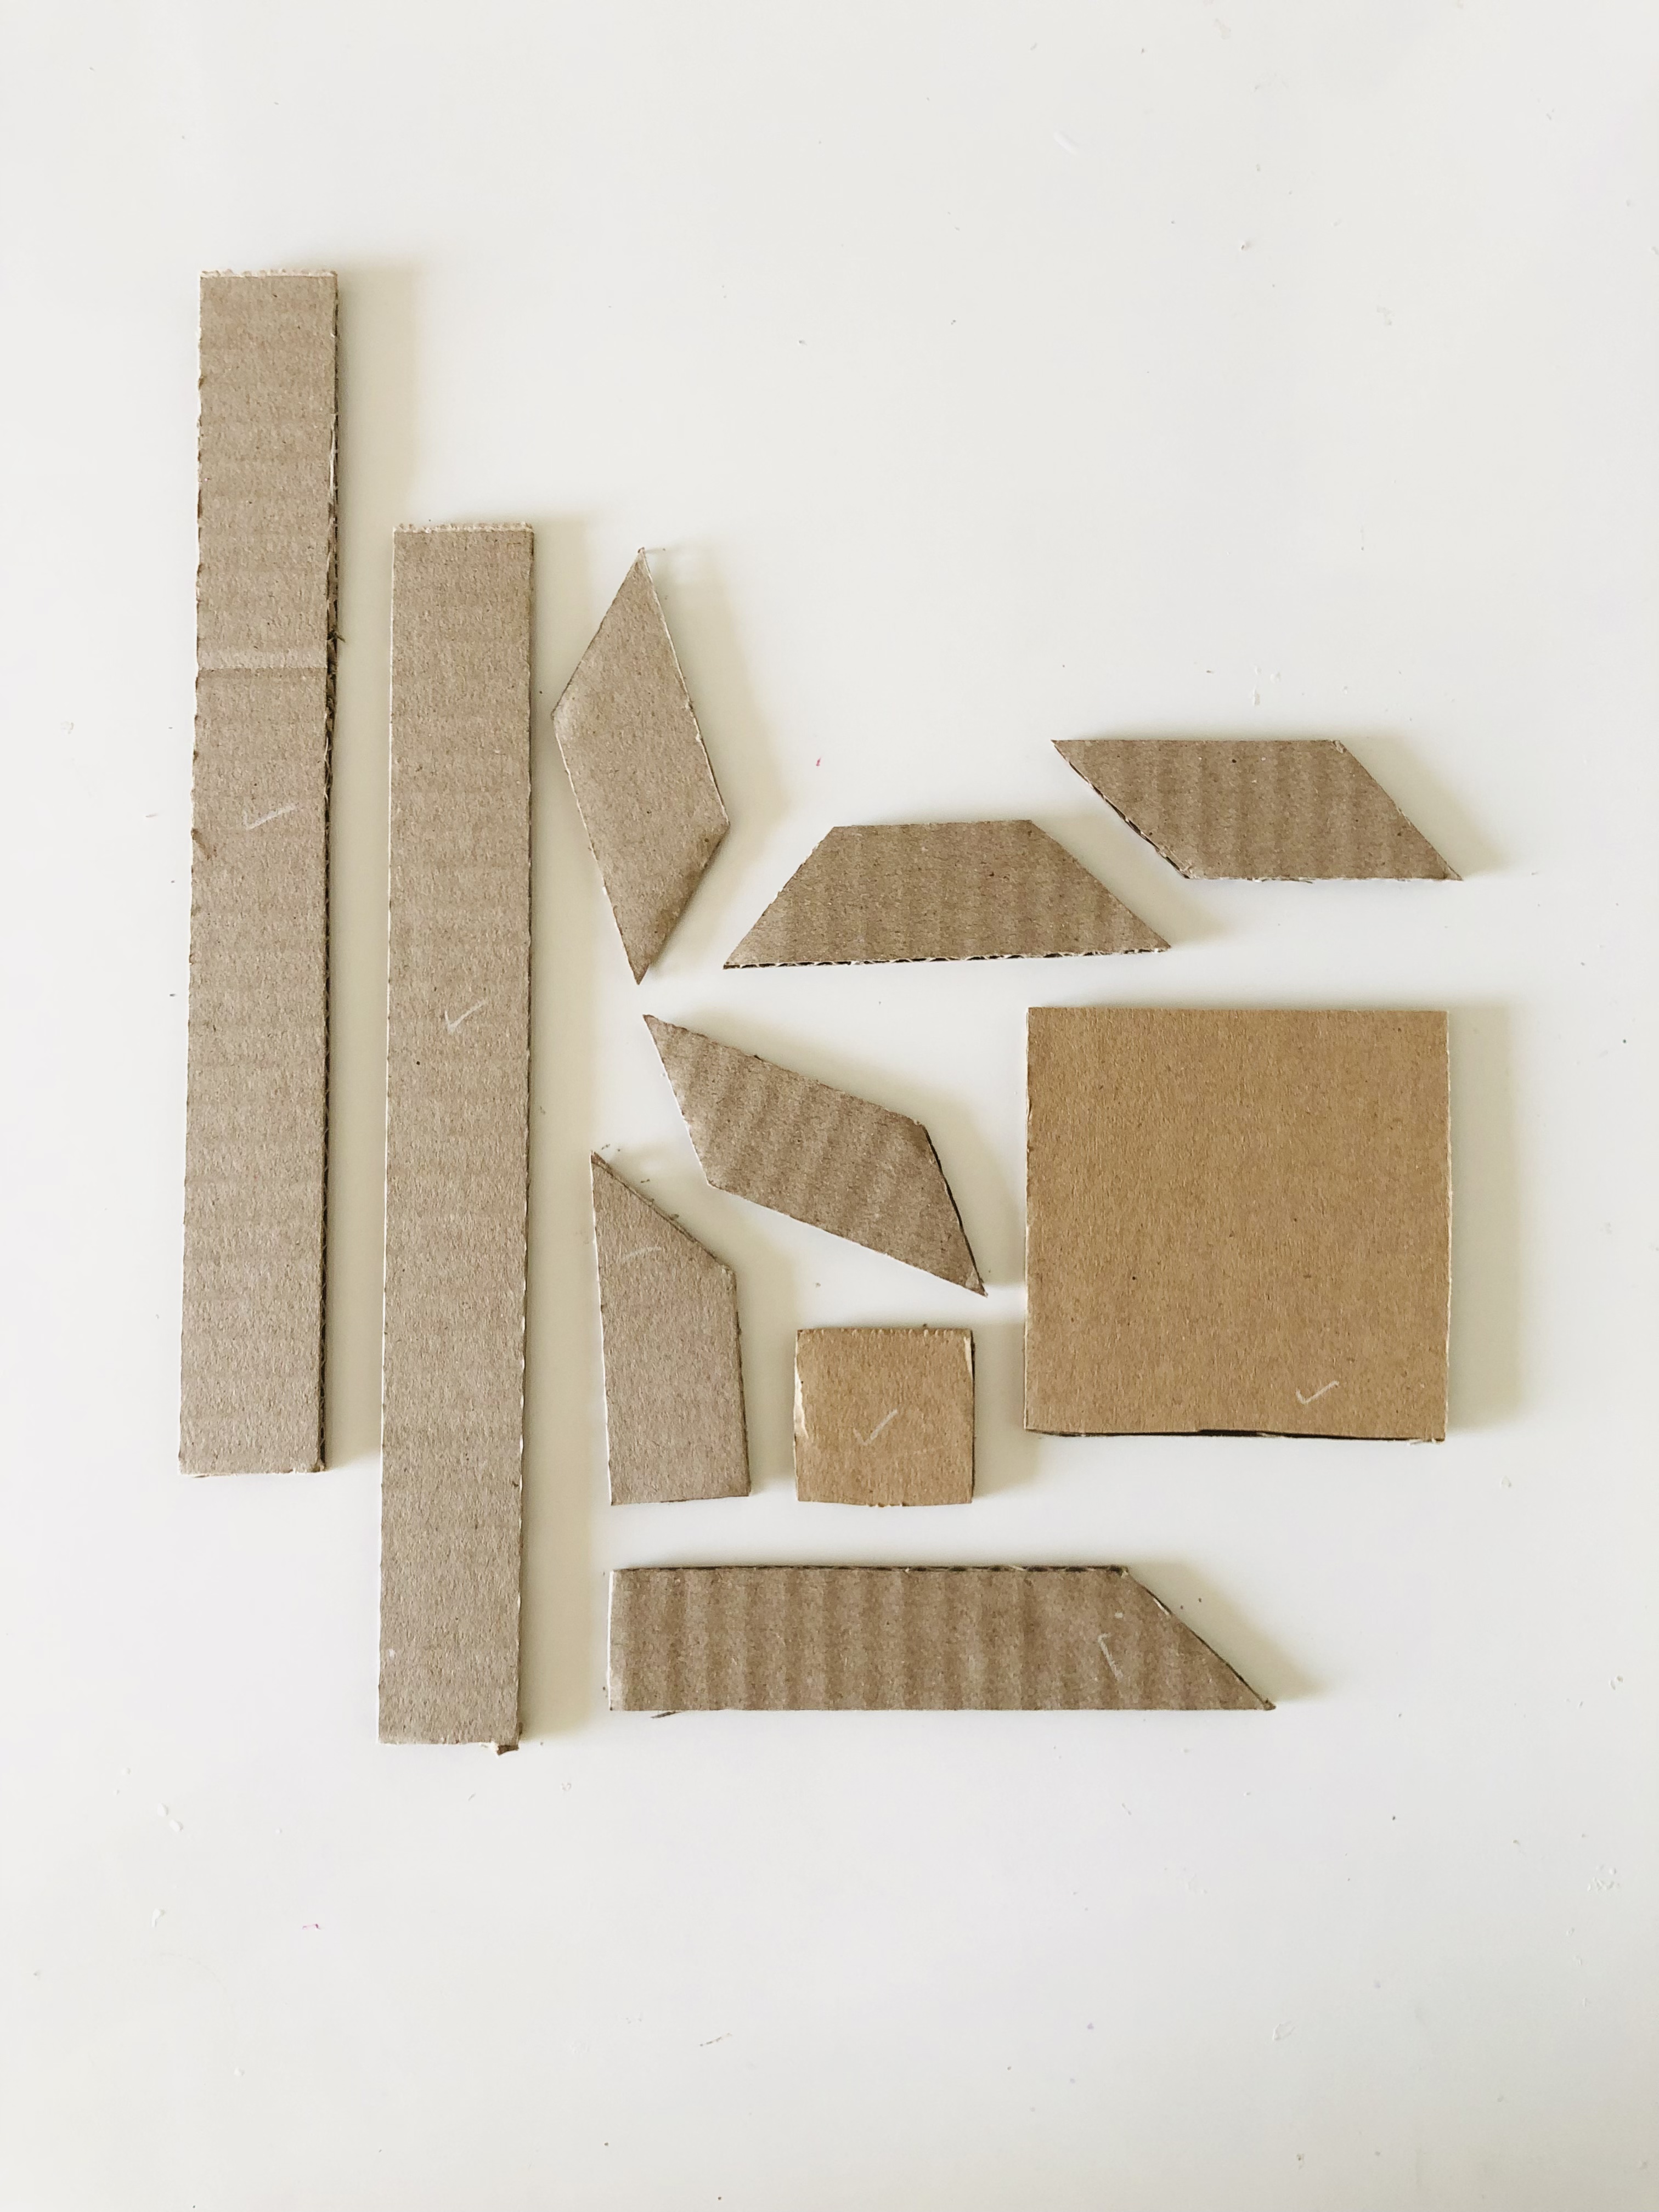
- Cut the 1” strips according to the design we have selected as reference for the wall art.
STEP 5 : Placement
- Cut various pieces according to the reference design and place them together to get an idea how the designs will turn out to be.
STEP 6 : Tie & dye technique
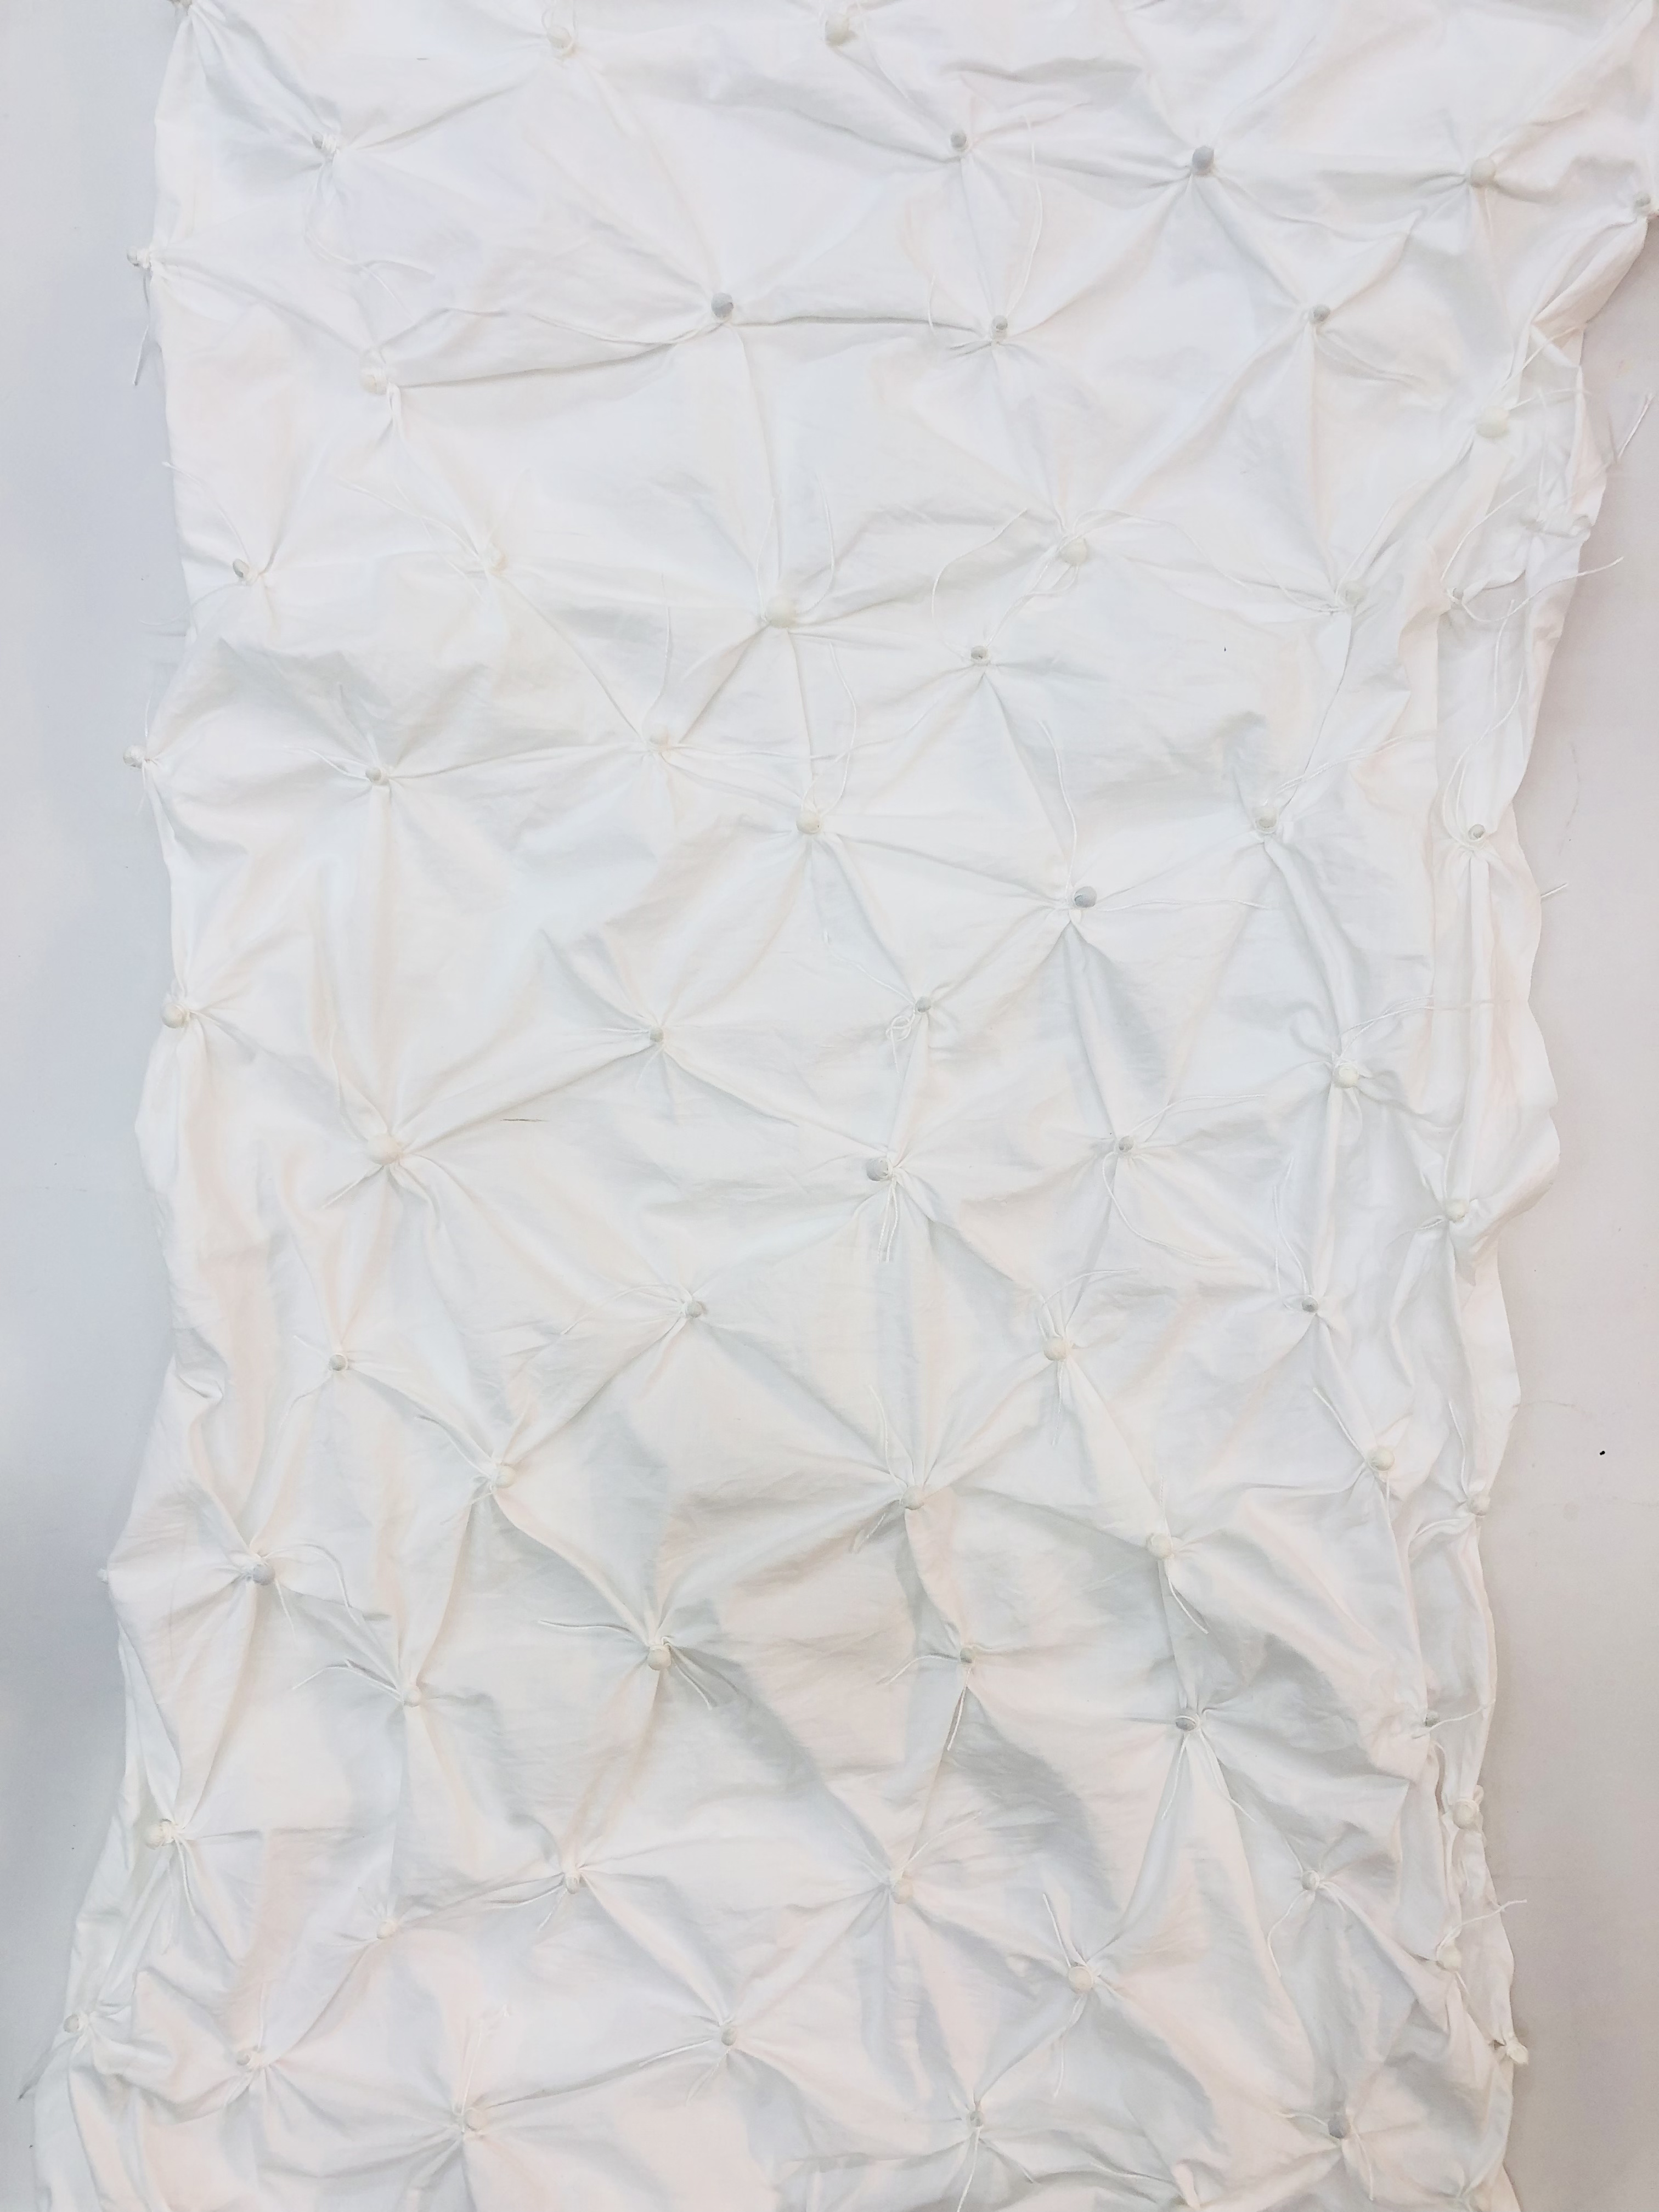
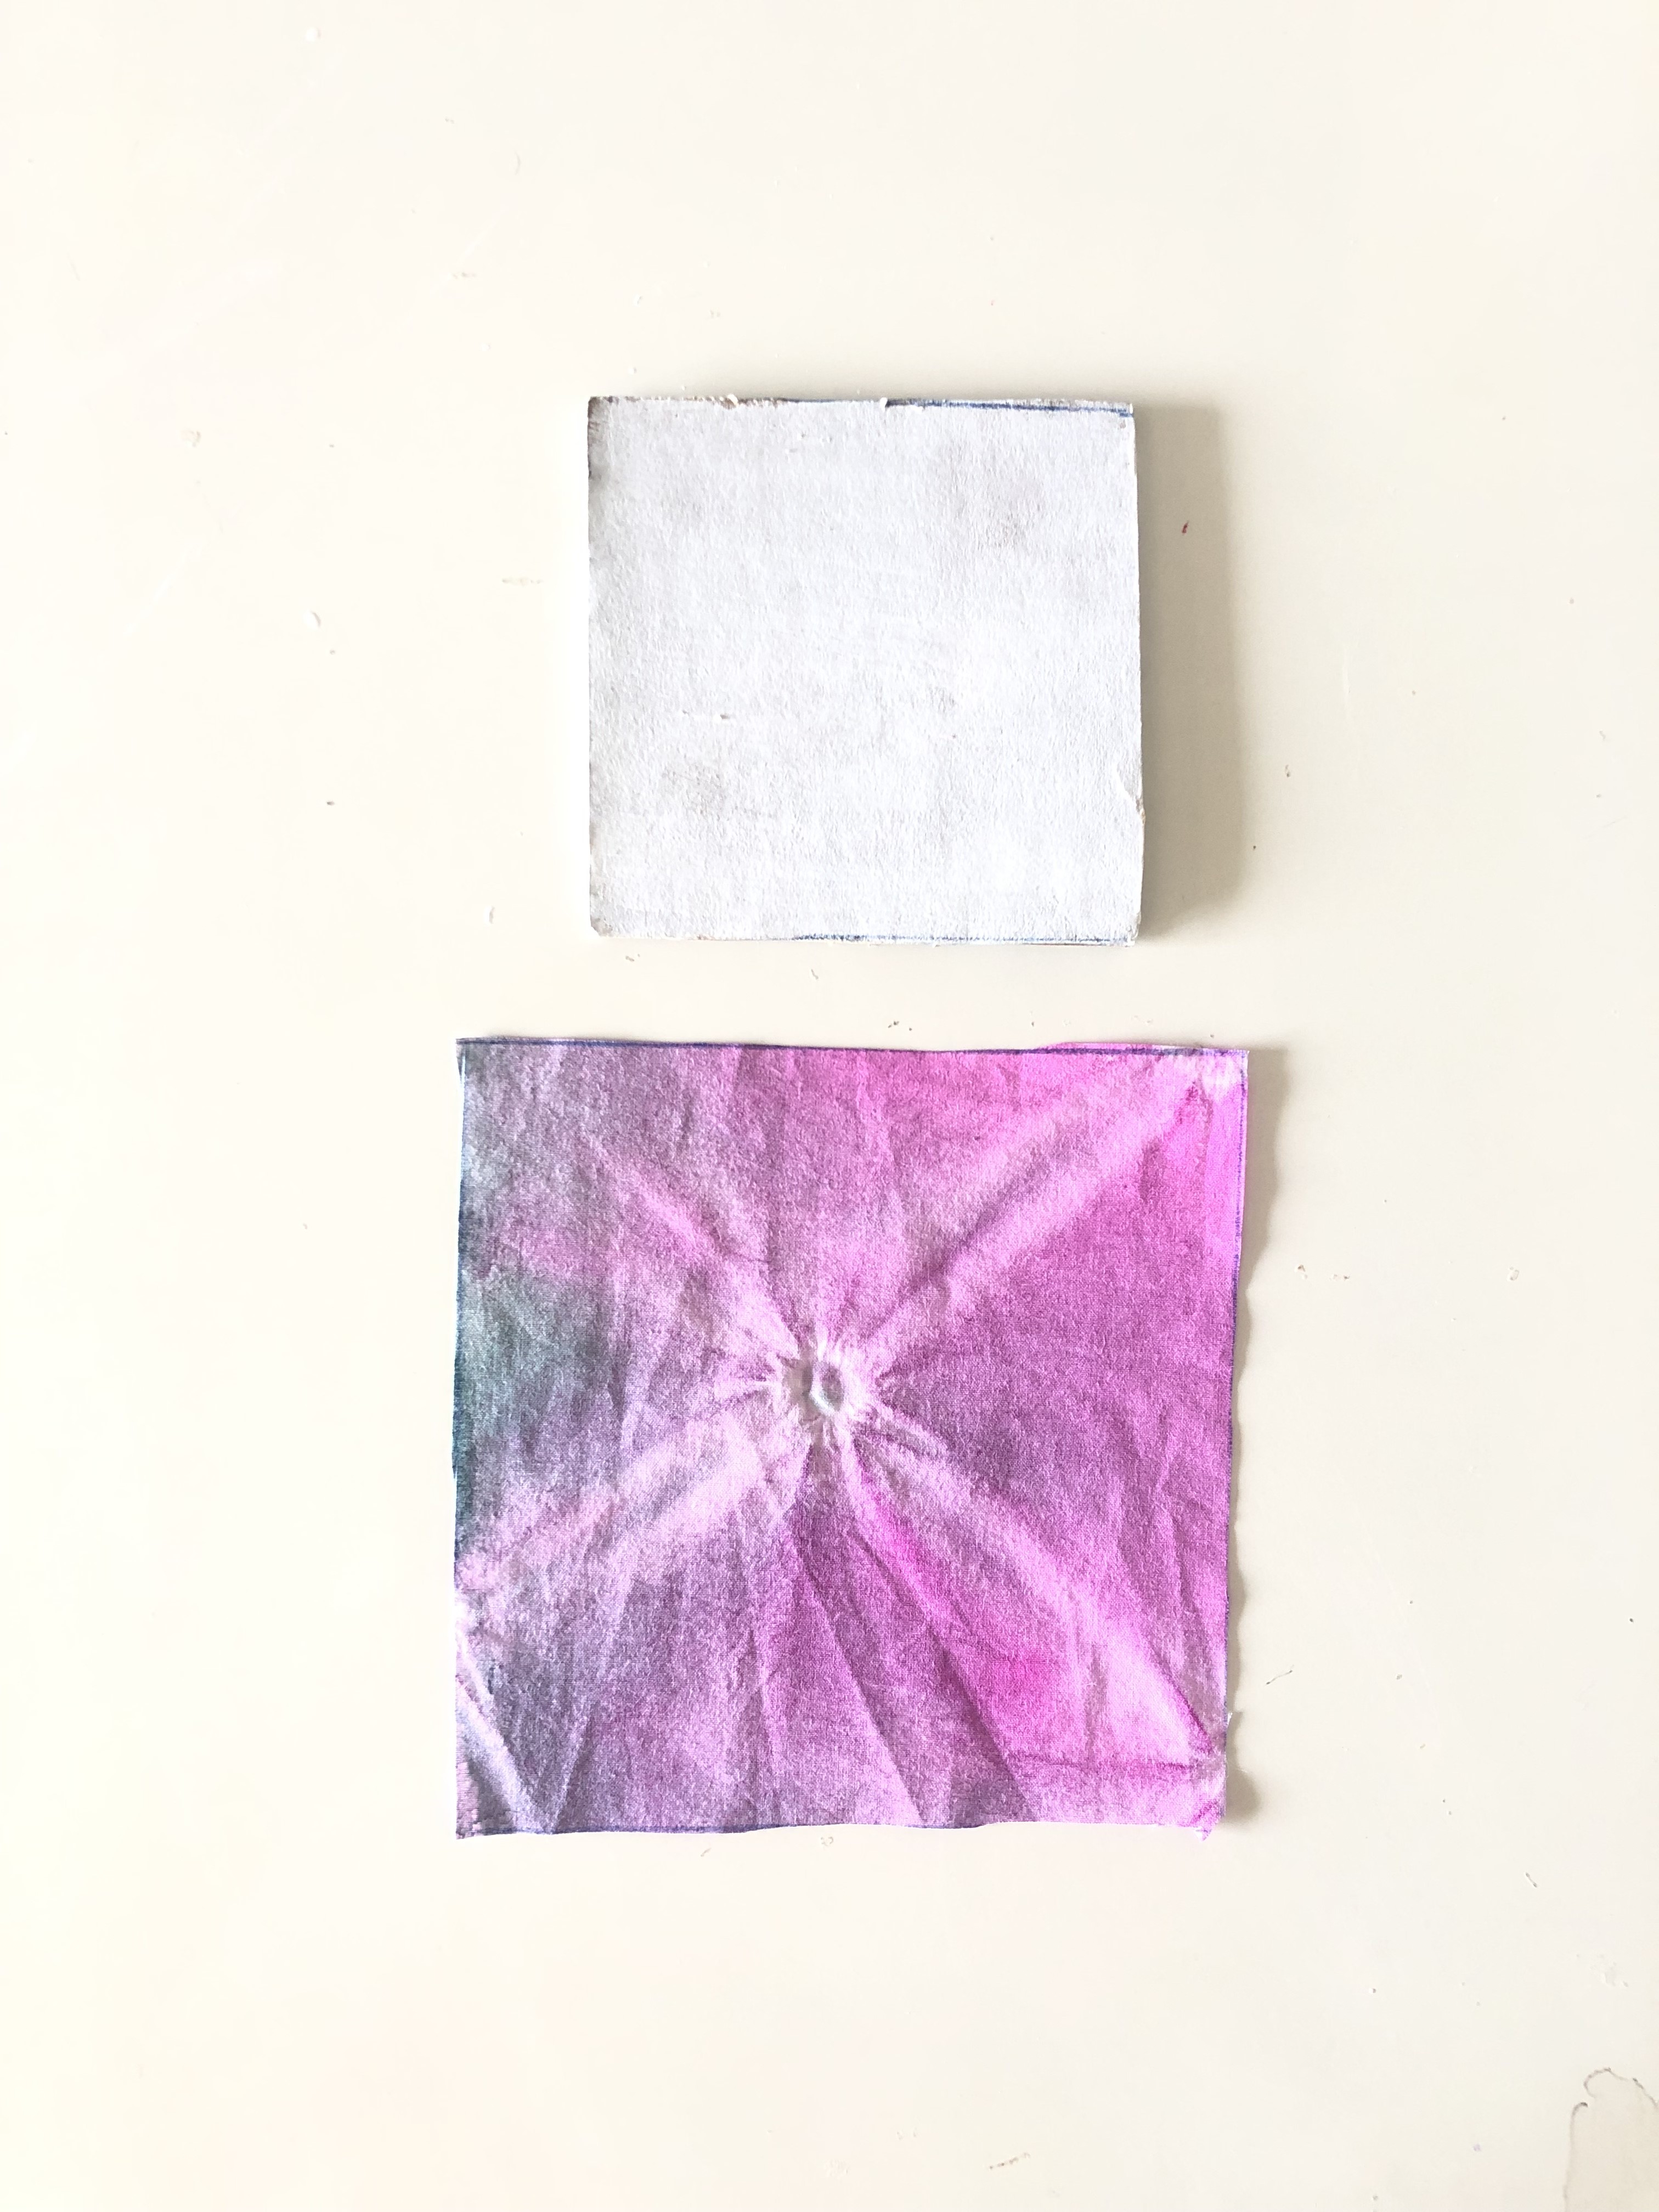
- Take 1 mt of white cotton fabric.
- Do the resist technique on the fabric by placing beads in random places and resisting them with white cotton yarn.
- Dip this piece of fabric in water.
STEP 7 : Dyeing of fabric
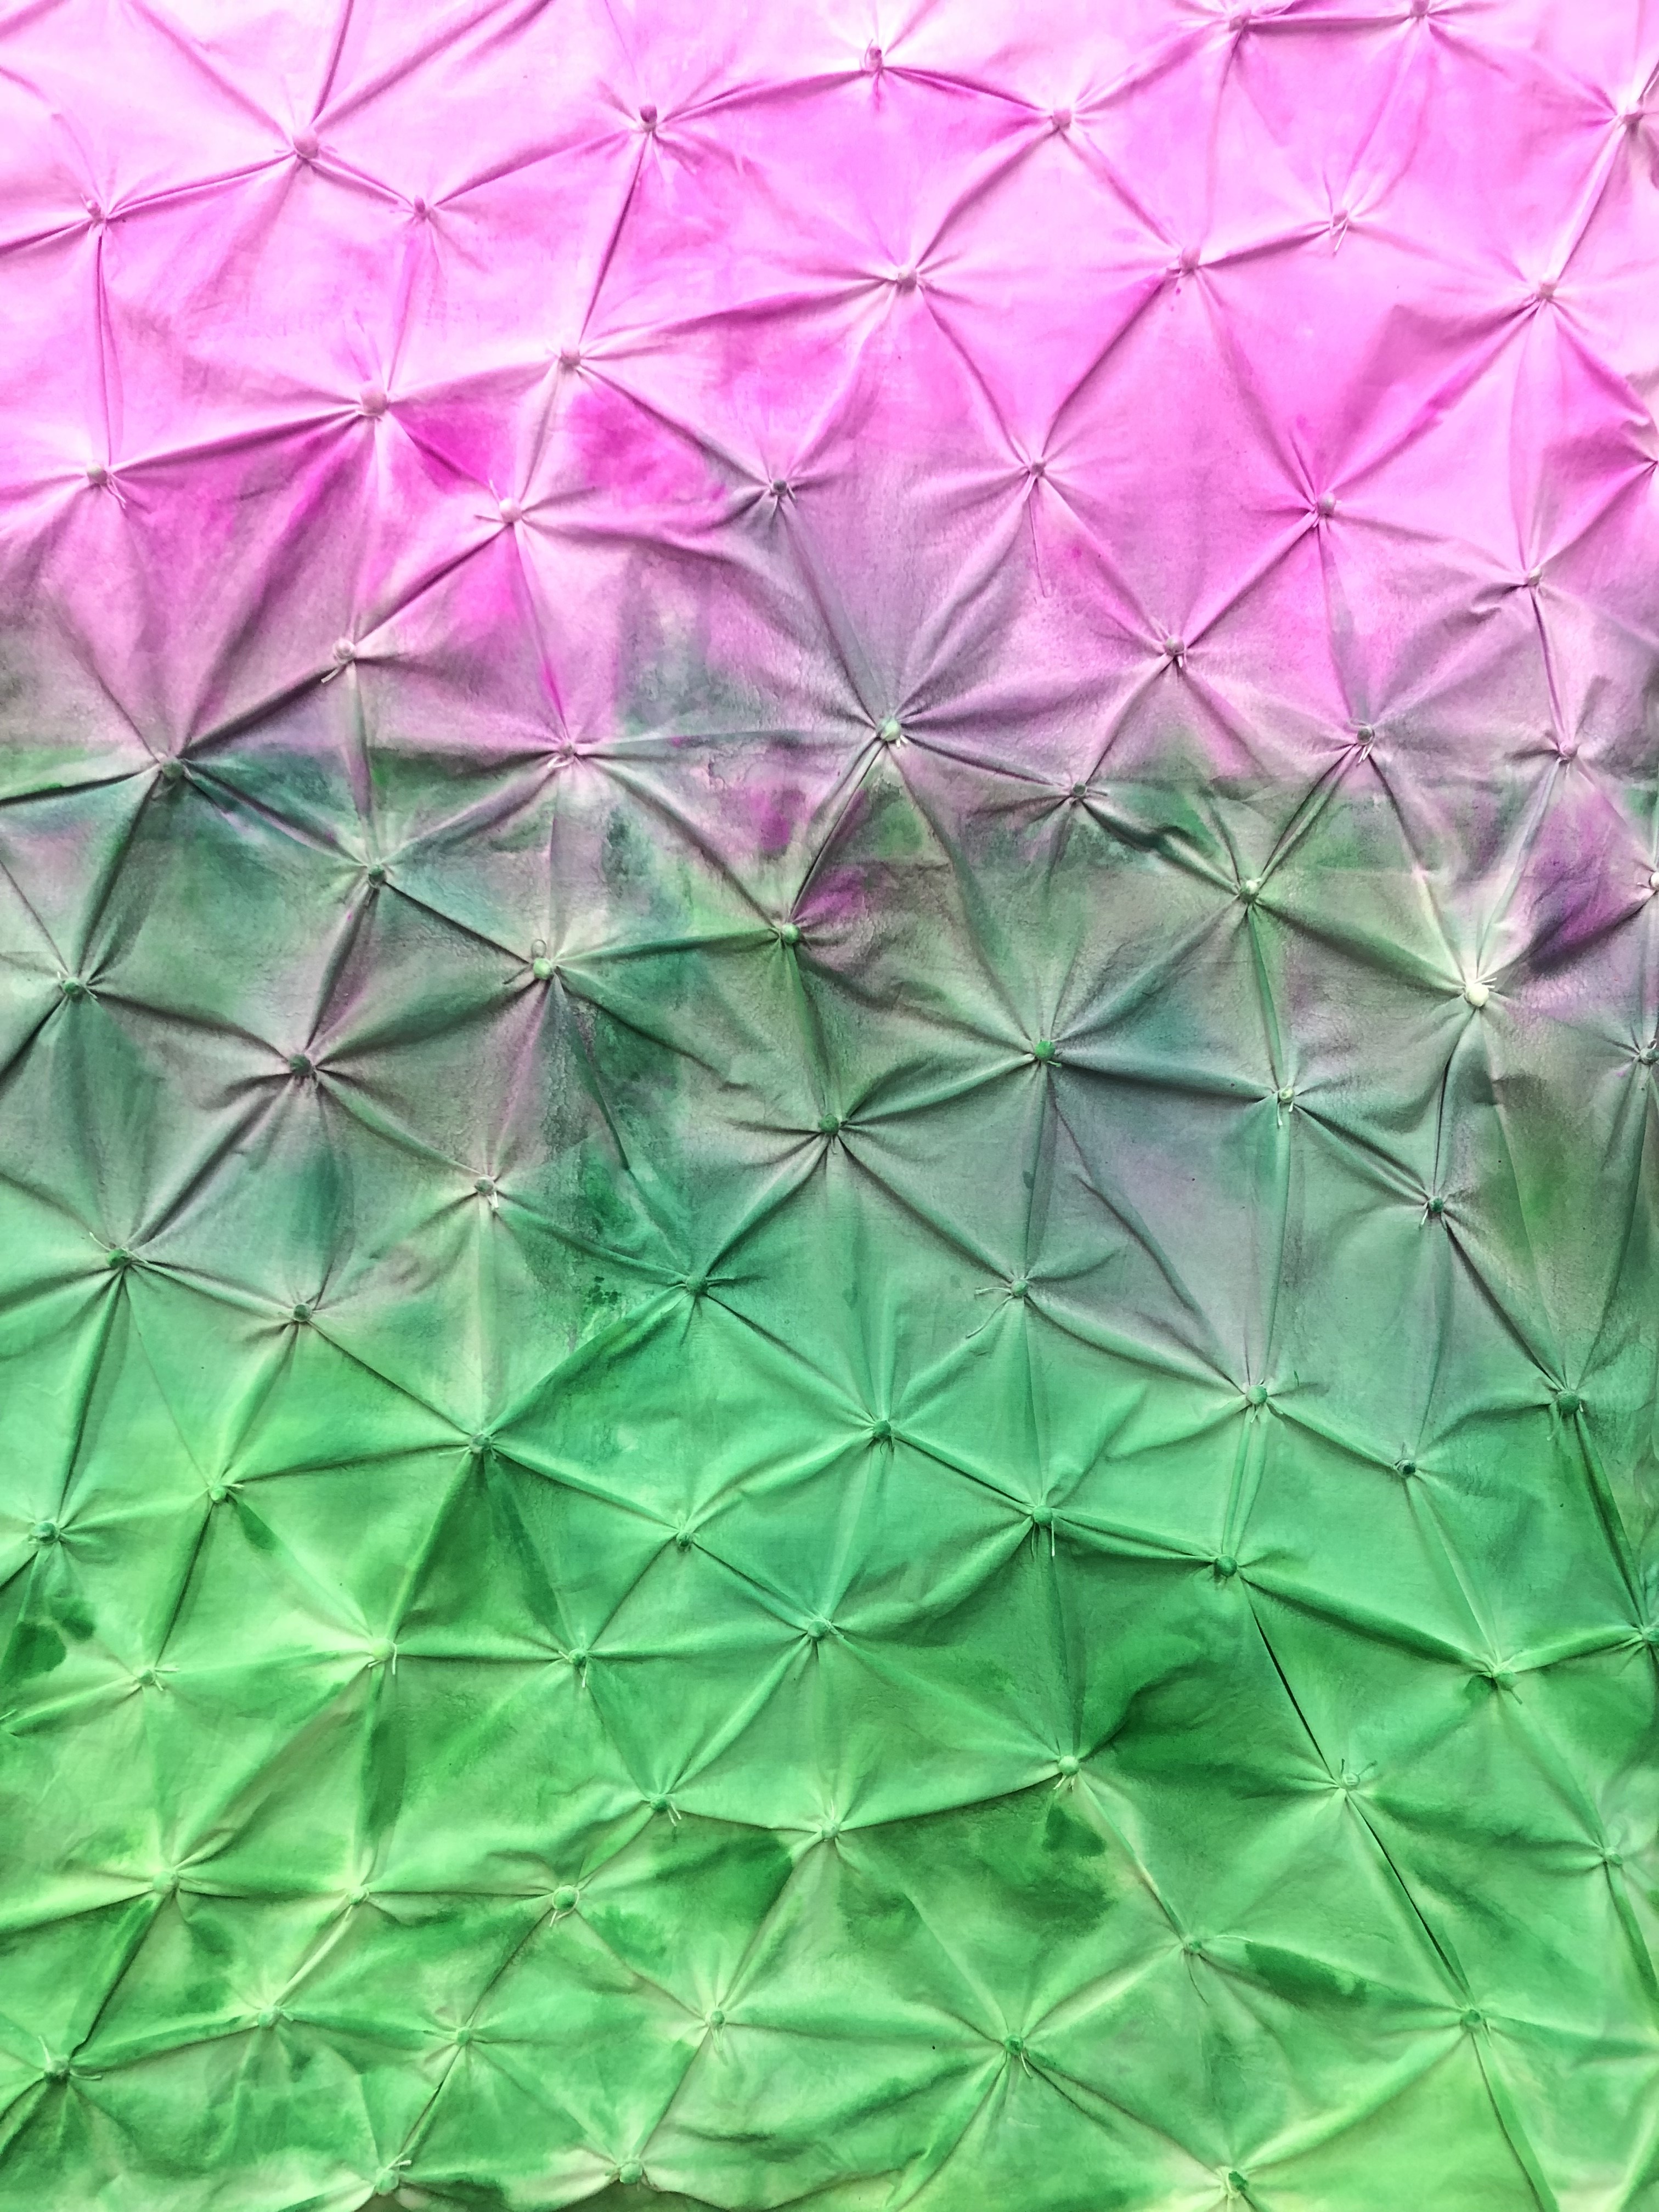
- Take Fevicryl Fabric Colours (white, deep brilliant purple, dark green, light green, lemon yellow) and create a gradational effect as shown in the image.
- The gradation travels from light deep brilliant purple to darker, mixture of purple and dark green and end it with light green.
- Spread the fabric on a big surface and use a broad brush to spread the colours on the fabric.
- Let the fabric dry.
STEP 8 : Paint the cutouts
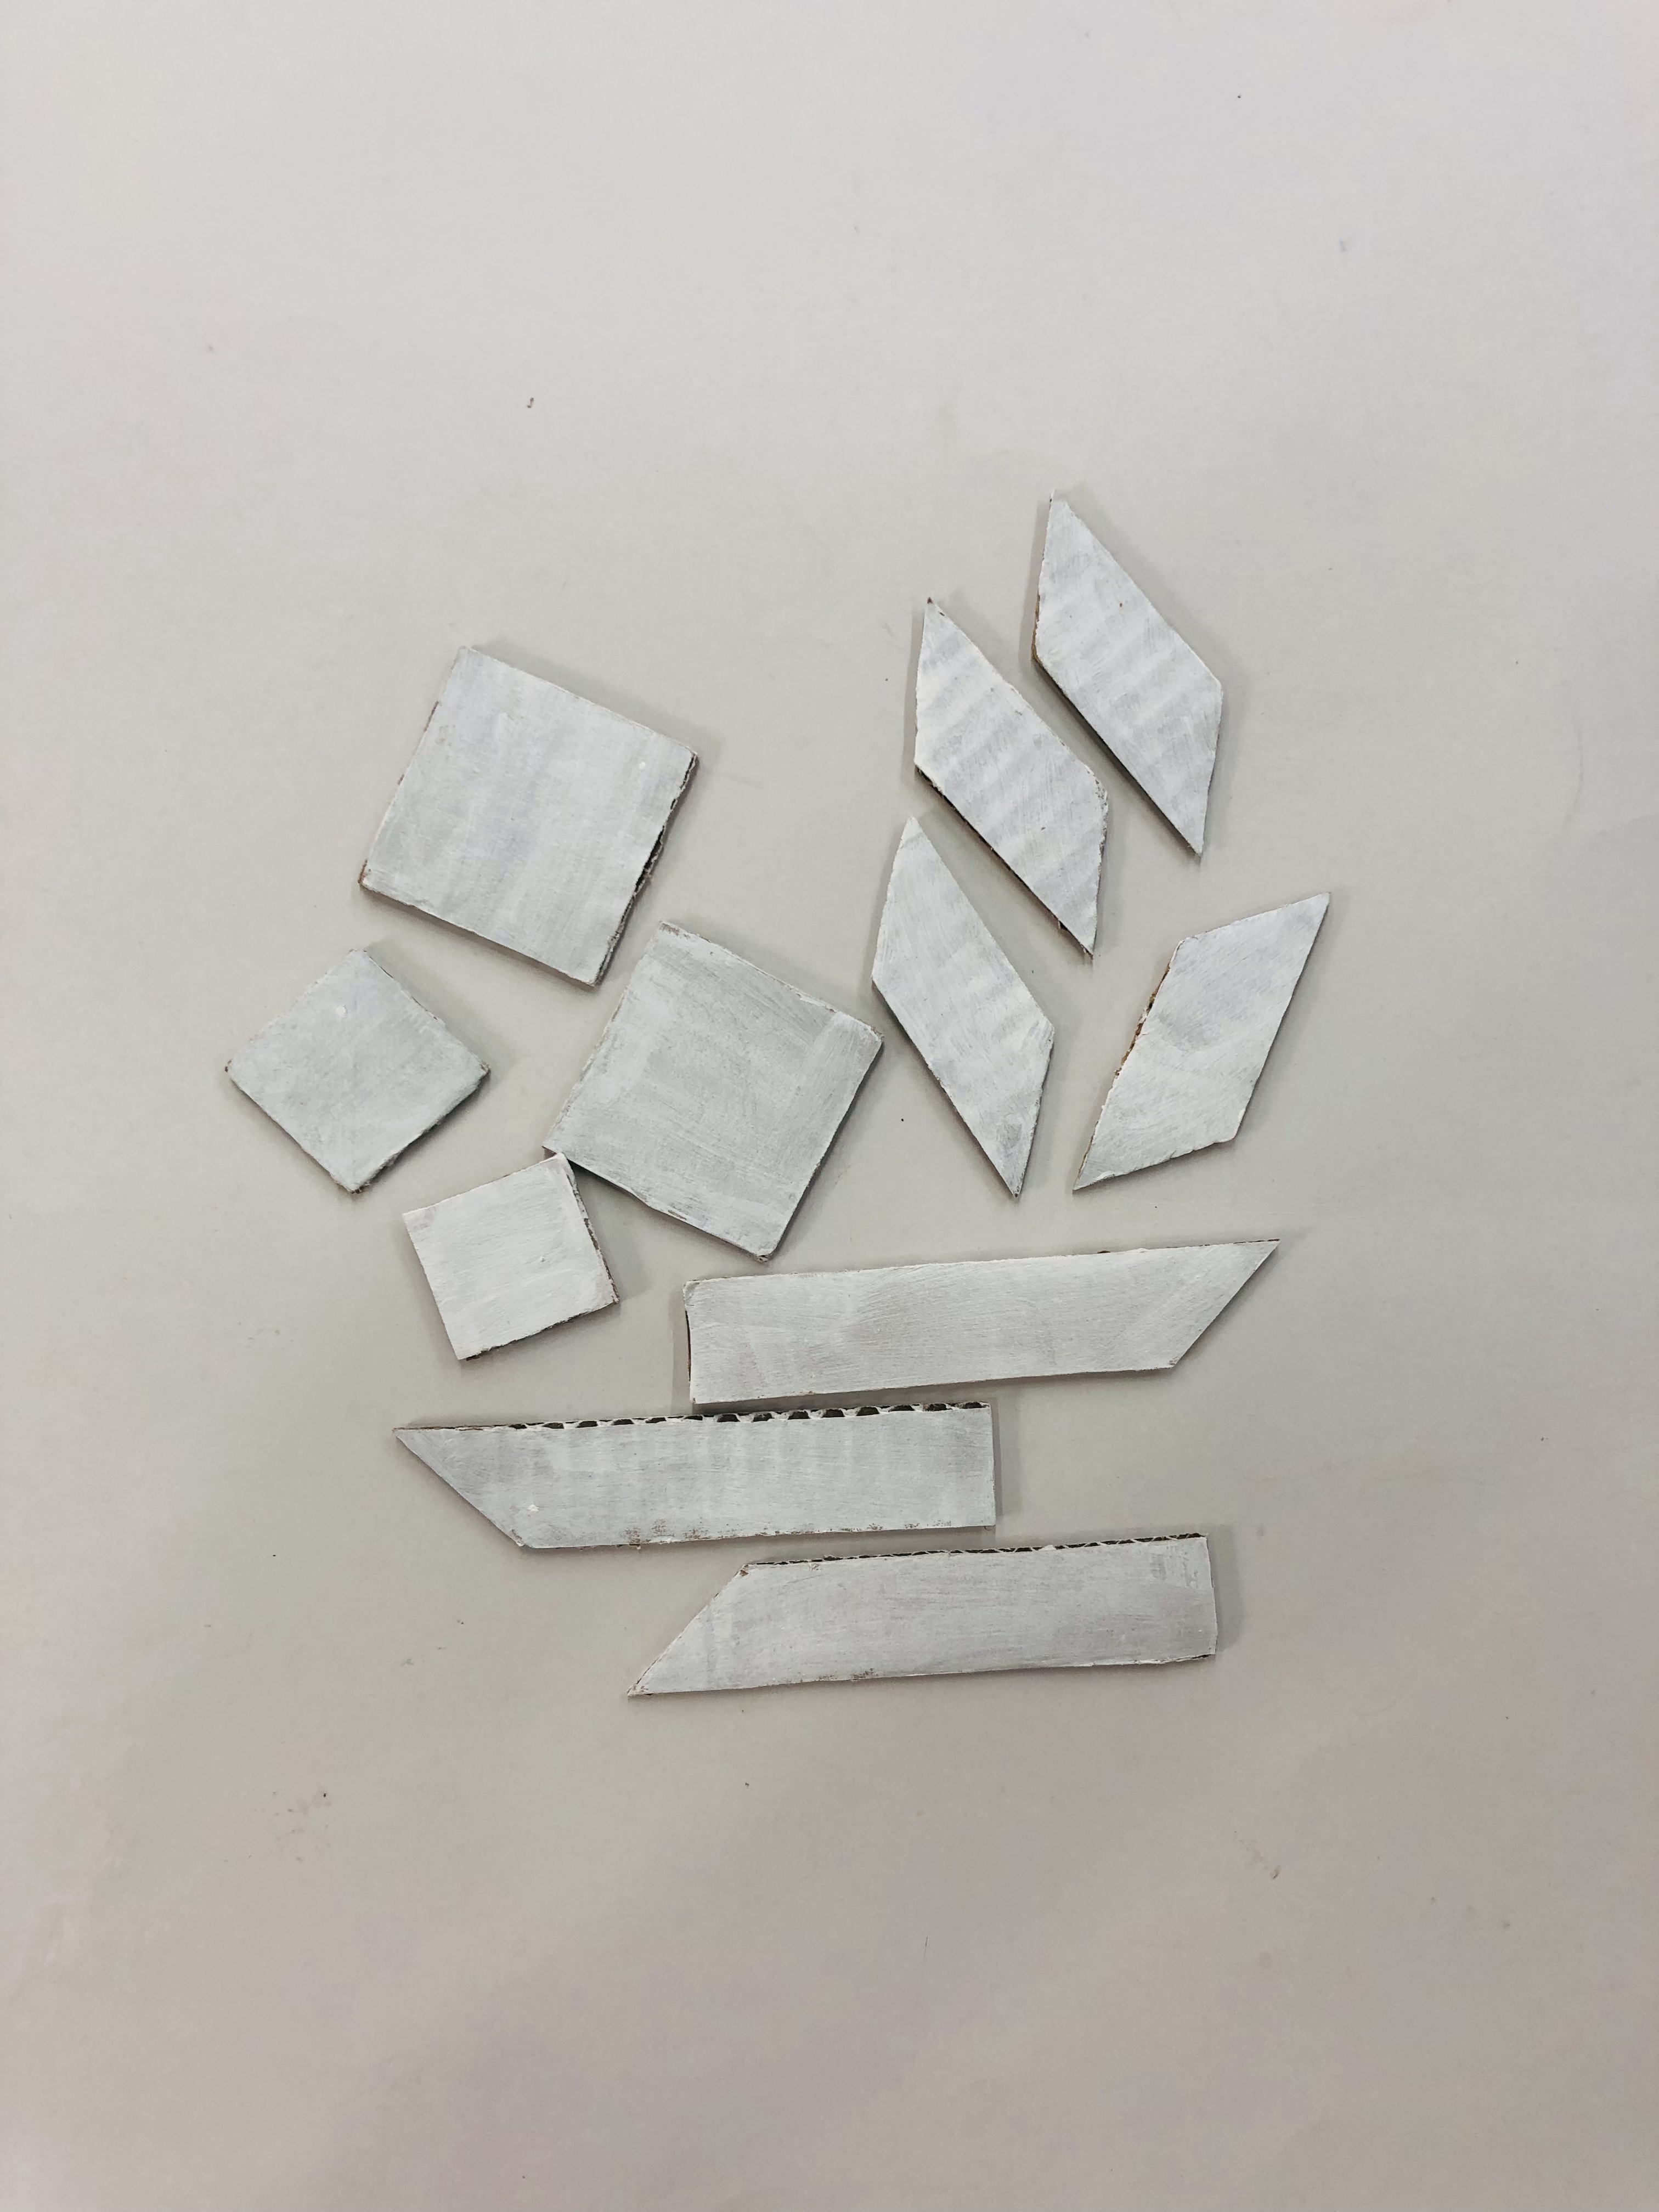
- Paint the cut-out pieces using Fevicryl Acrylic Colour white and brush.
- Let it dry.
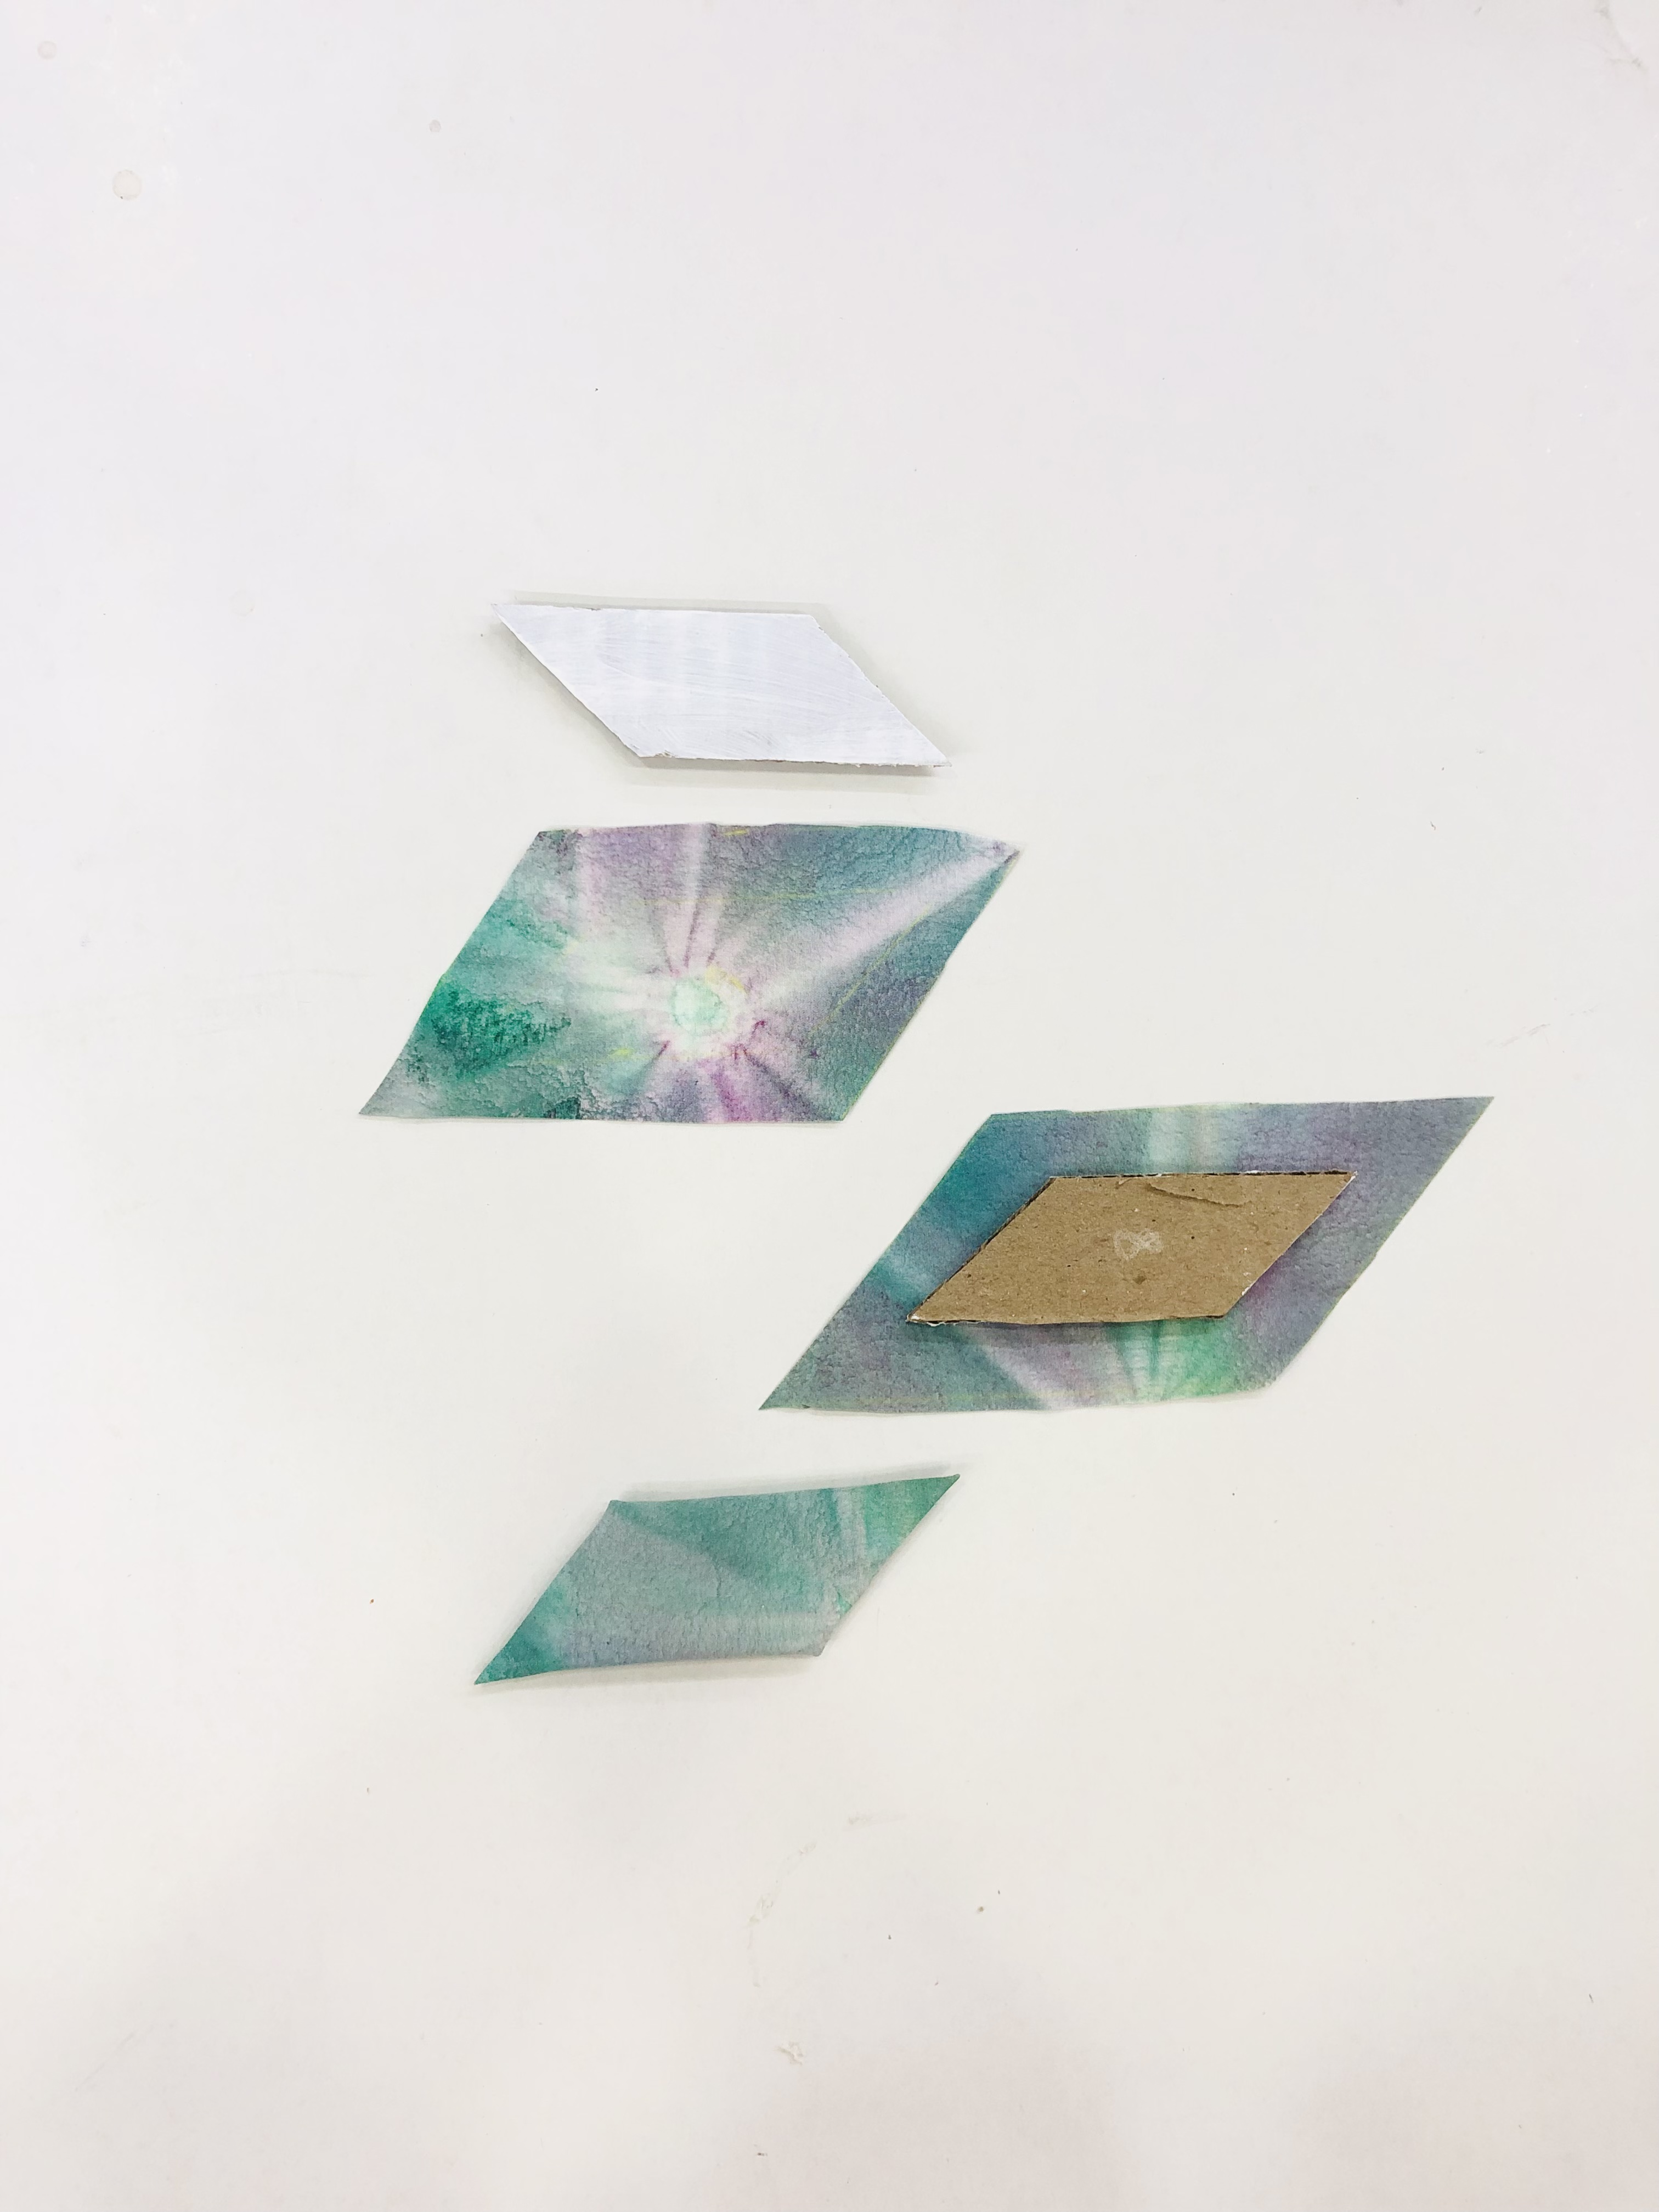
STEP 9 : Placement for wrapping

- Place the pieces on the dyed fabric piece to calculate which piece will have what part of the dyed fabric.
- The bottom part will be placed on the green side and the top part on the purple side.
- Once the pieces are placed, draw around the pieces with 1” space on all sides.
STEP 10 : Cutting and sticking
- Take the pieces one by one and cut the fabrics with 1” on all sides.
- Fold them and stick them on the back using Fevicryl Fabric Glue.
- Let it dry.
STEP 11 : Wrapping the pieces
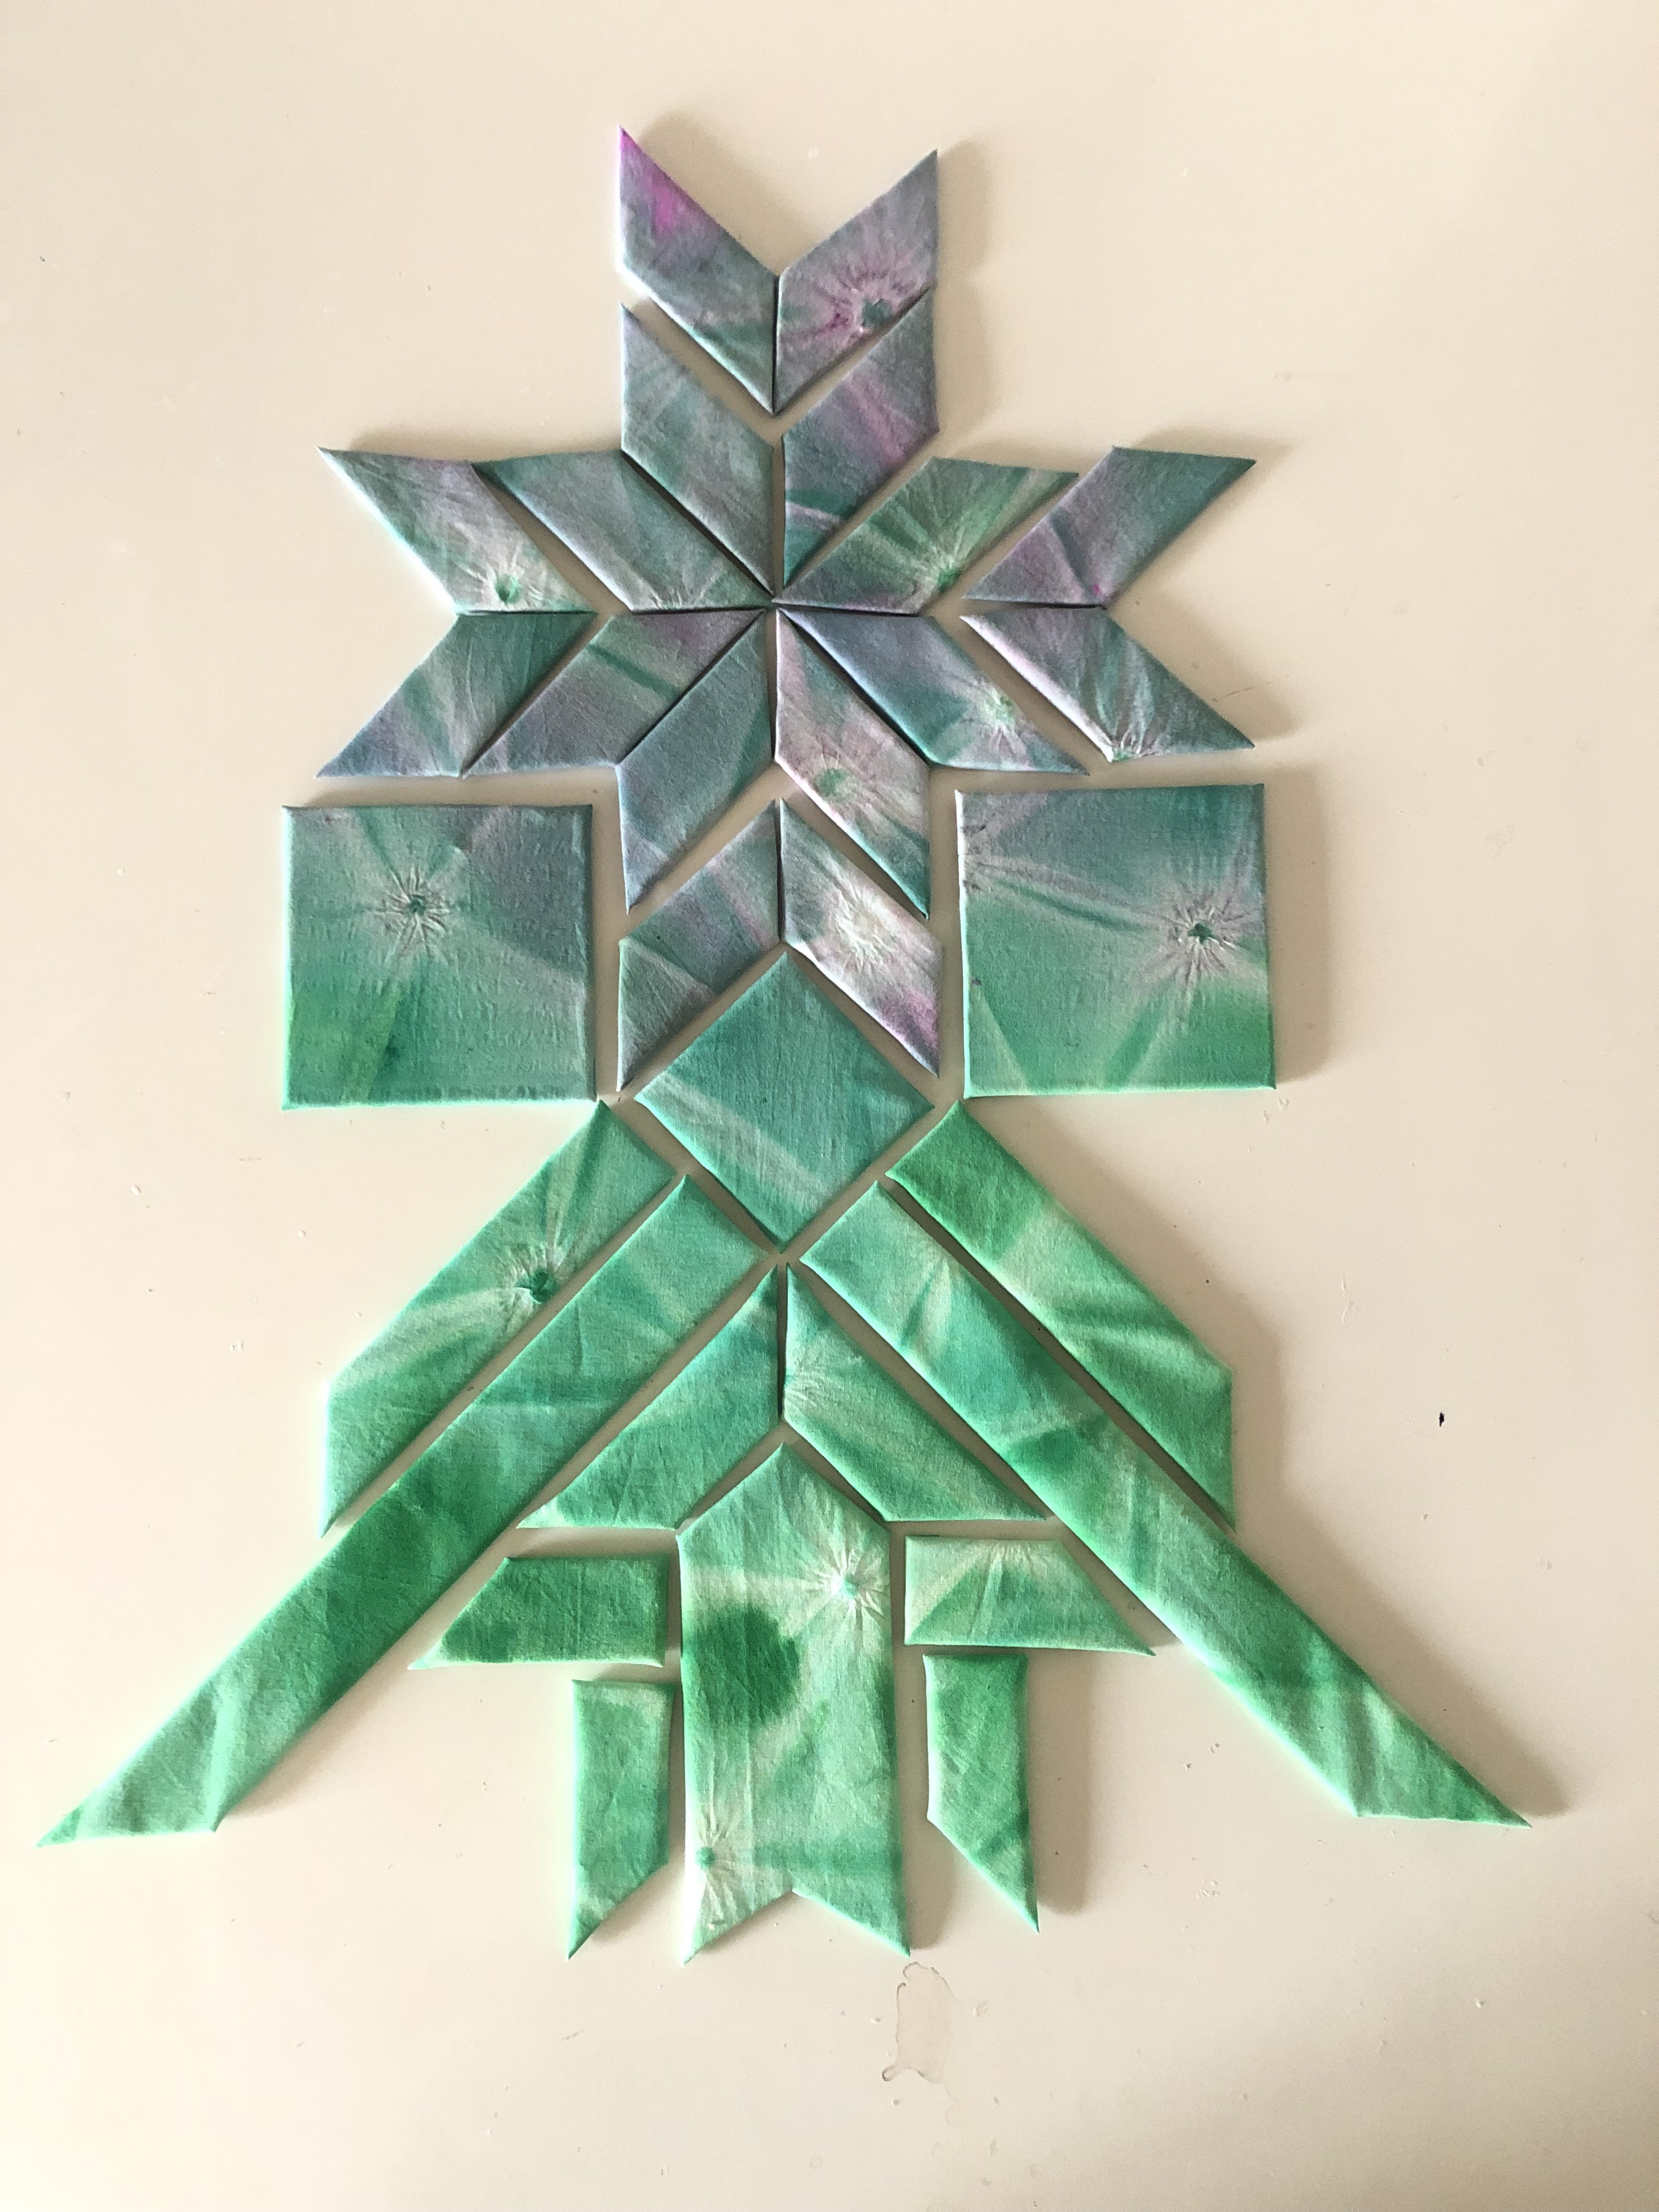
- This is how the pieces will start to look once they are wrapped and start to place them according to the design.
- This is the green part of the design
STEP 12 : Place the painted pieces
- Place the painted pieces on the purple fabric and wrap them using Fevicryl Fabric Glue
- Let it dry.
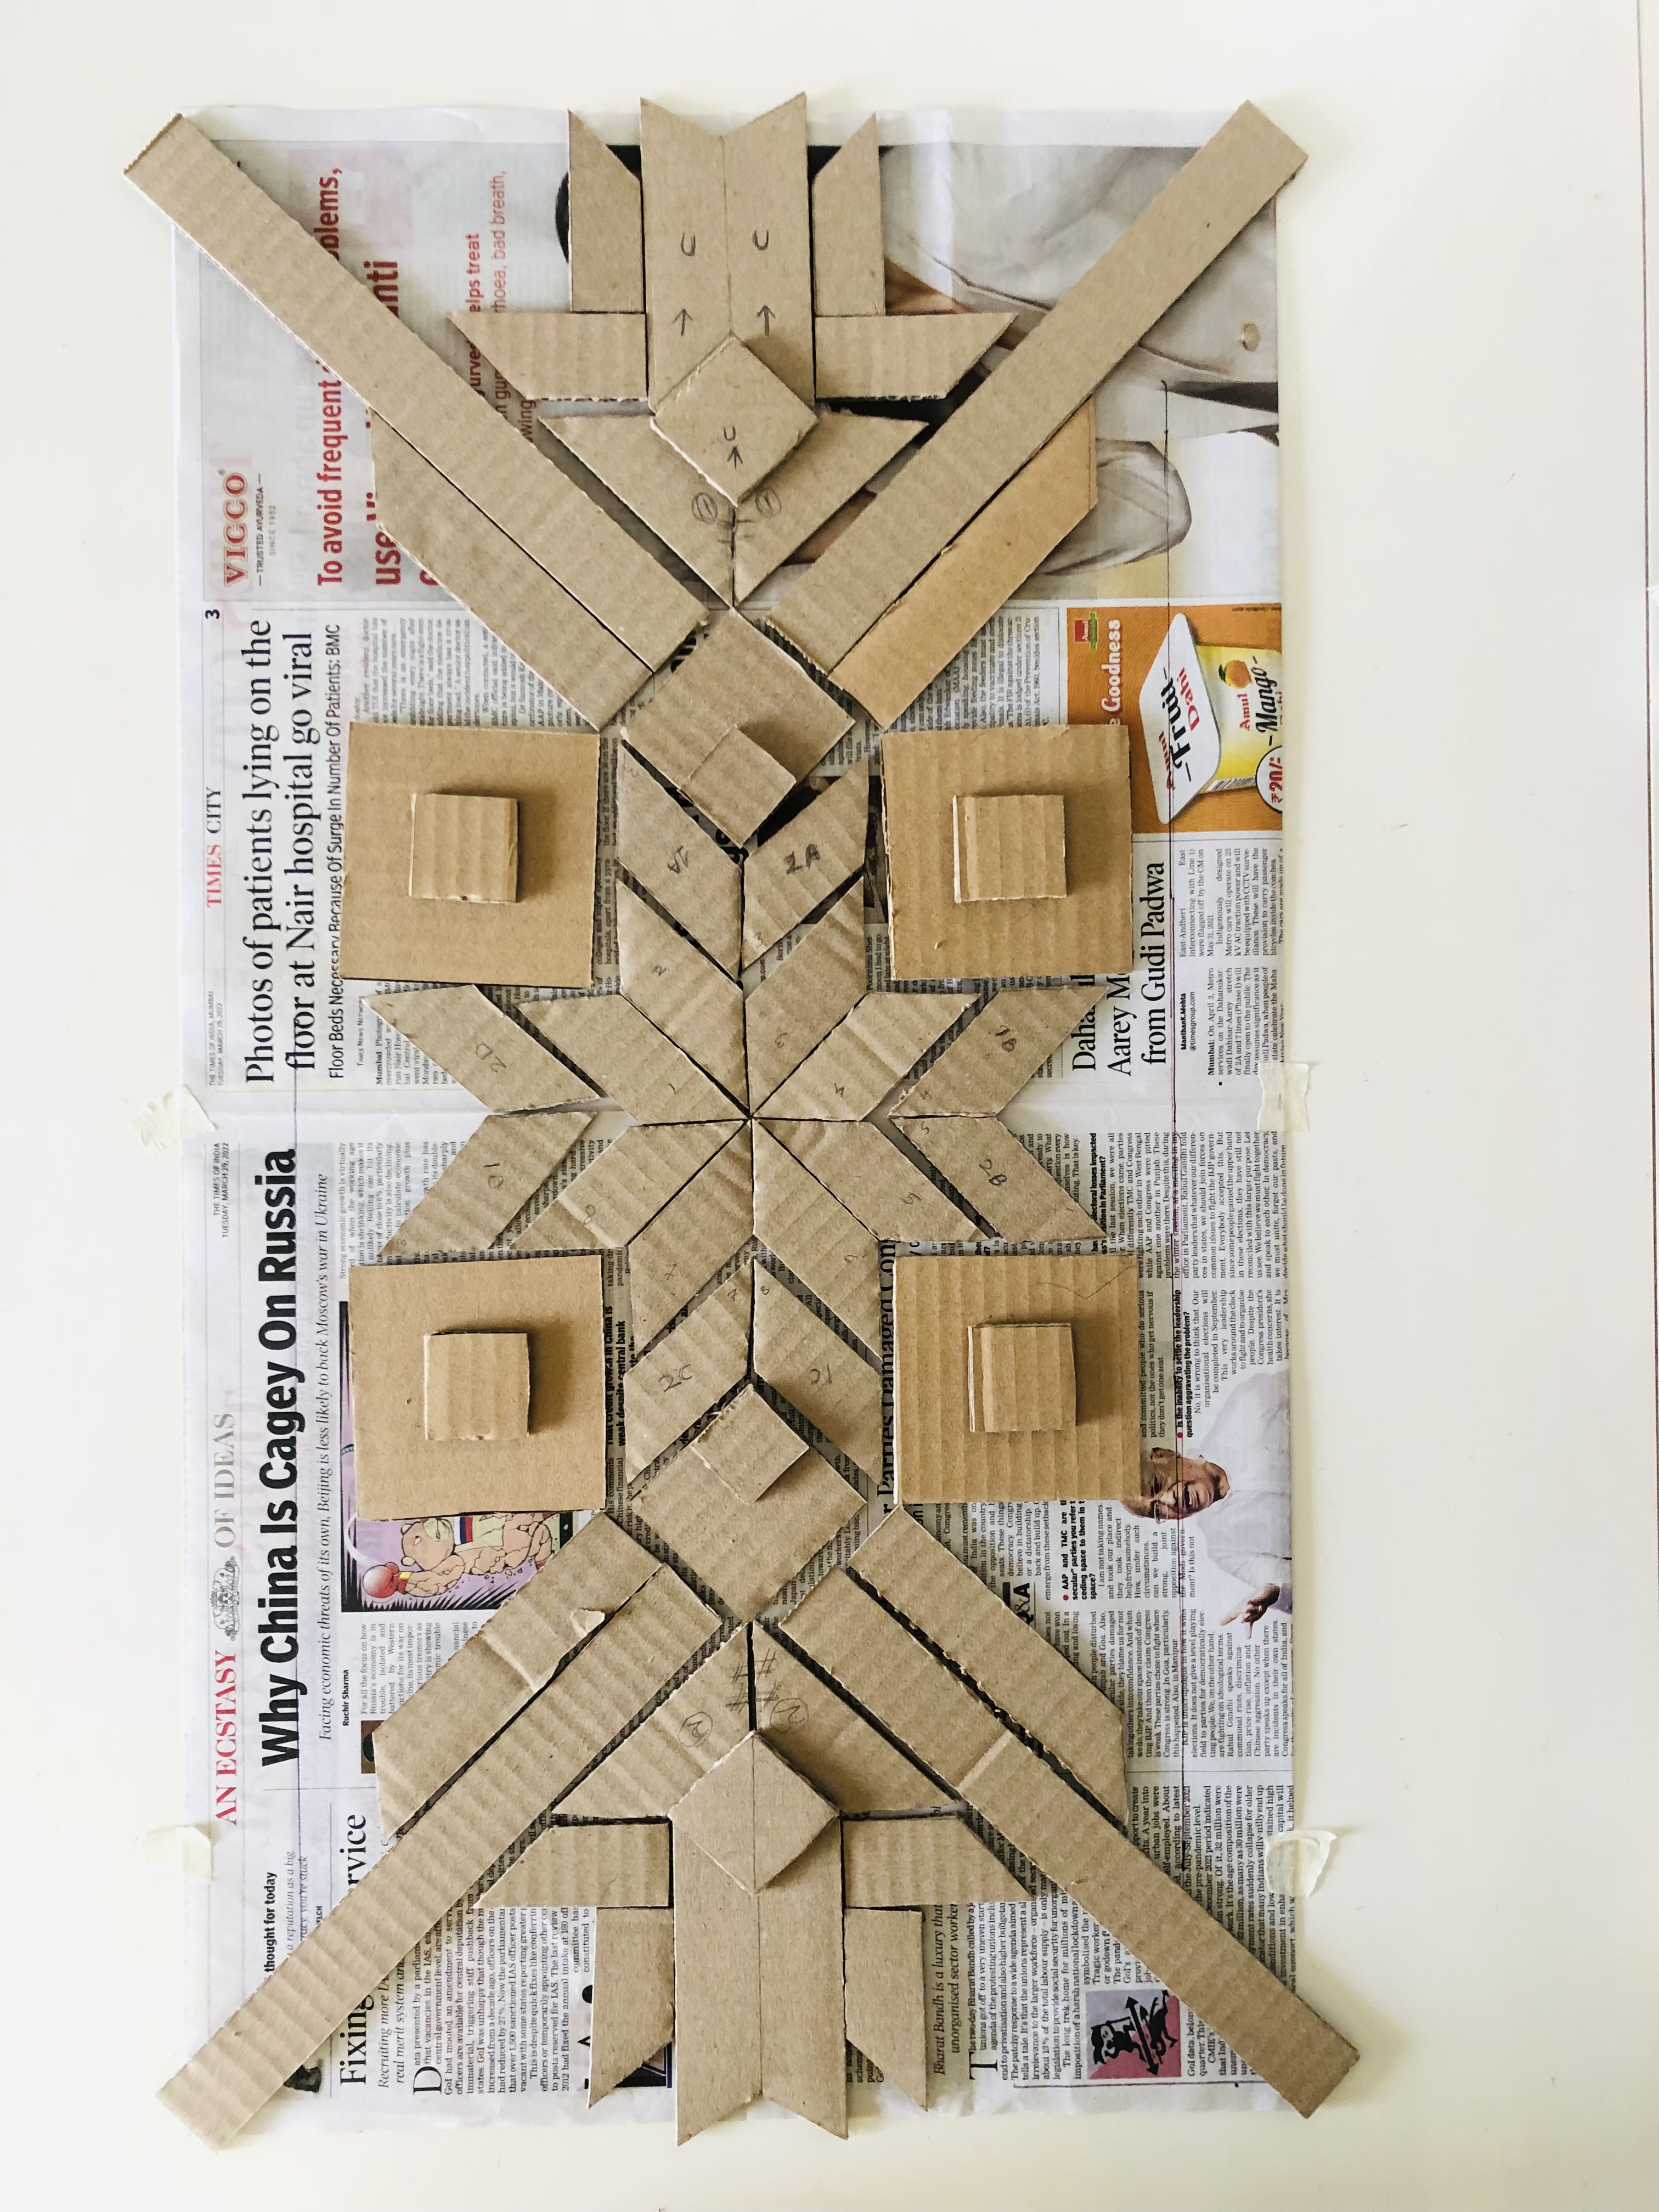
STEP 13 : Placement of all the pieces
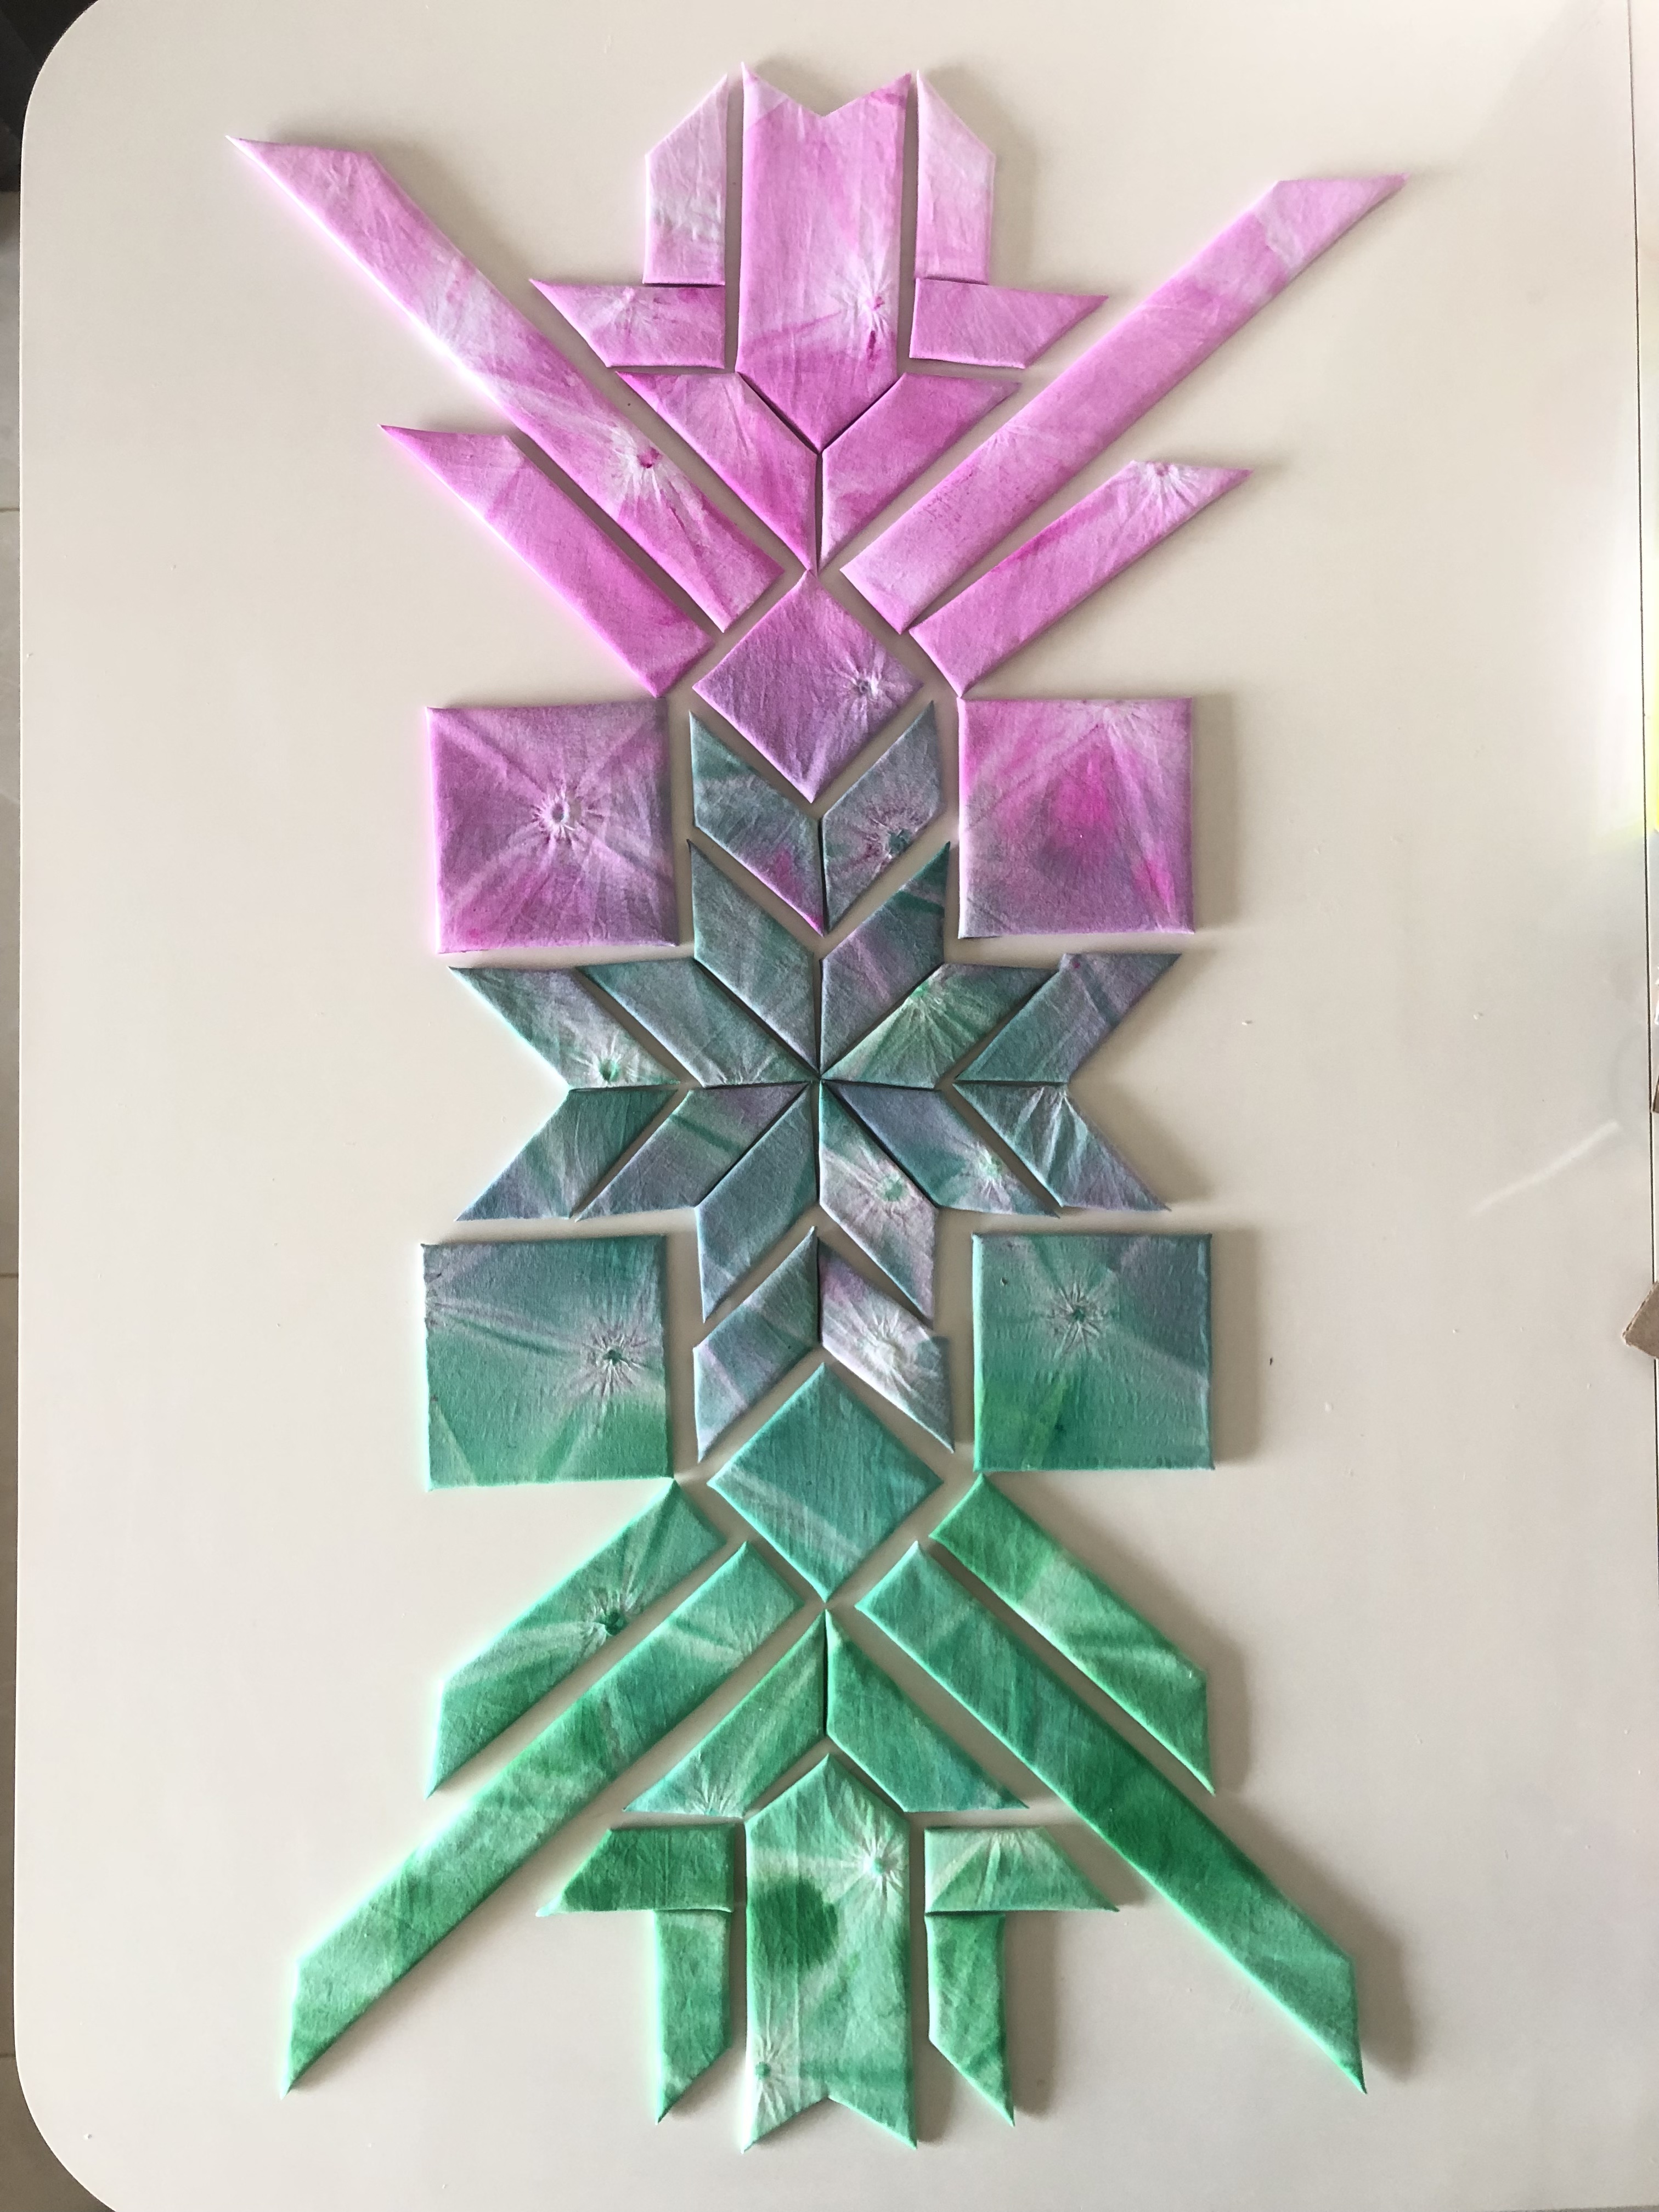
- Take all the pieces and place them together to see the flow of the colours , if they are seamless and there is no jump in the colour flow.
STEP 14 : Top layer
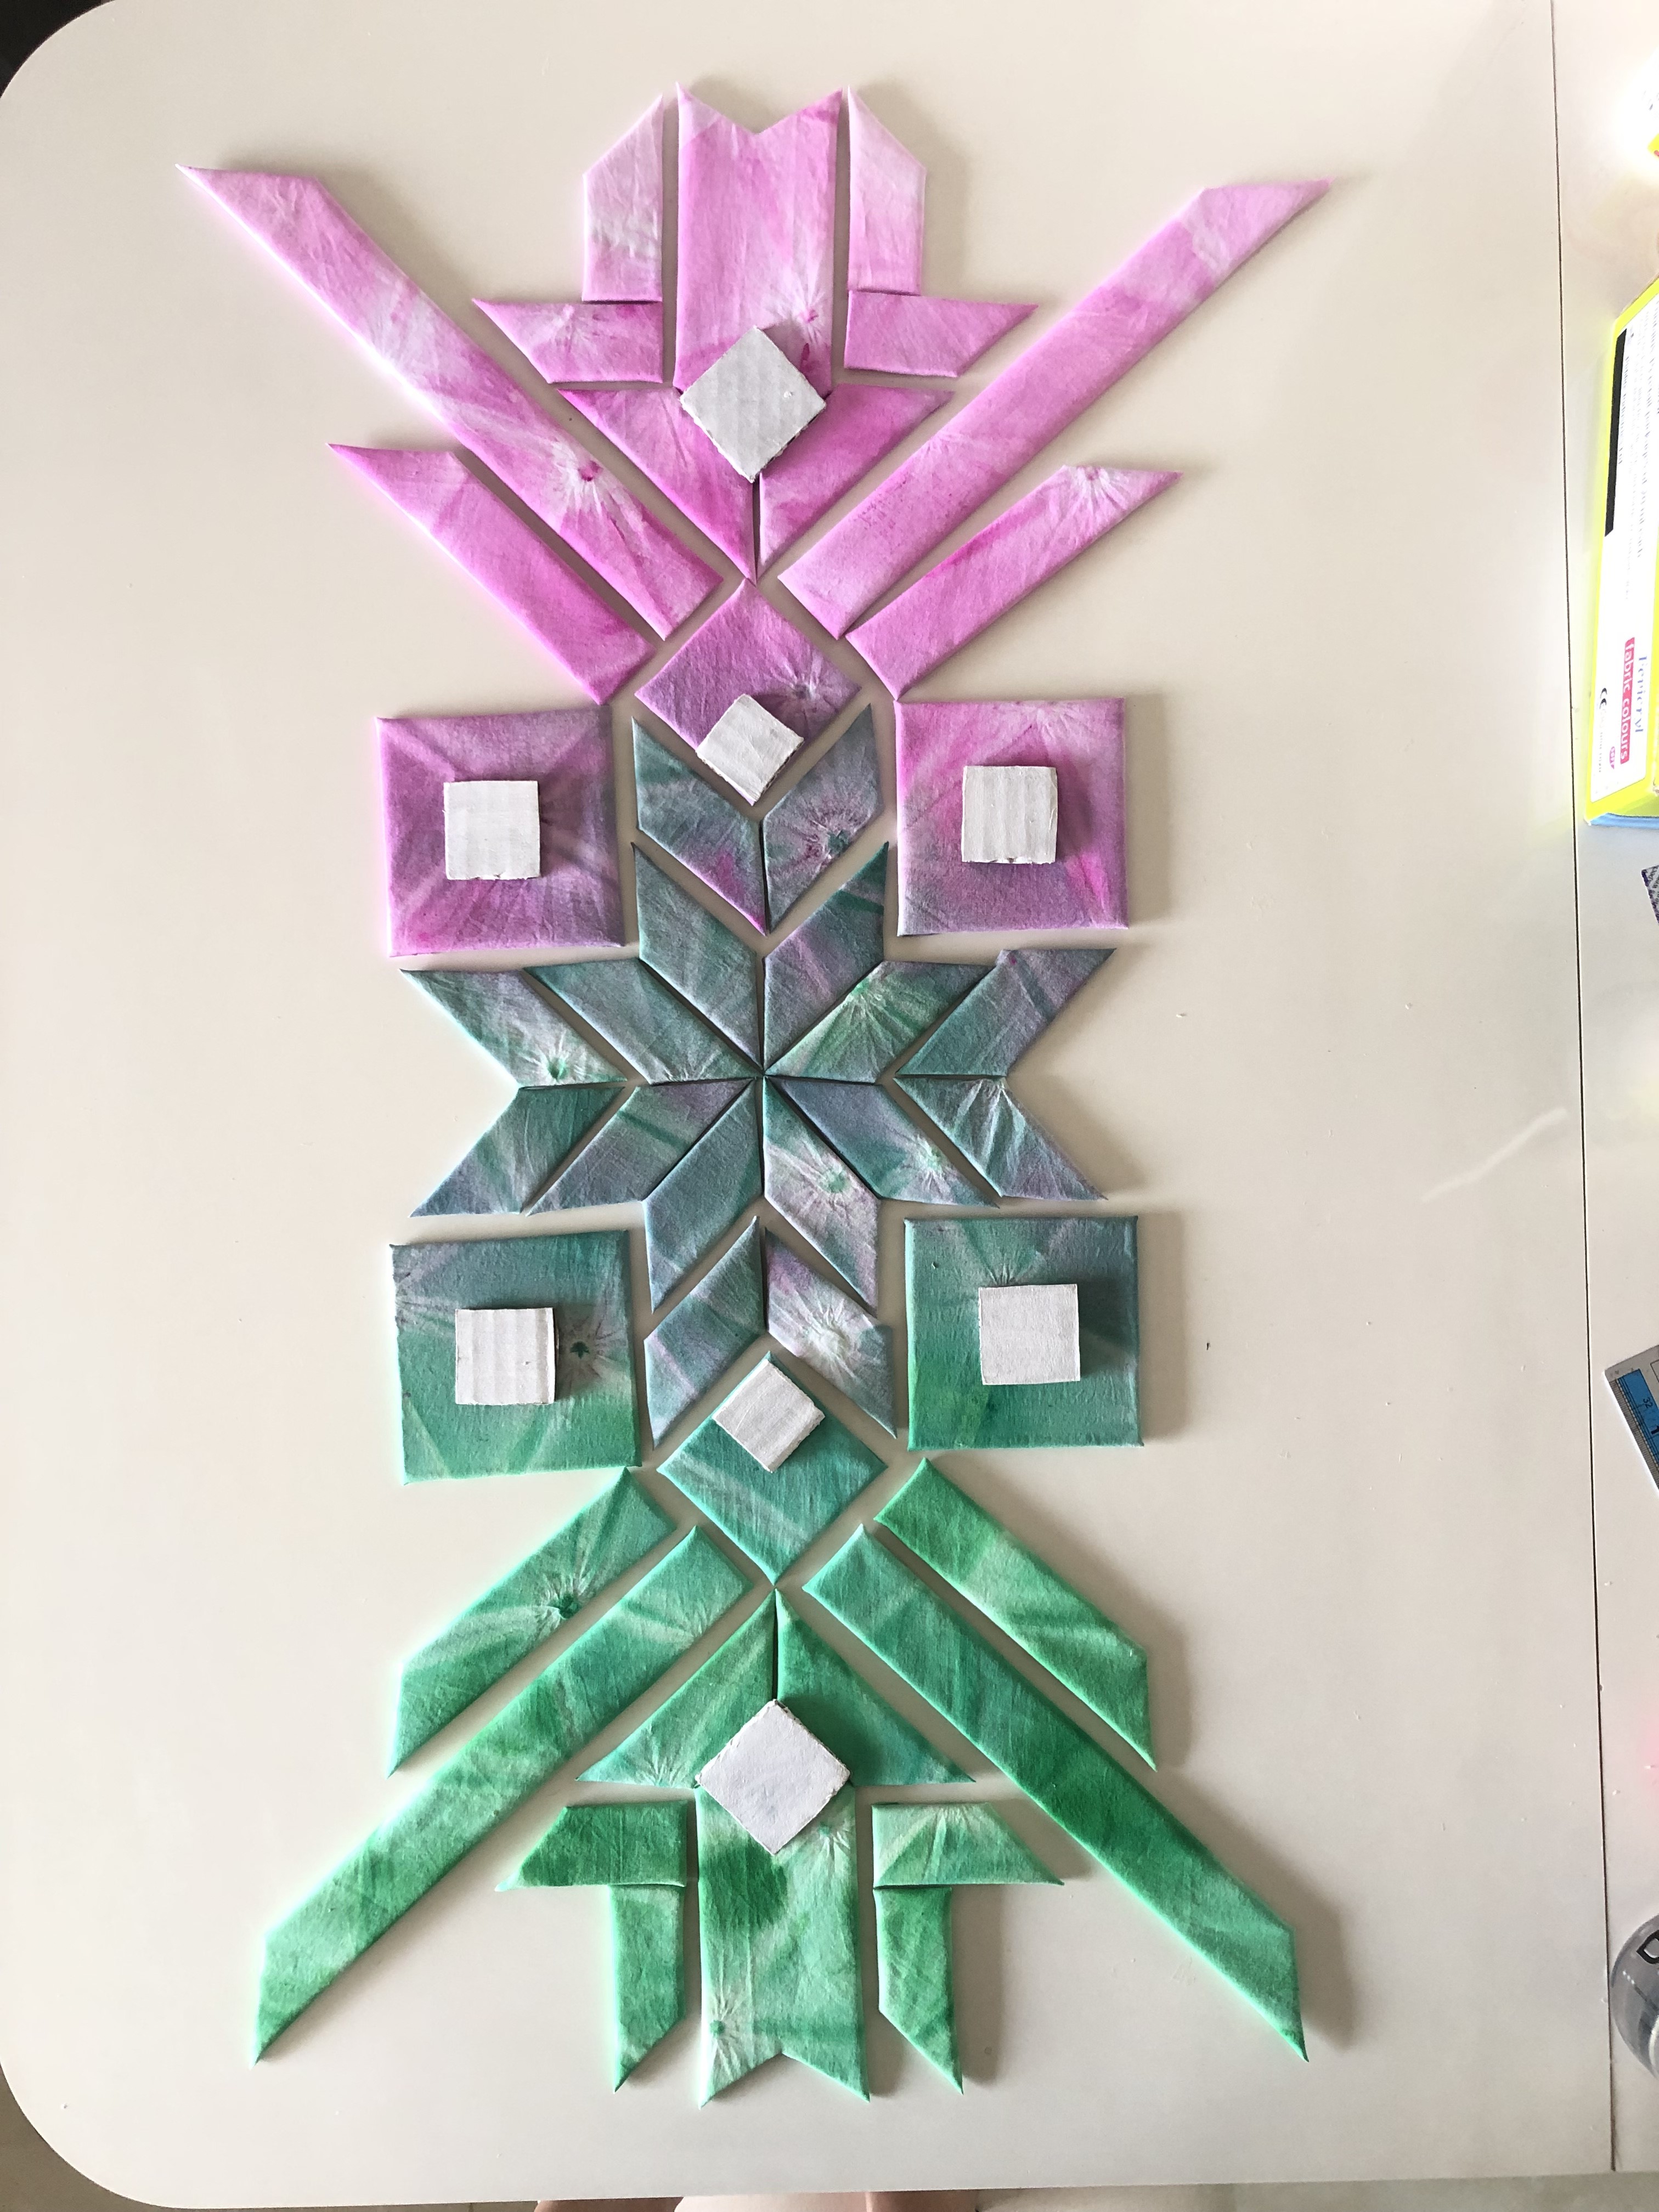
- Place small pieces on top of the bottom layer as shown in the image.
- Paint them white as well
- Let it dry
STEP 15 : Wrapping pieces
- Wrap the smaller pieces with the tie dye fabric and place them on the base design formation as shown in the image.
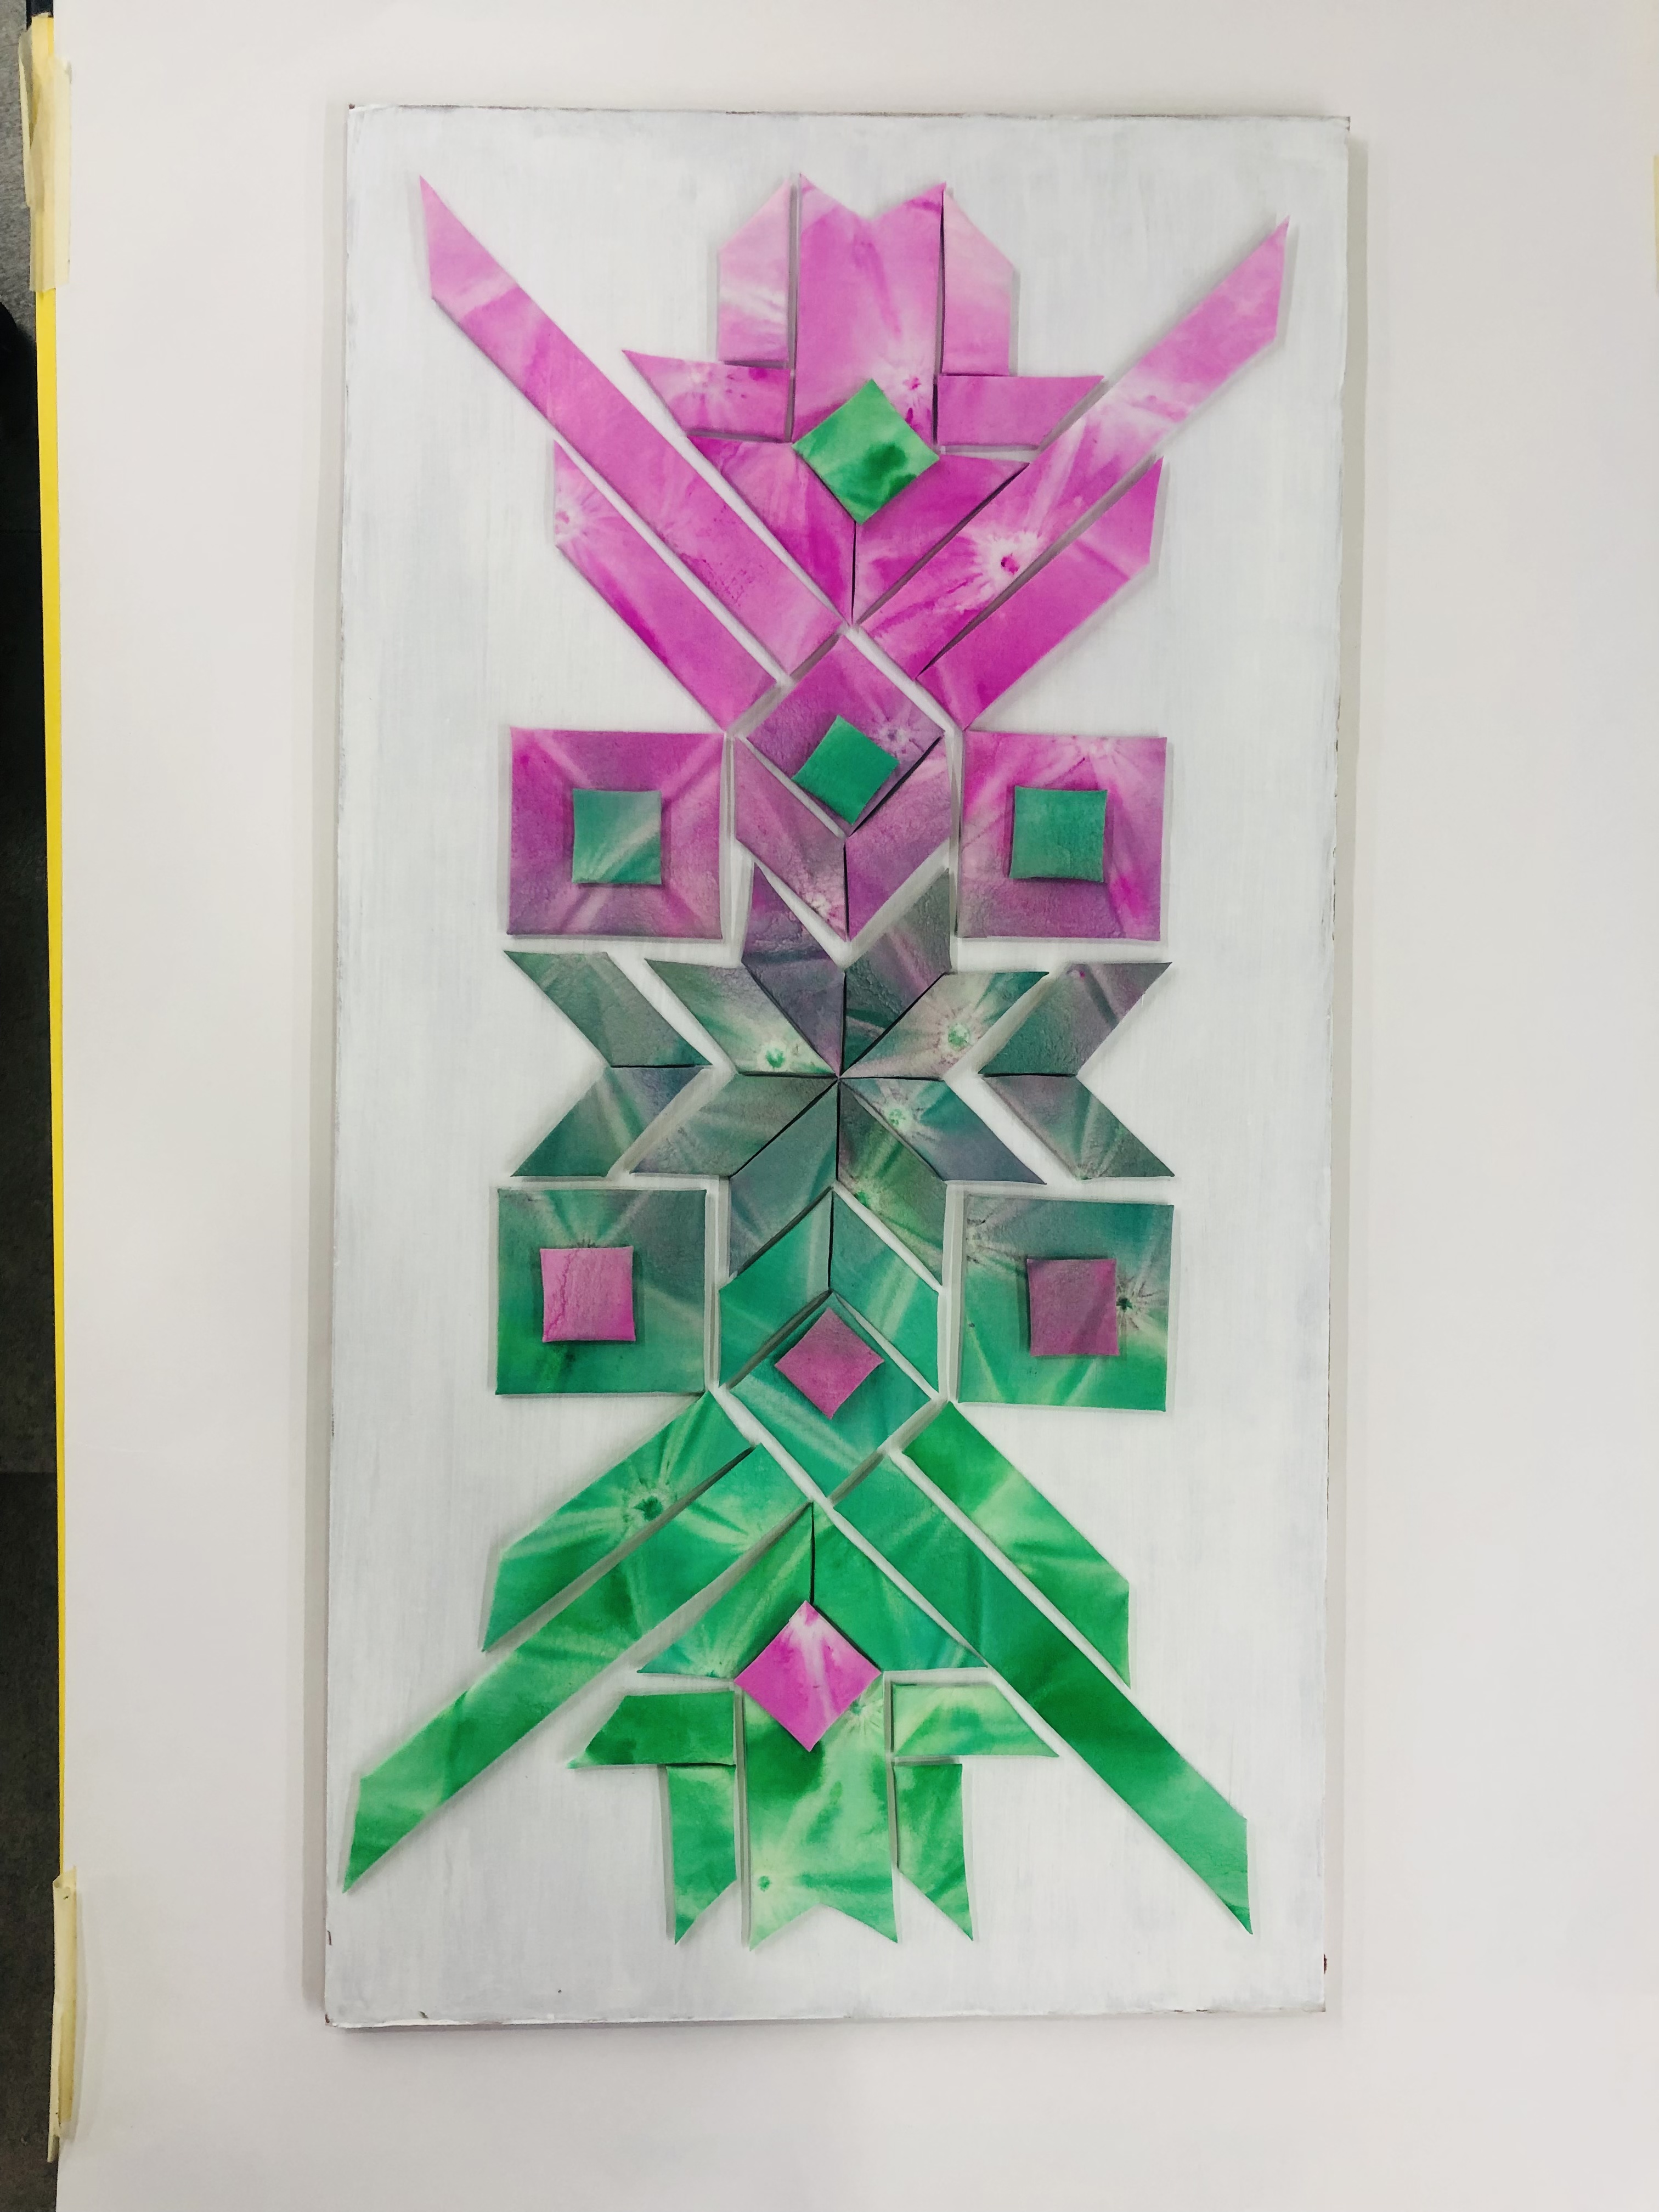
STEP 16 : Take the base
- Take a thick corrugated sheet measuring 30” x 15”
STEP 17 : Surface texture

- Paint the thick corrugated sheet using Fevicryl Acrylic Colour White.
- Let it dry.
- Using Fevicryl Acrylic Sparkling Gold Dust, Fevicryl Acrylic White, Fevicryl Glass colors (Black, White) and brush, create a white marble like texture on the white surface.
- Let it dry
STEP 18 : Gold foil application
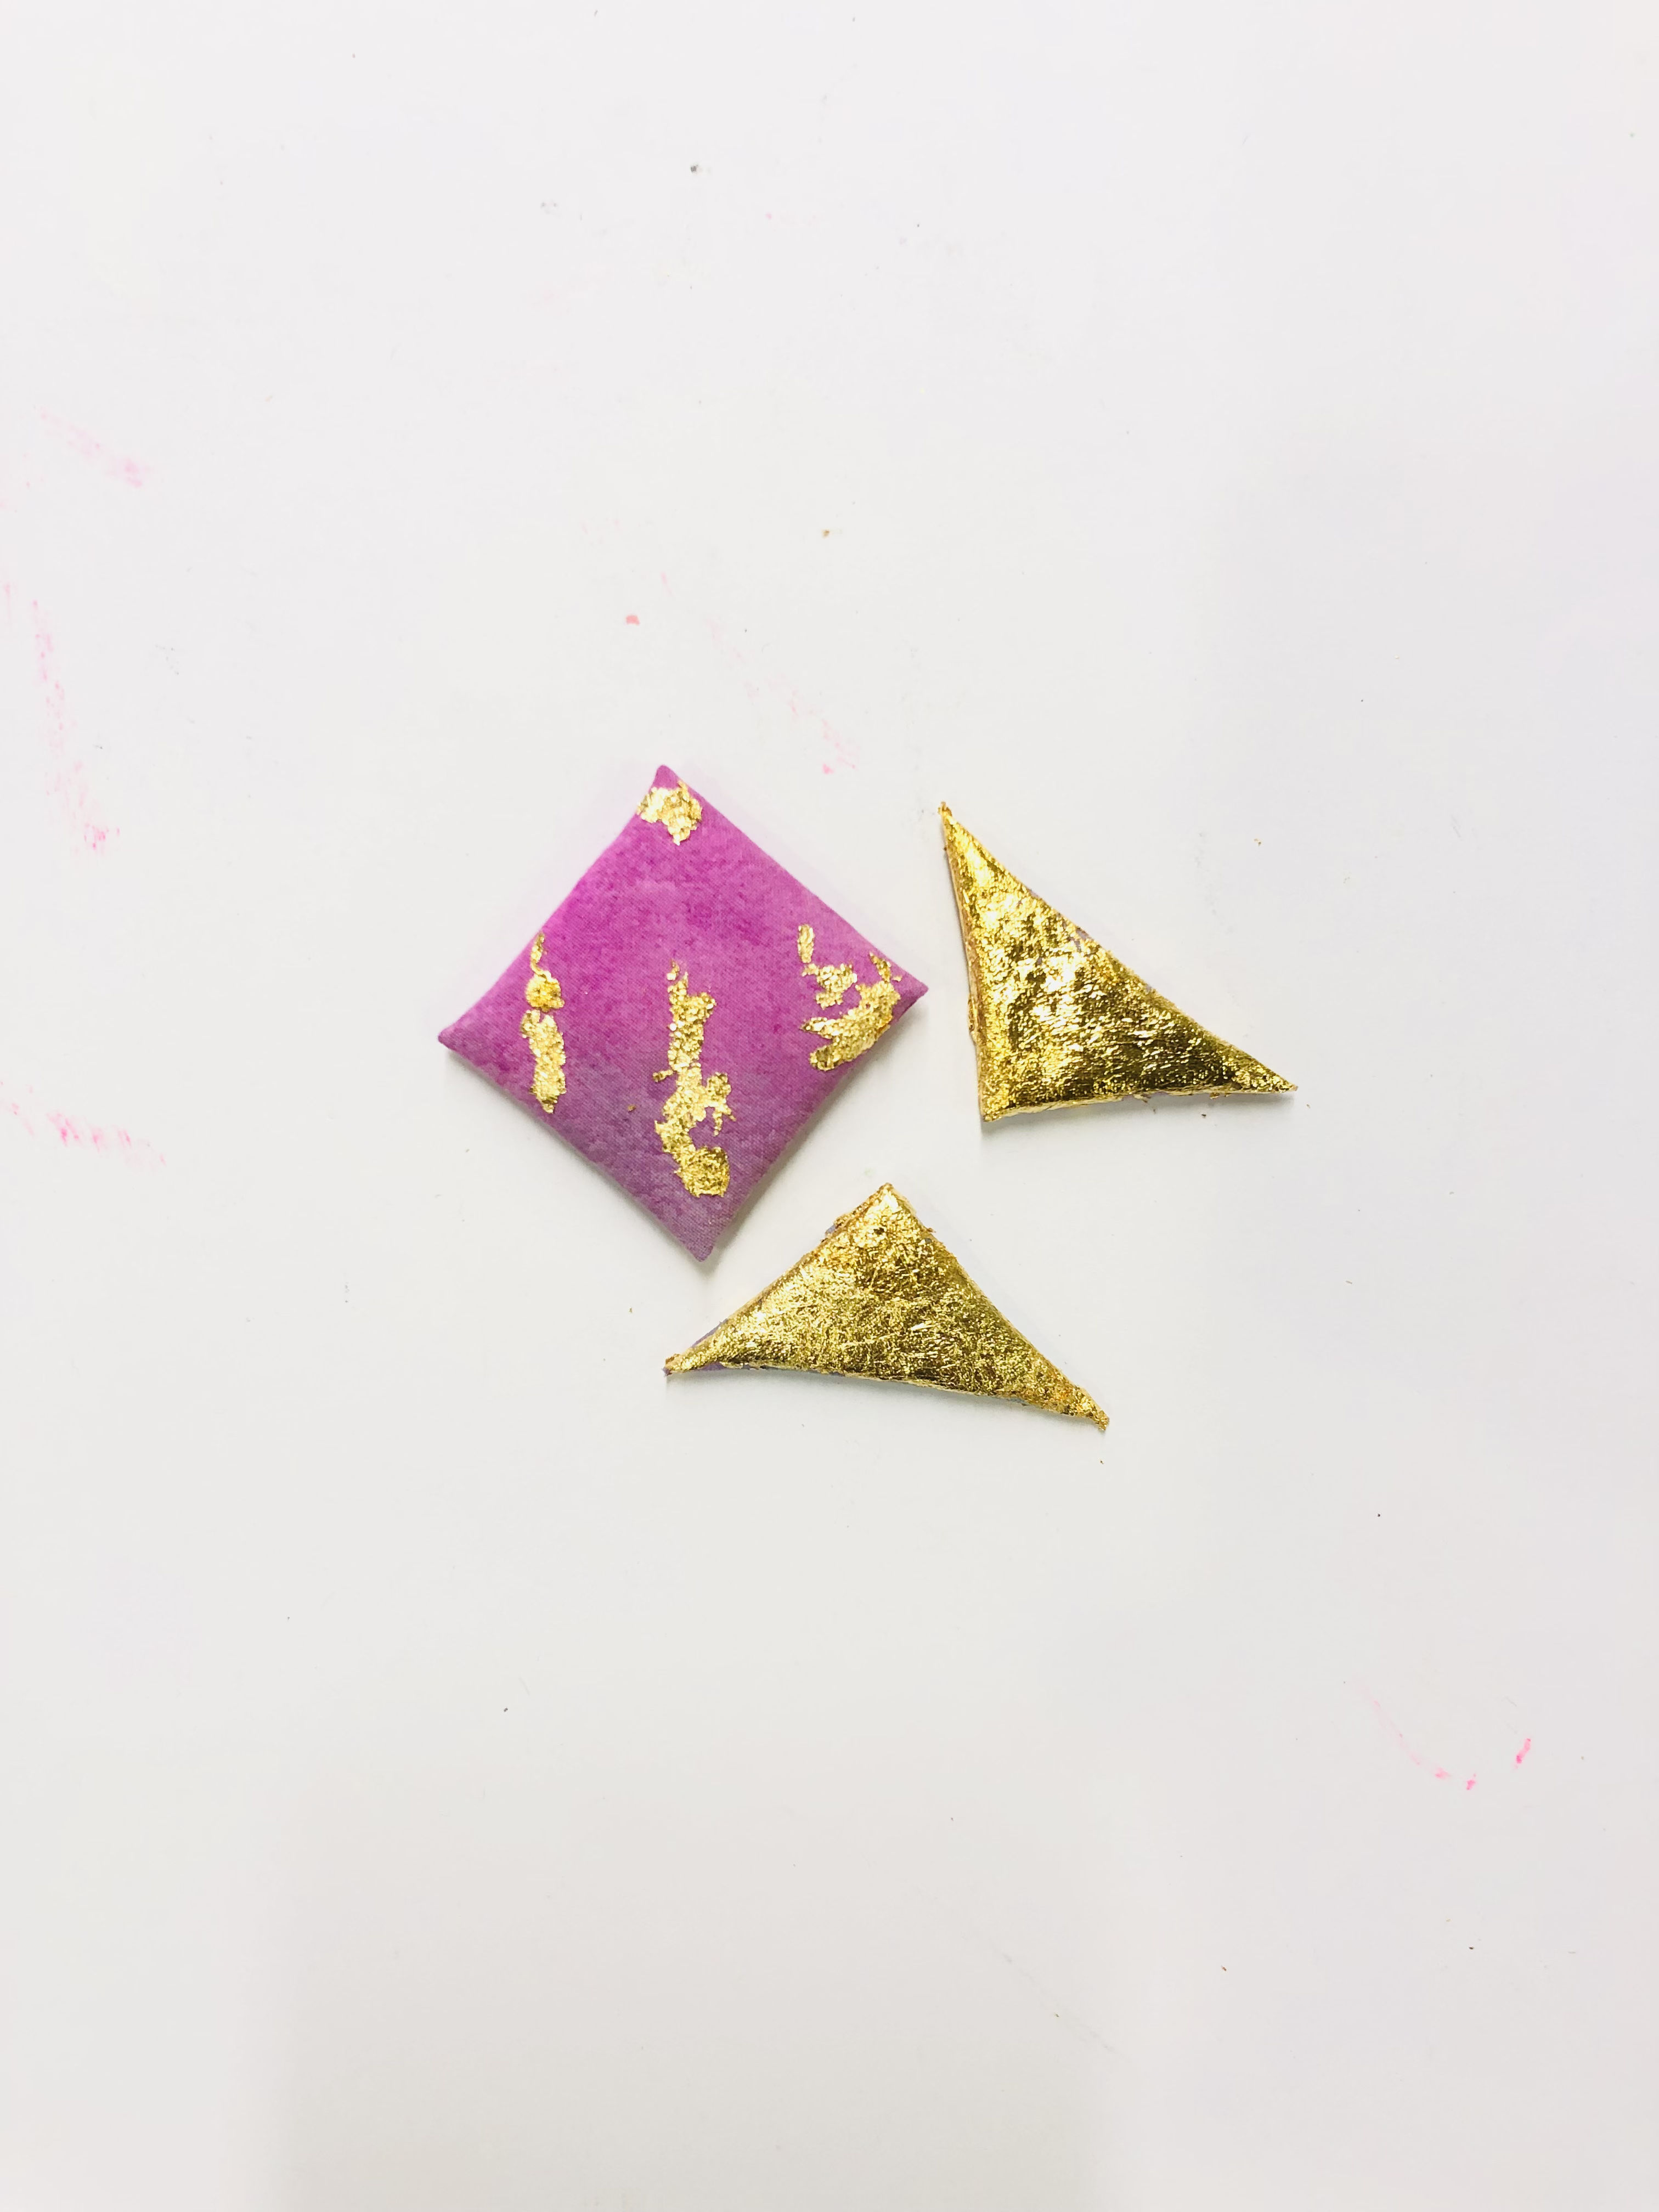
- Take the small pieces that we have placed on the base design
- Apply Fevicryl Fabric Glue randomly on the piece and stick gold foil on it.
- Once the foil is stuck, brush off the excess foil.
- Apply gold foil completely on the center pieces by applying fabric glue all over the pieces.
STEP 19 : Sticking
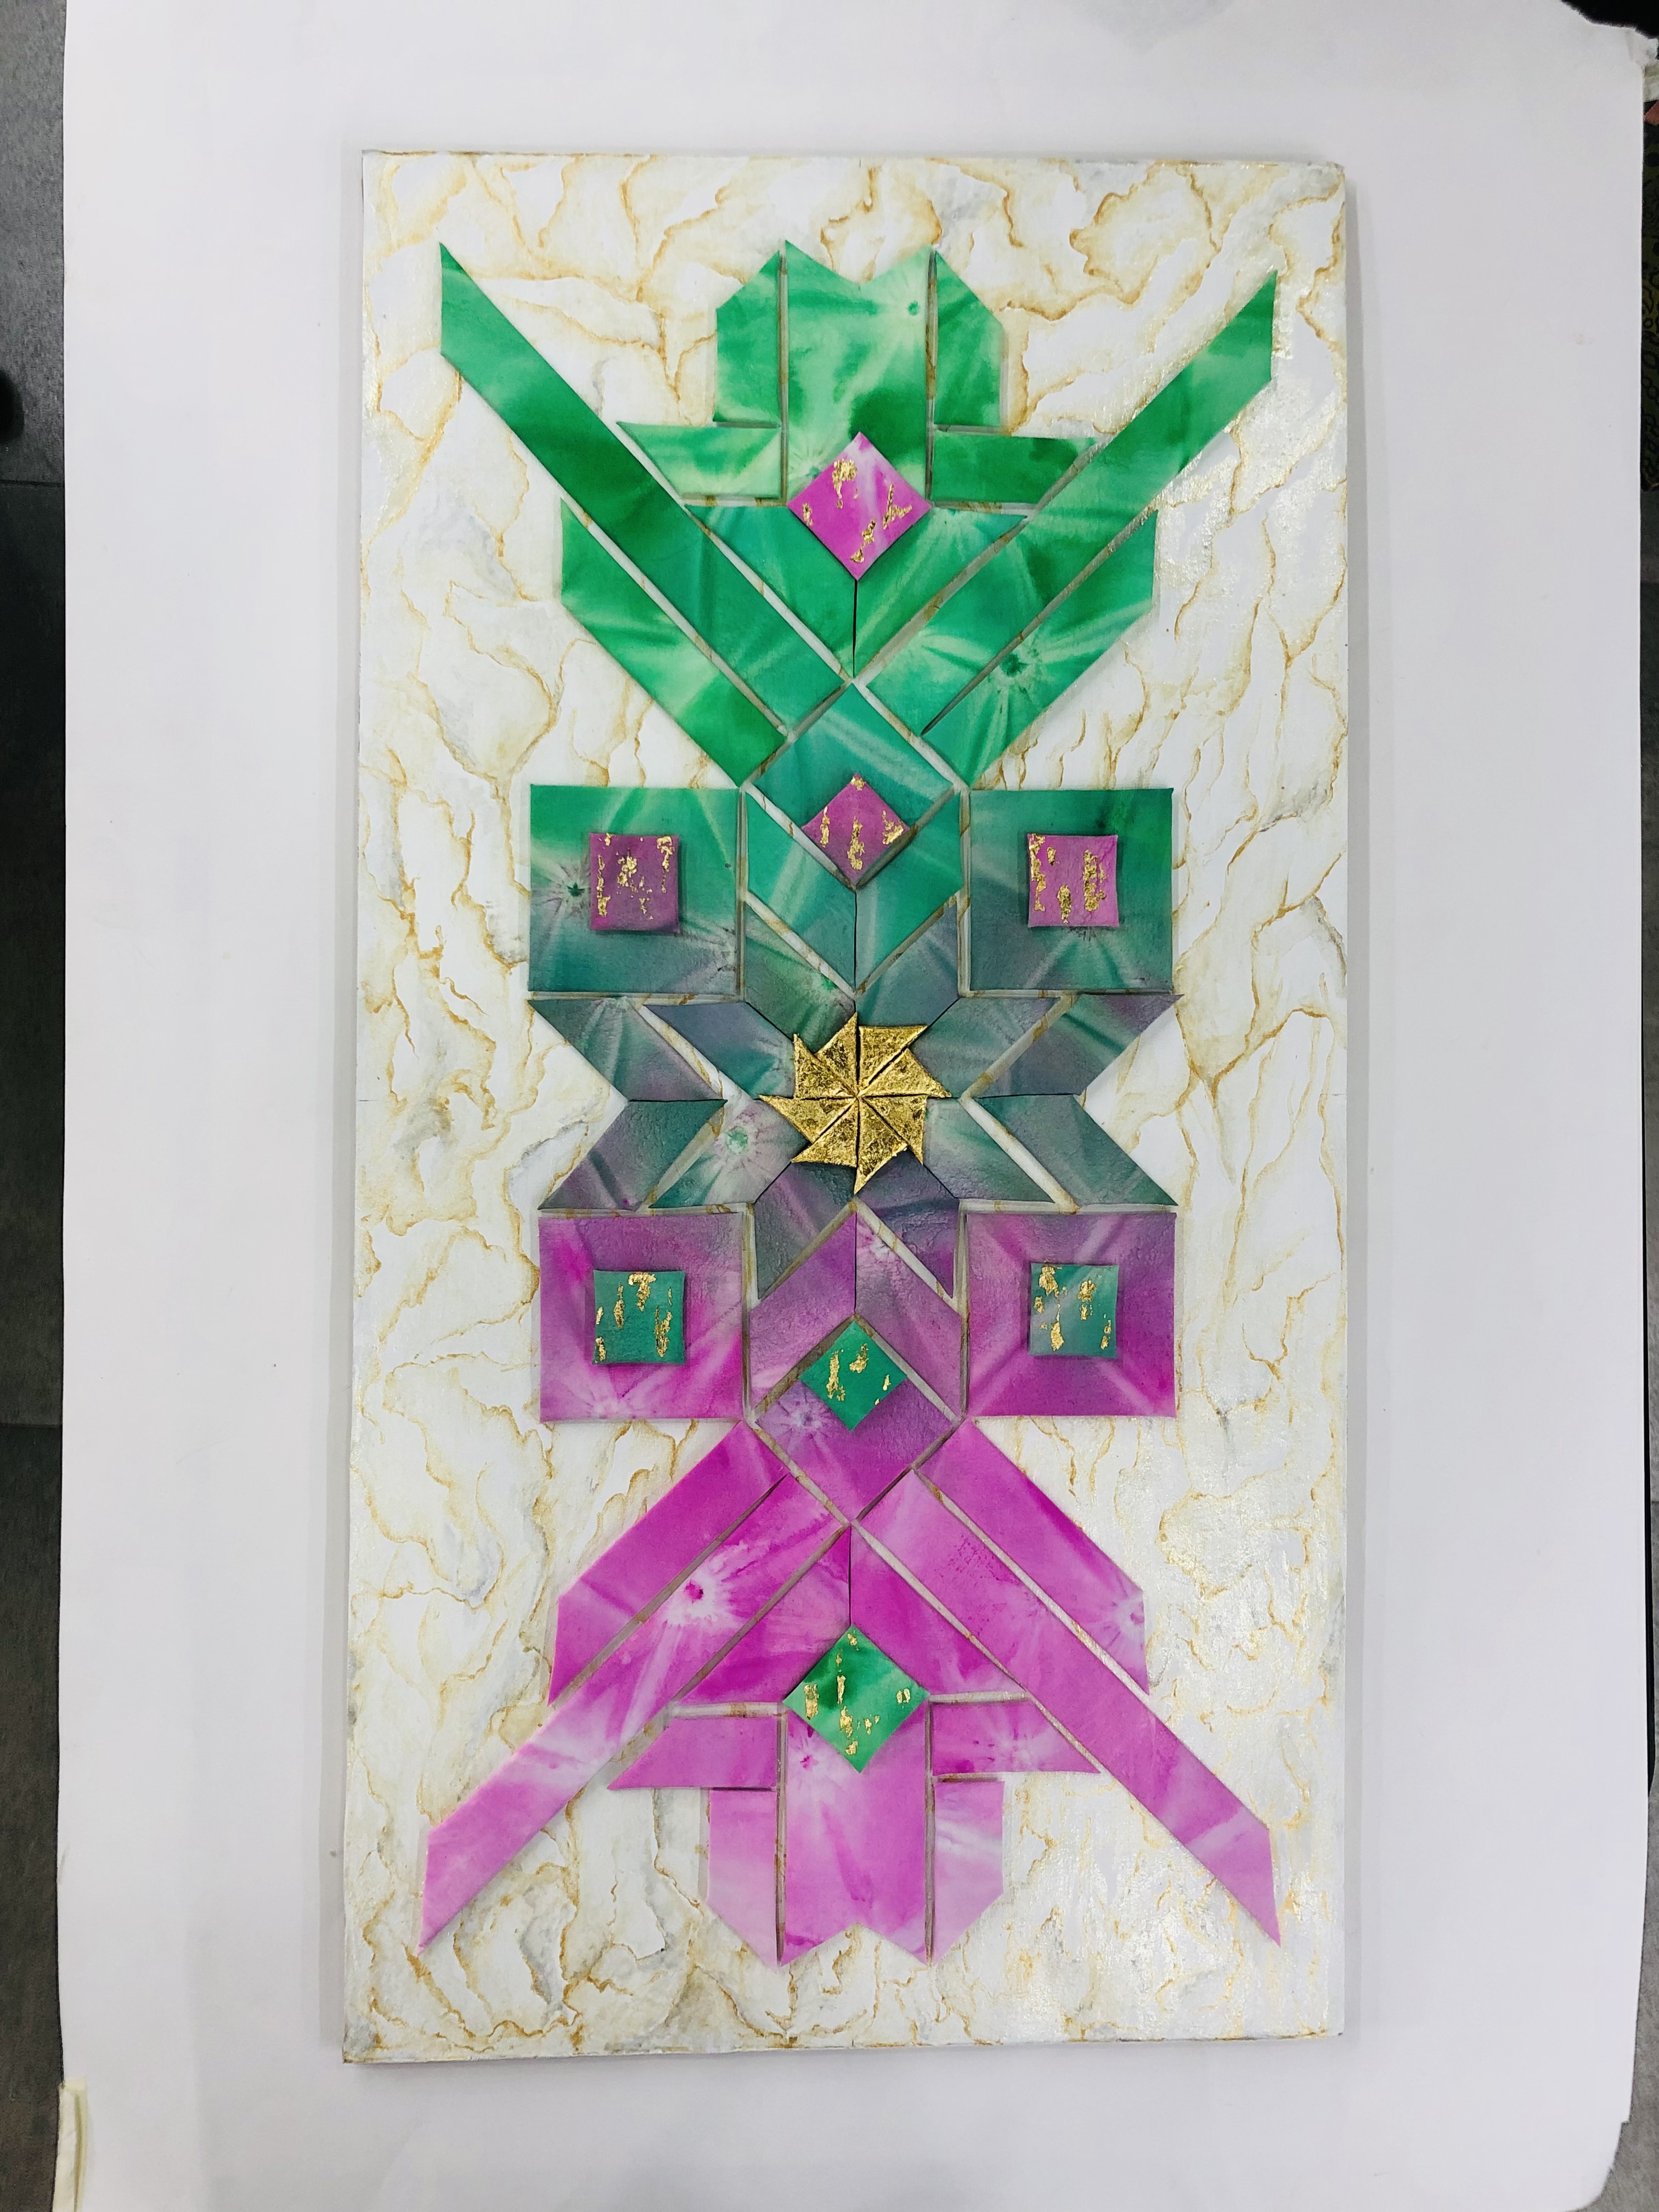
- Stick all the pieces on the base board as shown.
- Use Fevicryl Fabric Glue to stick them
- Let it all dry.
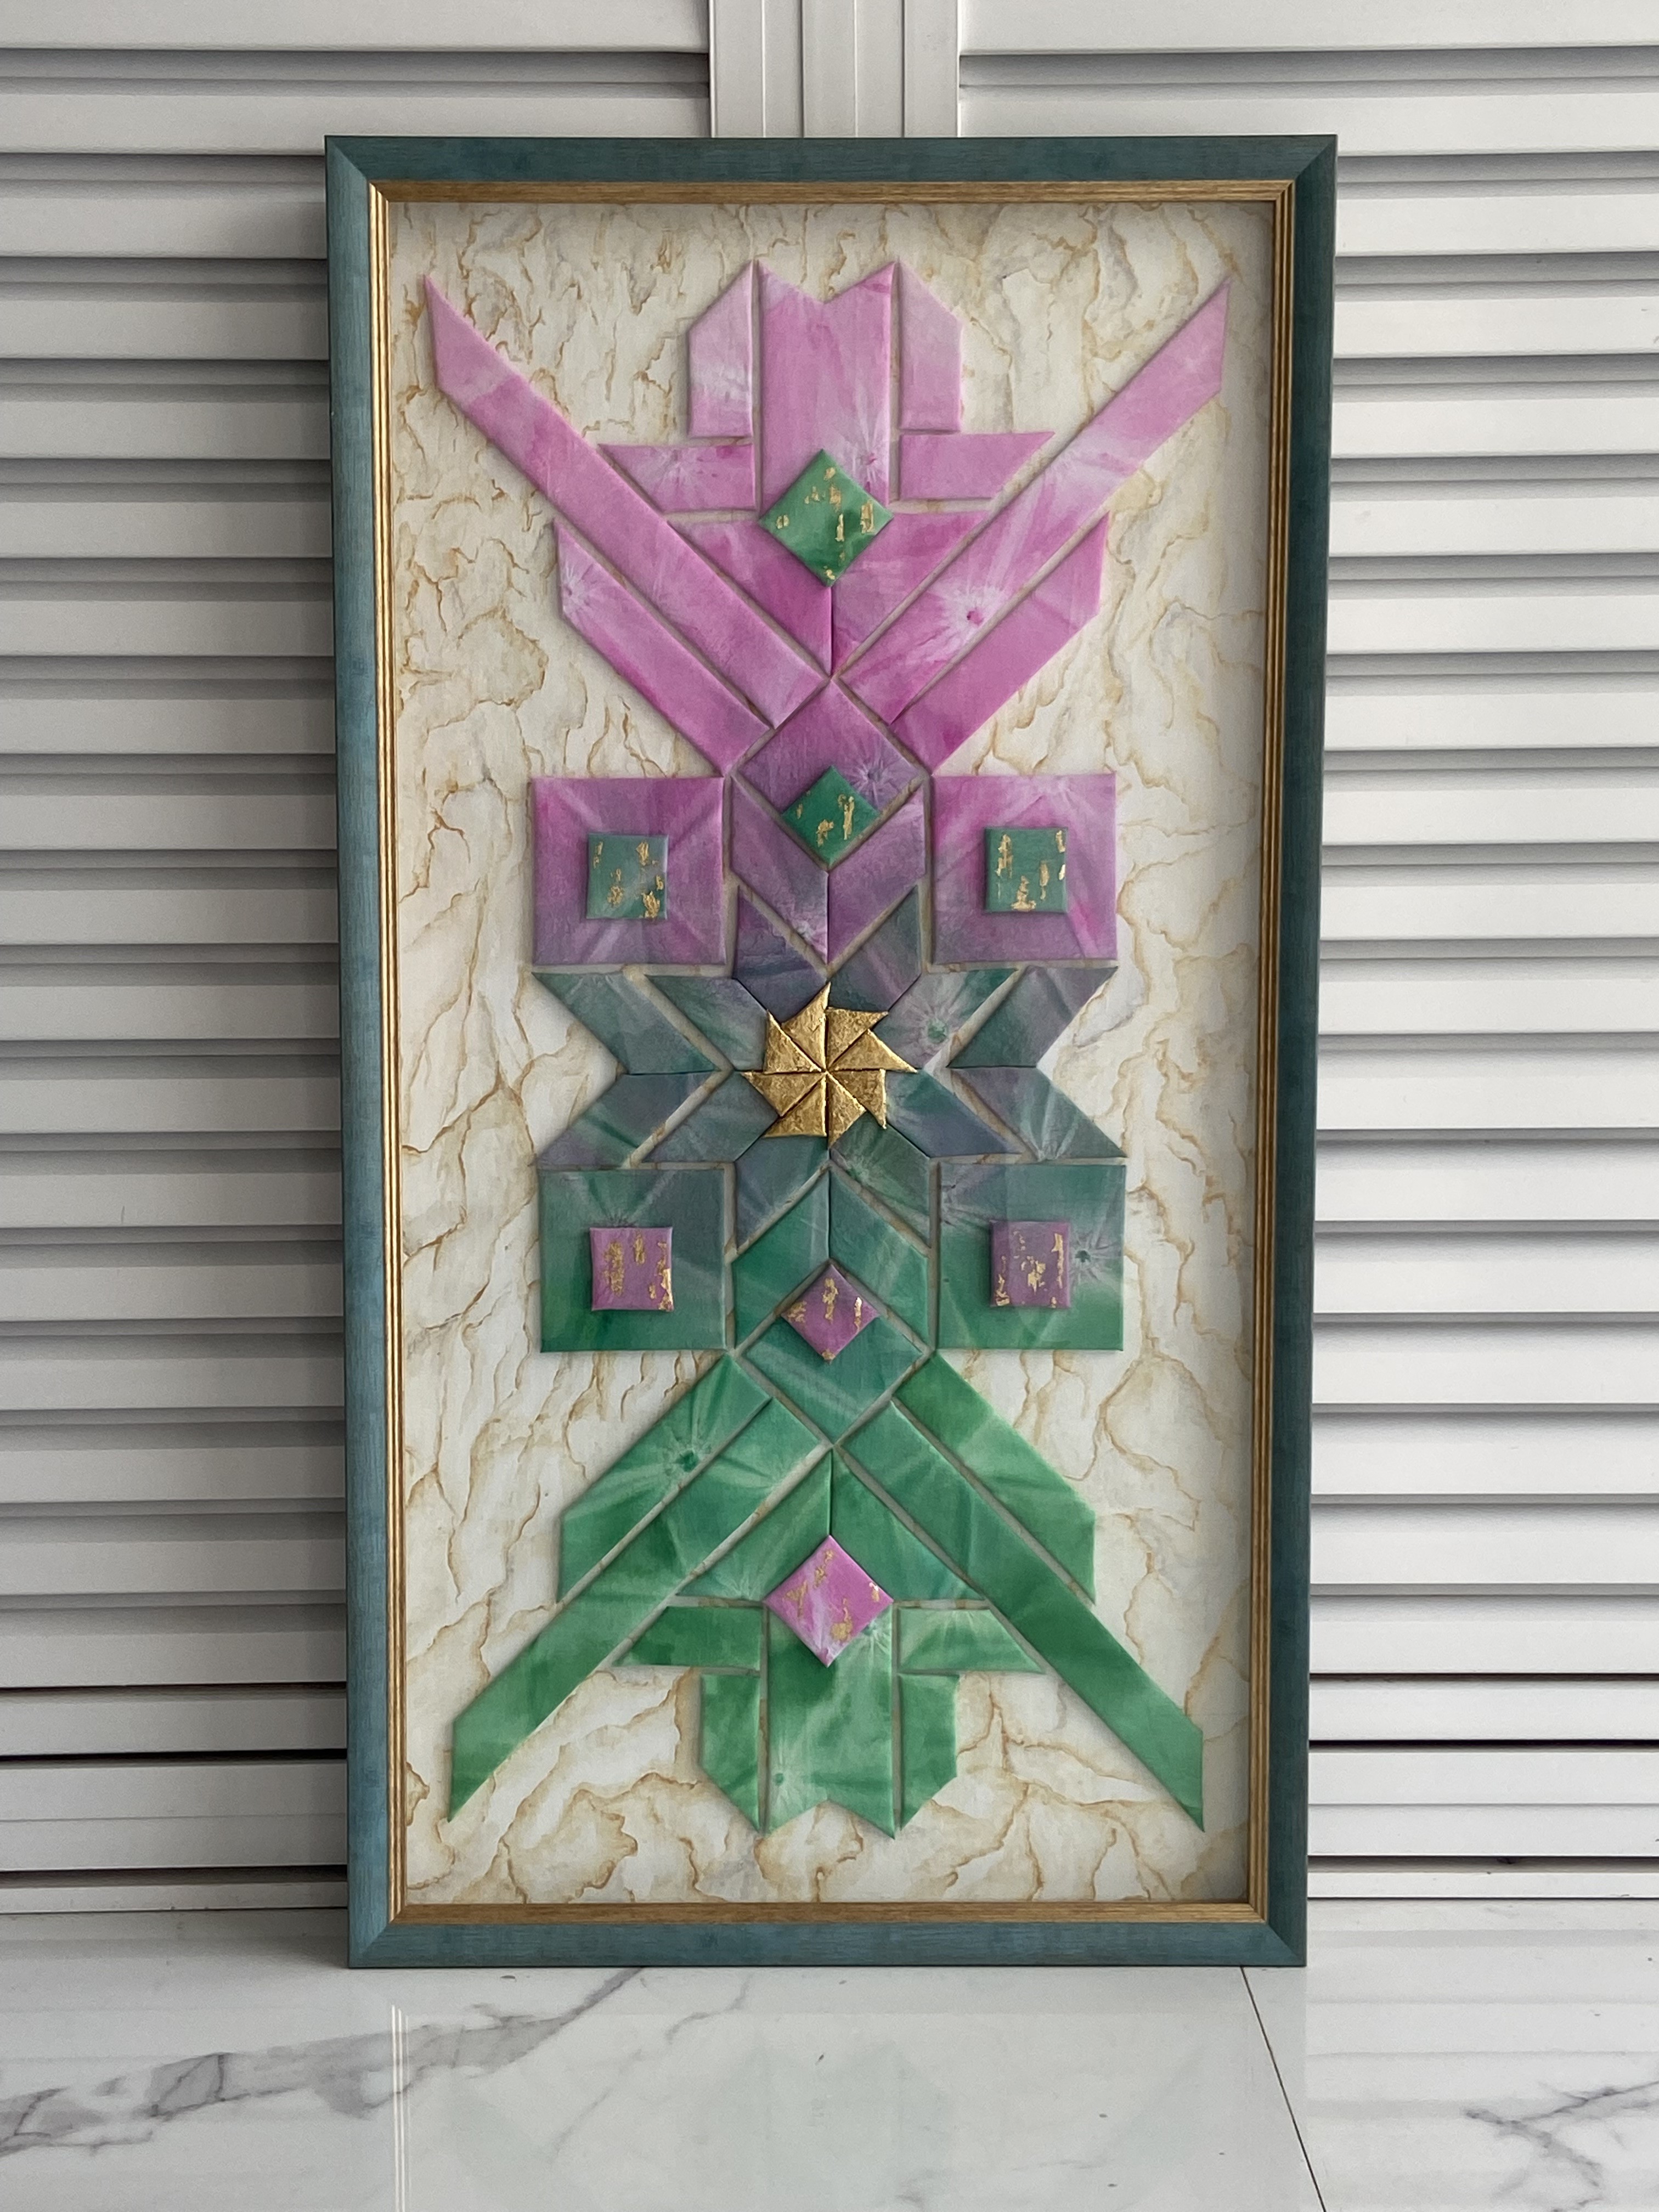
STEP 20 : Finishing

Frame the Aztec Wall Art and it is ready to be placed as a center piece in your living room.


 +91 99676 55545