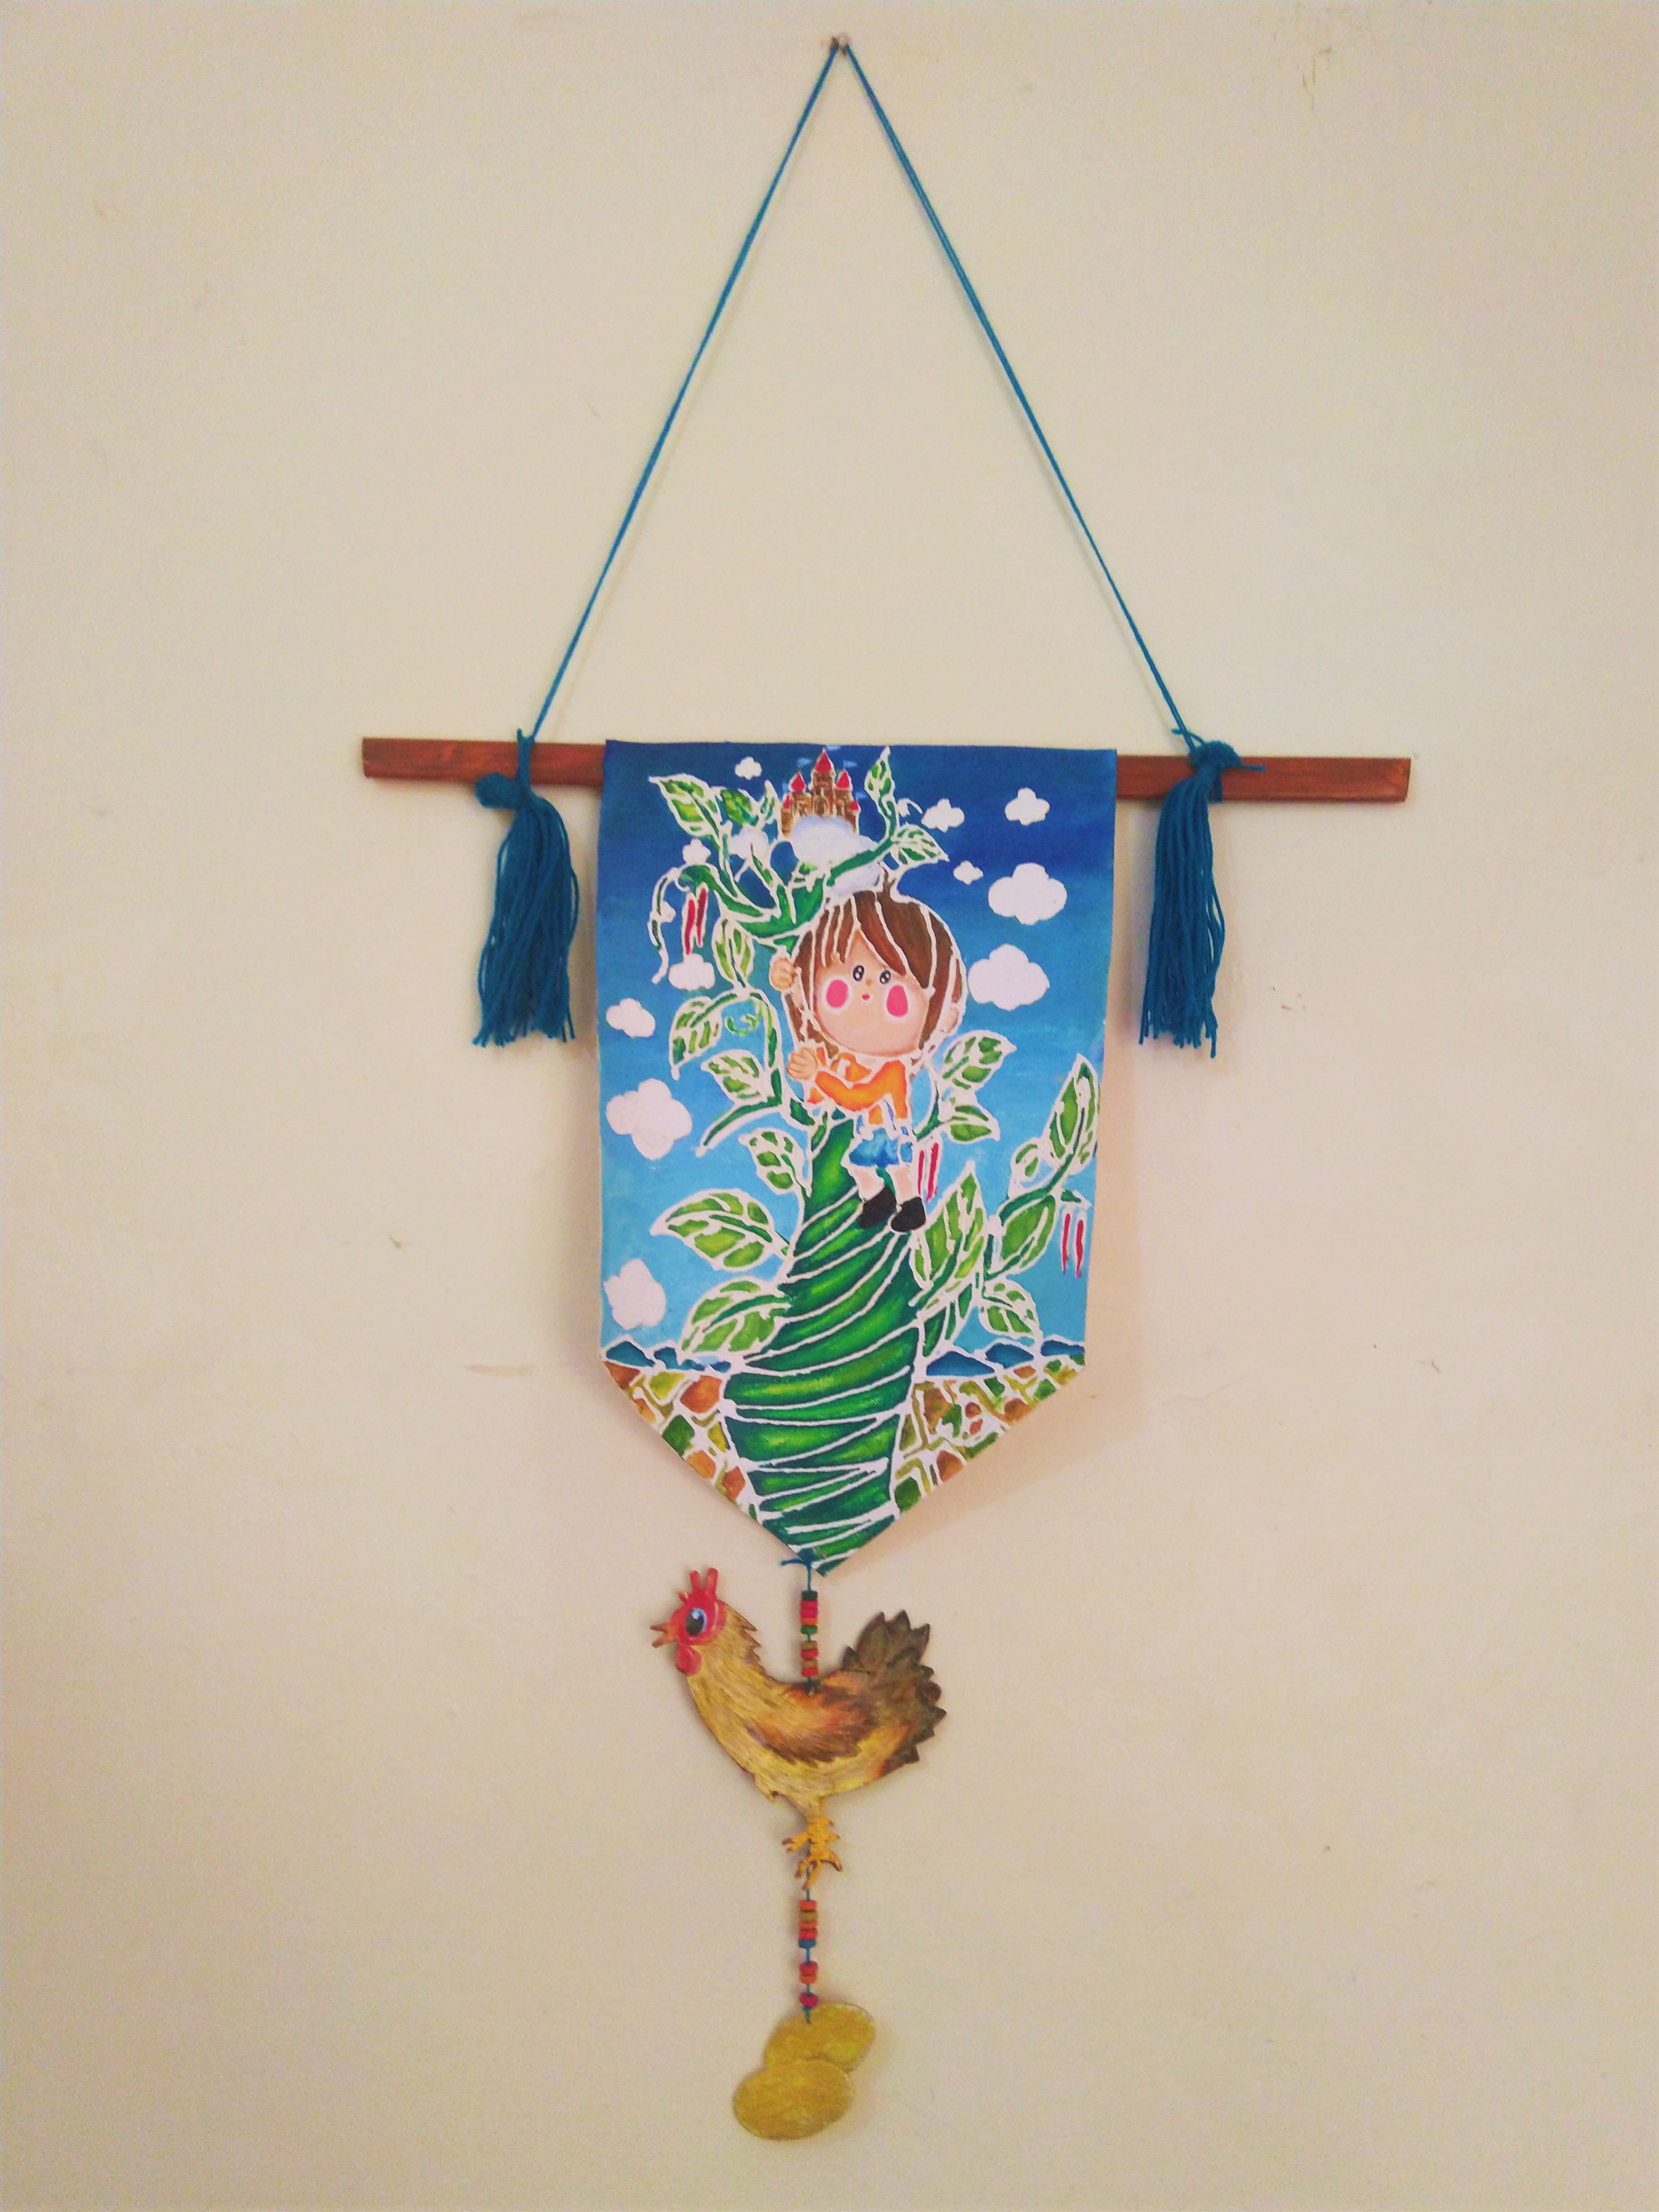
Tapestry With Jack And Bean Stalk

You Will Need:
Fevicryl Acrylic Colours Burnt Sienna 01, Black 02, Crimson 04, Dark Green 06, Golden Yellow 09, Lemon Yellow 11, Light Green 12, Orange 17, Sap Green 21, White 27, Cerulean Blue 32, Sky Blue 63, Teal Blue 68, Fevicryl Acrylic Colour Pearl Metallic Gold 352, Fevicryl Mouldit, Fevicryl Fabric Glue Fevicol MR, Fine Art Canvas Sheet, Fine Art Brushes, Readymade Woolen Tassels, Rolling Pin, Pencil, Clay Carving Tools, Paper Cutter, Round Wooden Stick, Scissors, Colourful Wooden Beads, Colour Palette, Water Container
Product Used:

Description :
We would have all believed in fairy land at some part of our lives. This DIY is an ode to the perfect fairy tale of Jack and the Bean Stalk. It has an underdog hero, a villain and happy ever after with loads of riches thereafter, a quirky addition to your working or living space if you still believe in fairy tales and li’l bit of magic.
- We are going to make the tapestry with resist technique using Fevicol MR.
- We are taking the famous fairy tale story Jack and the Bean stalk in out tapestry.
- Take the plain canvas sheet measuring 12” x 9” in size, mark and cut the triangular shape towards one of the end of the sheet.
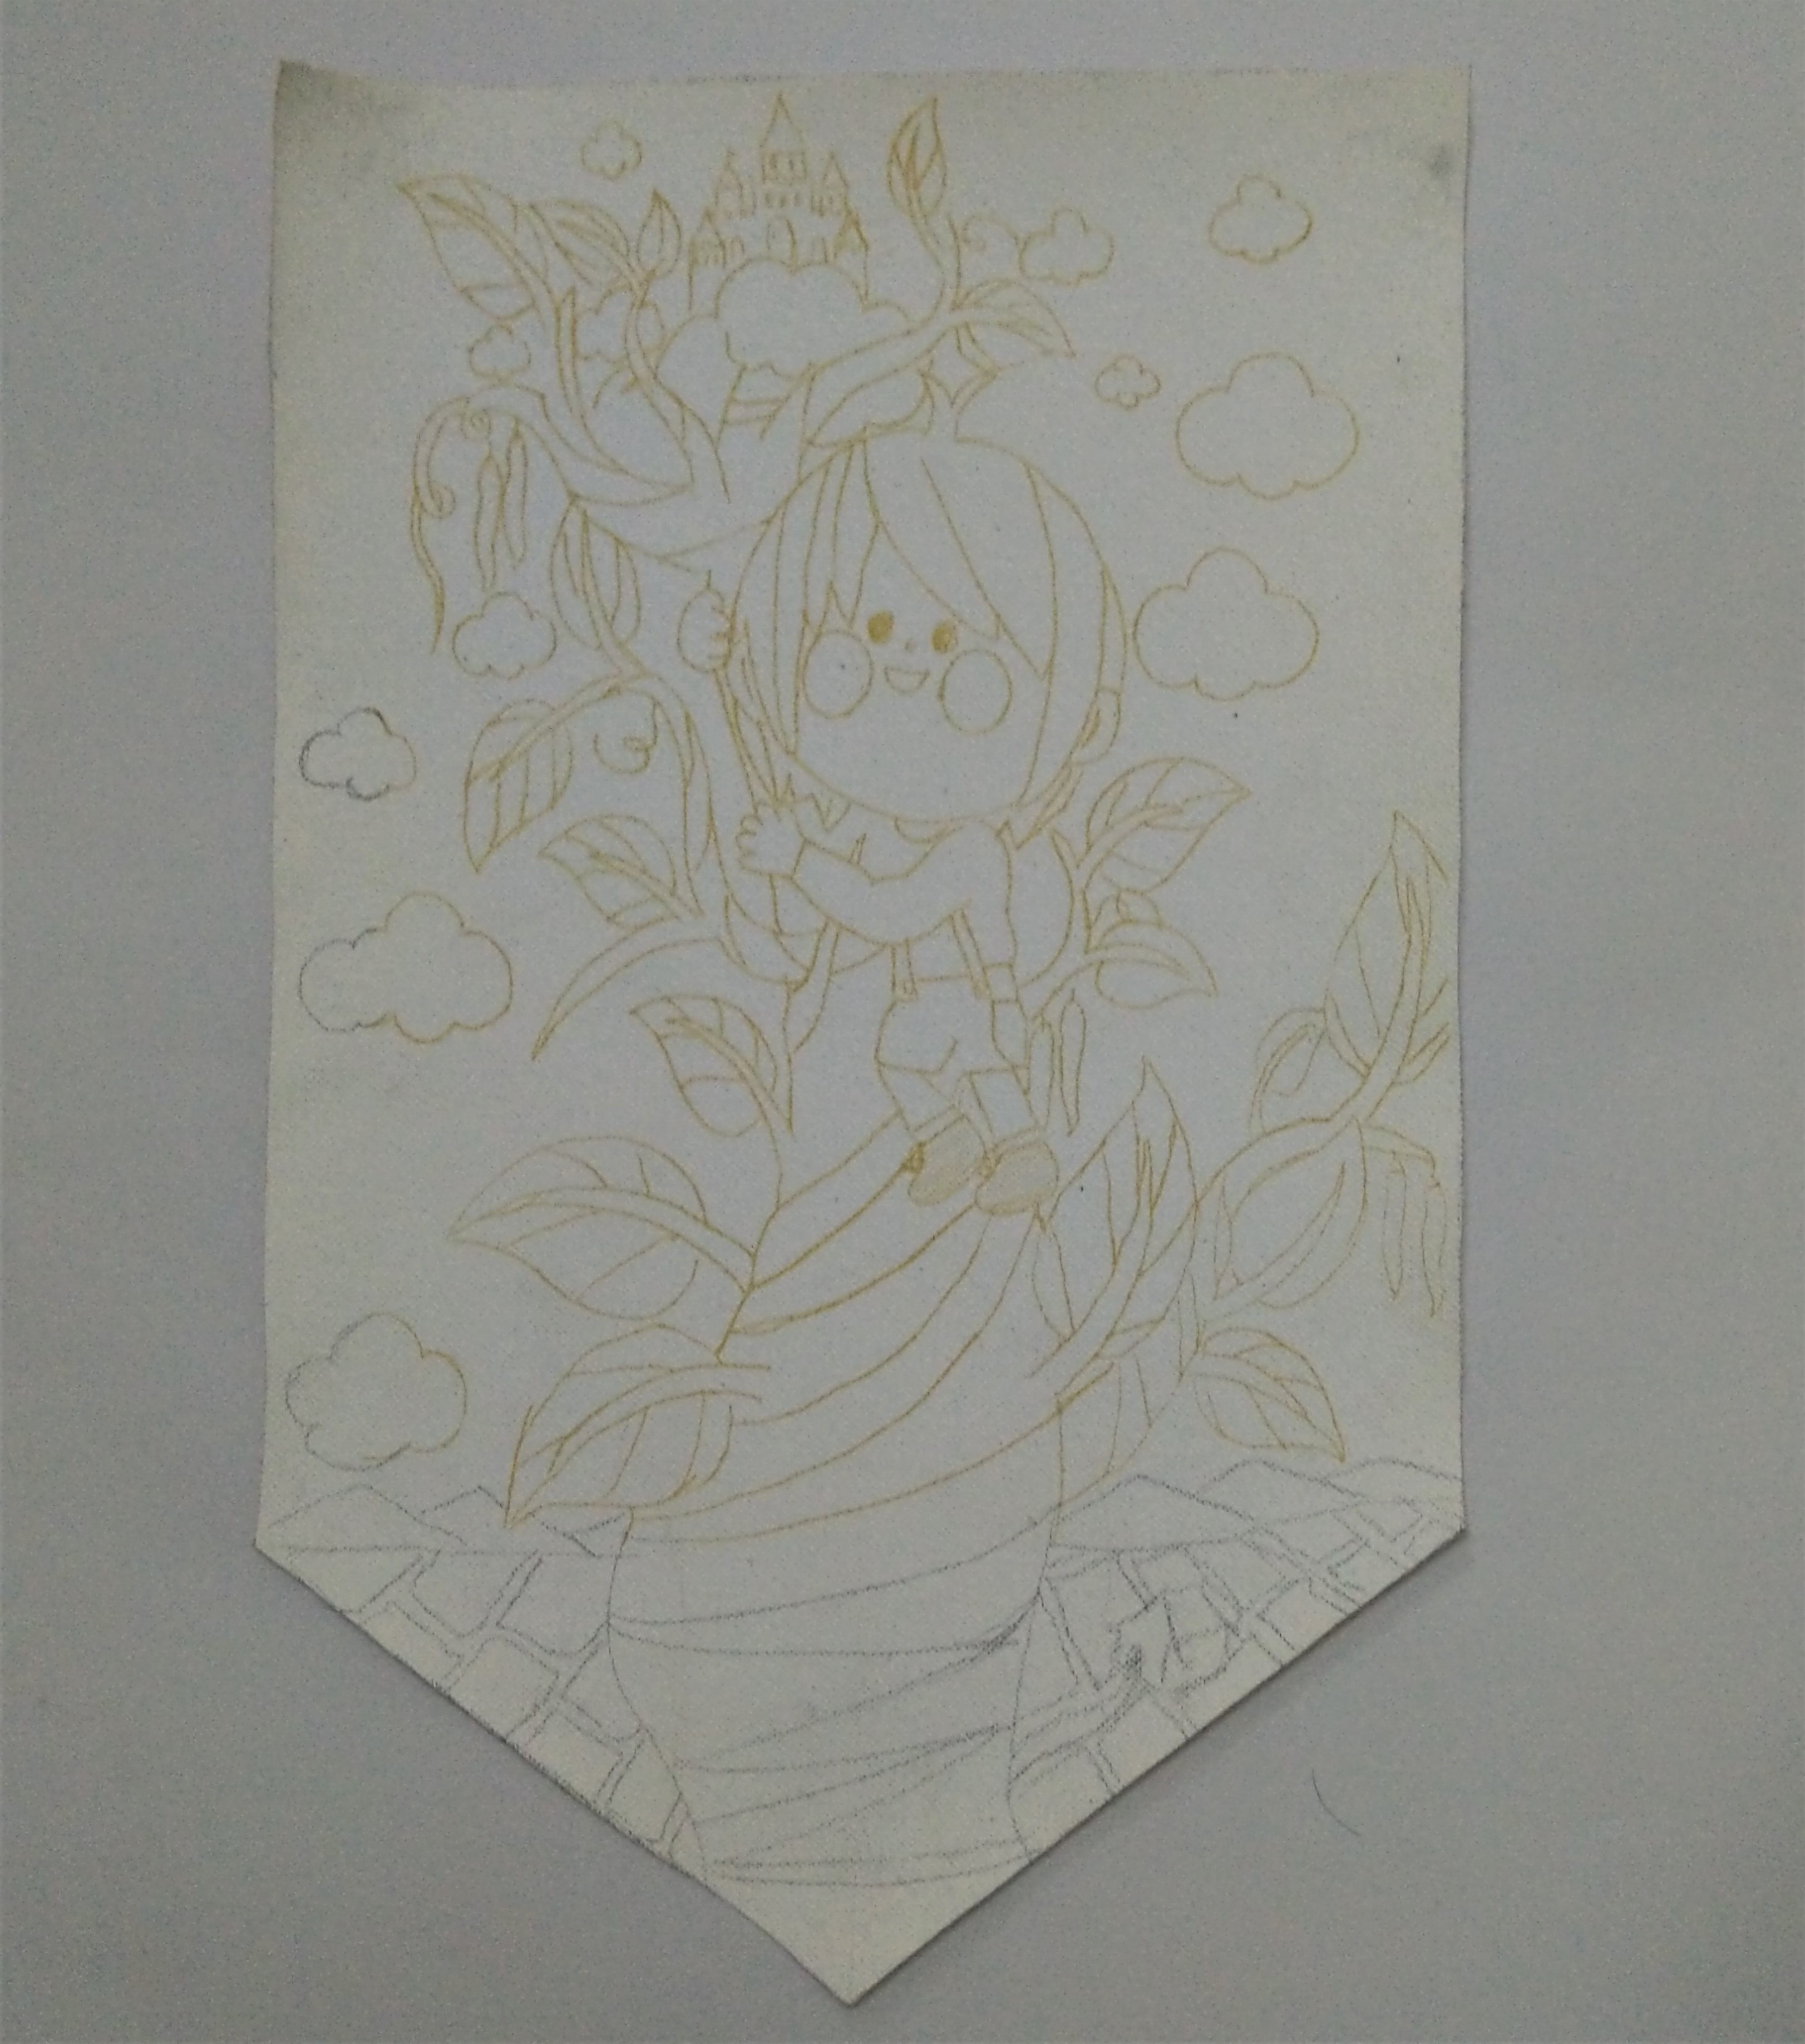
- Take an a4 white paper draw the simple draw of Jack climbing the bean creeper to reach at the castle of Giants on it.
- Trace the same on the sheet with yellow carbon paper.

- Paint the outline of the design with Fevicol MR.
- Let it dry completely.

- Paint the design with Acrylic Colours Burnt Sienna 01, Black 02, Crimson 04, Dark Green 06, Golden Yellow 09, Lemon Yellow 11, Light Green 12, Orange 17, Sap Green 21, White 27, Cerulean Blue 32, Sky Blue 63 and Teal Blue 68.
- Let it dry.
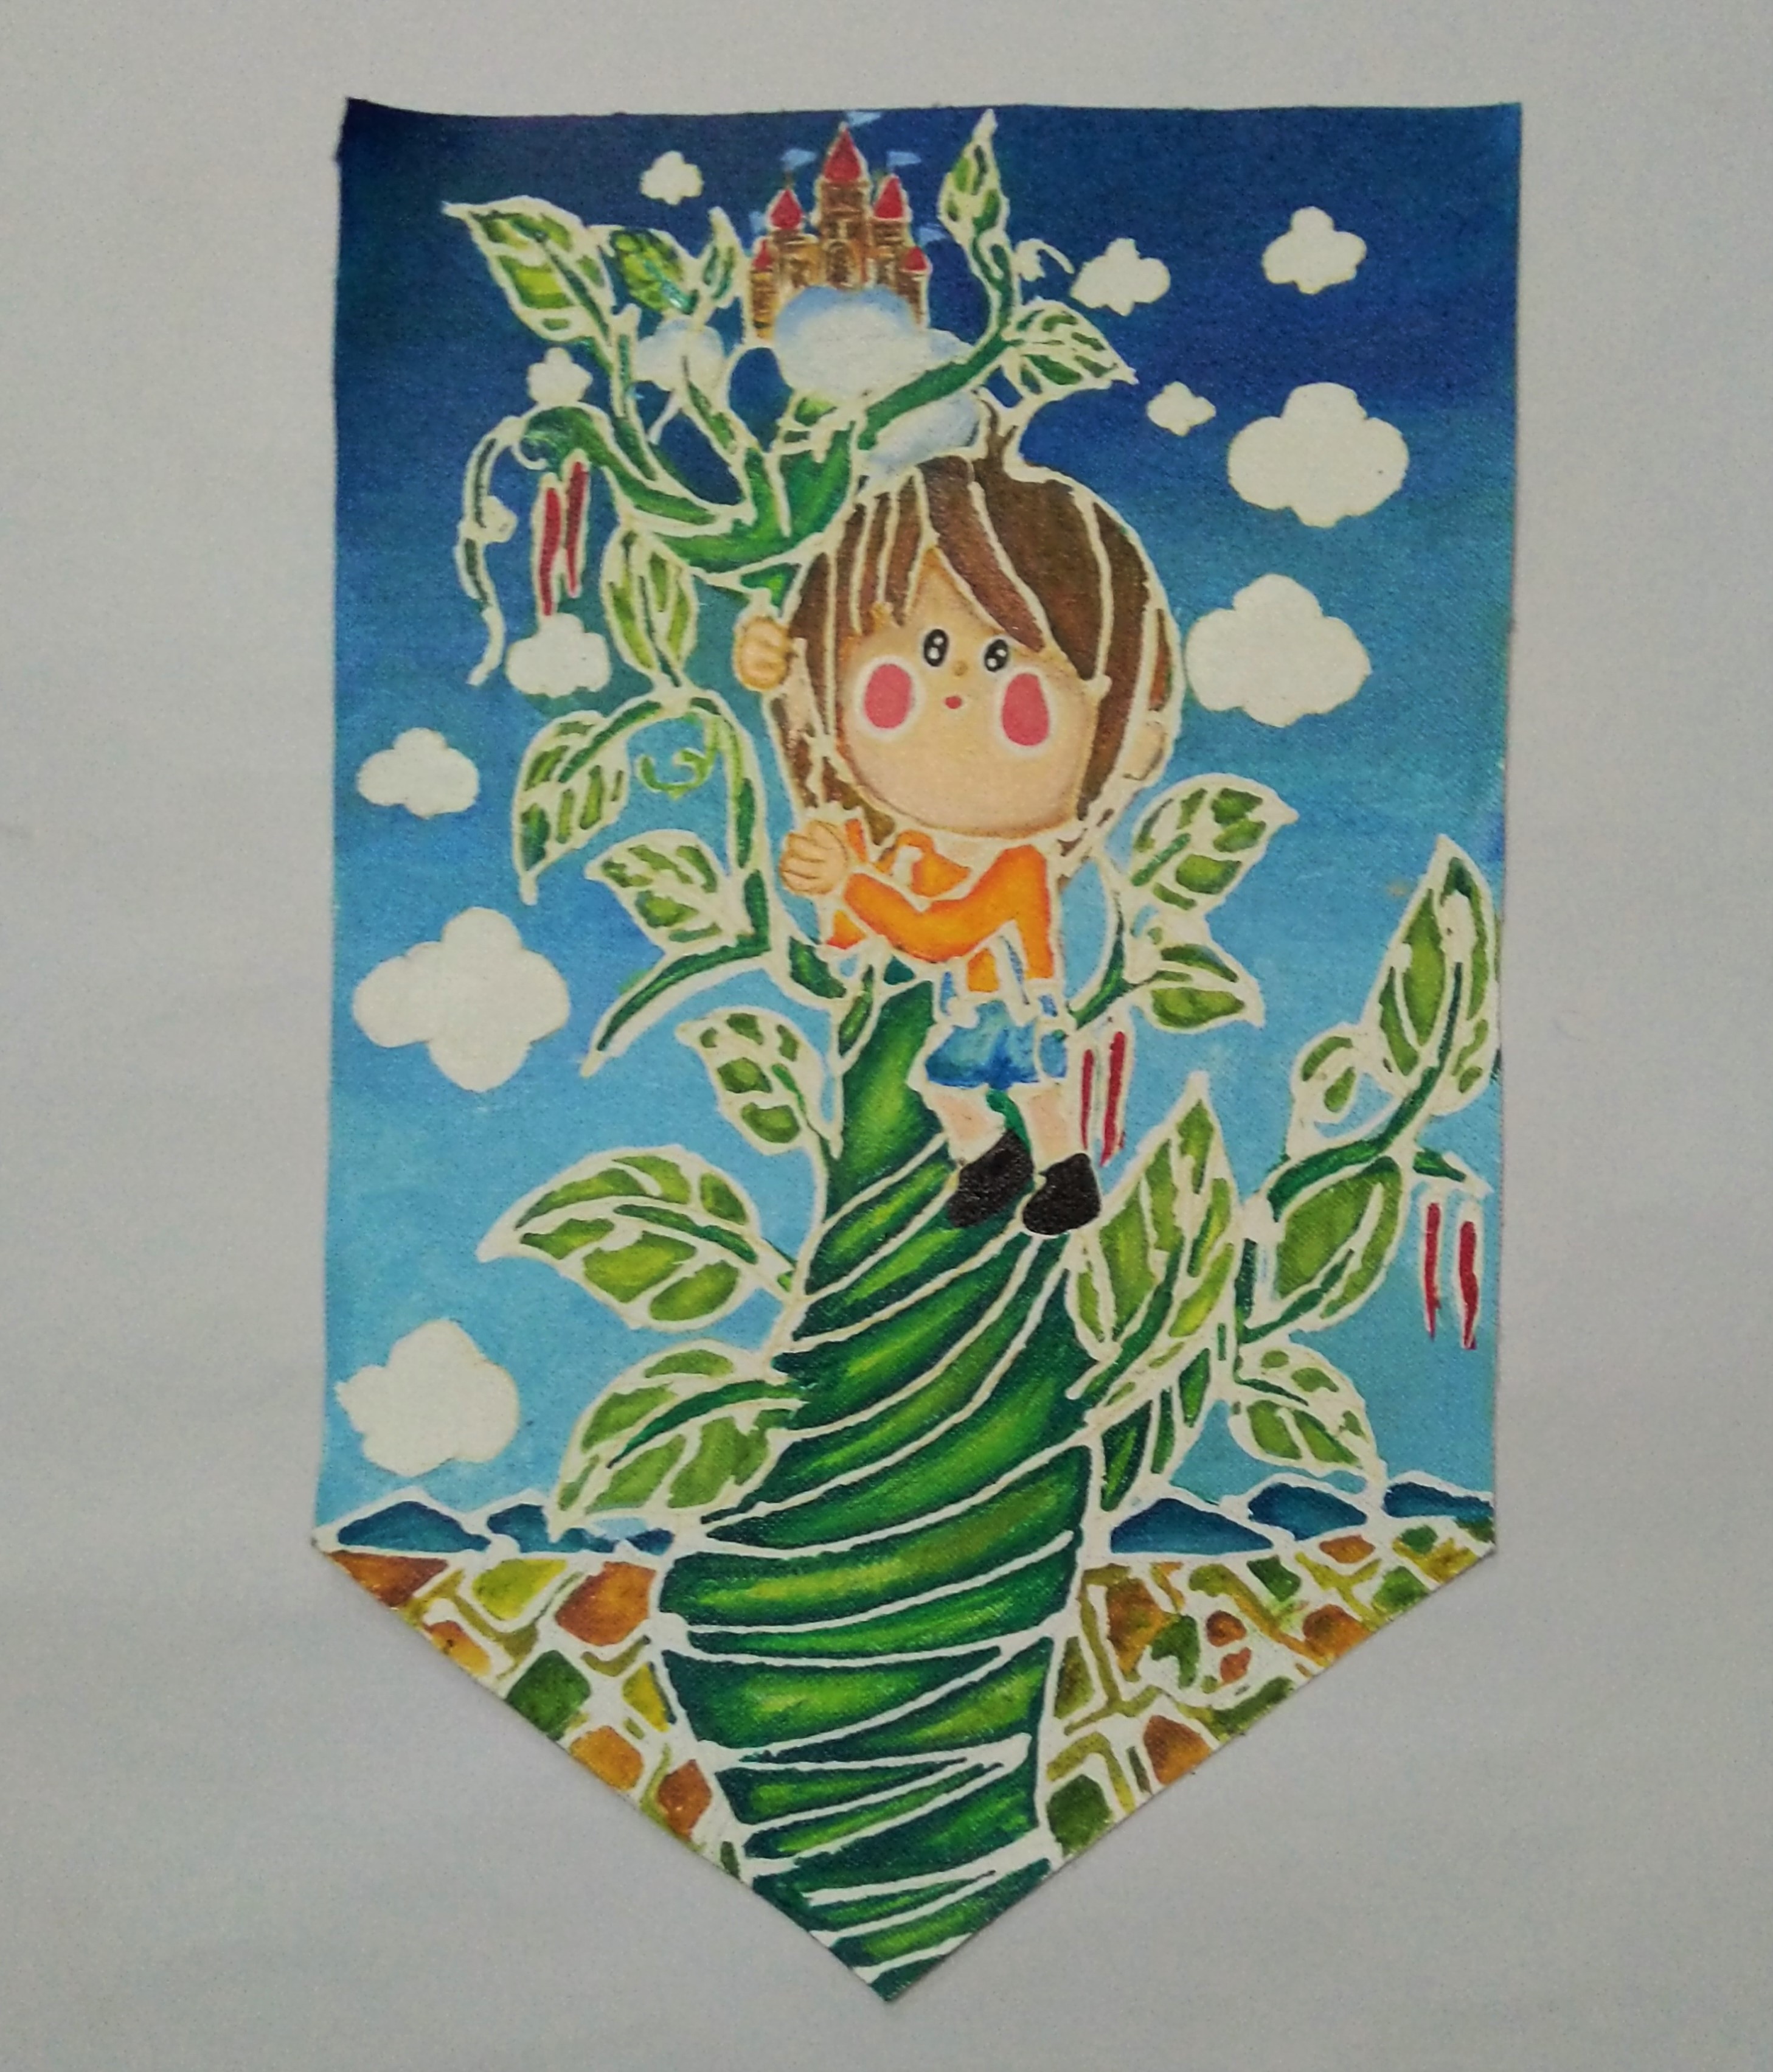
- After drying remove the dried Fevicol MR carefully.
- Refer to the image.
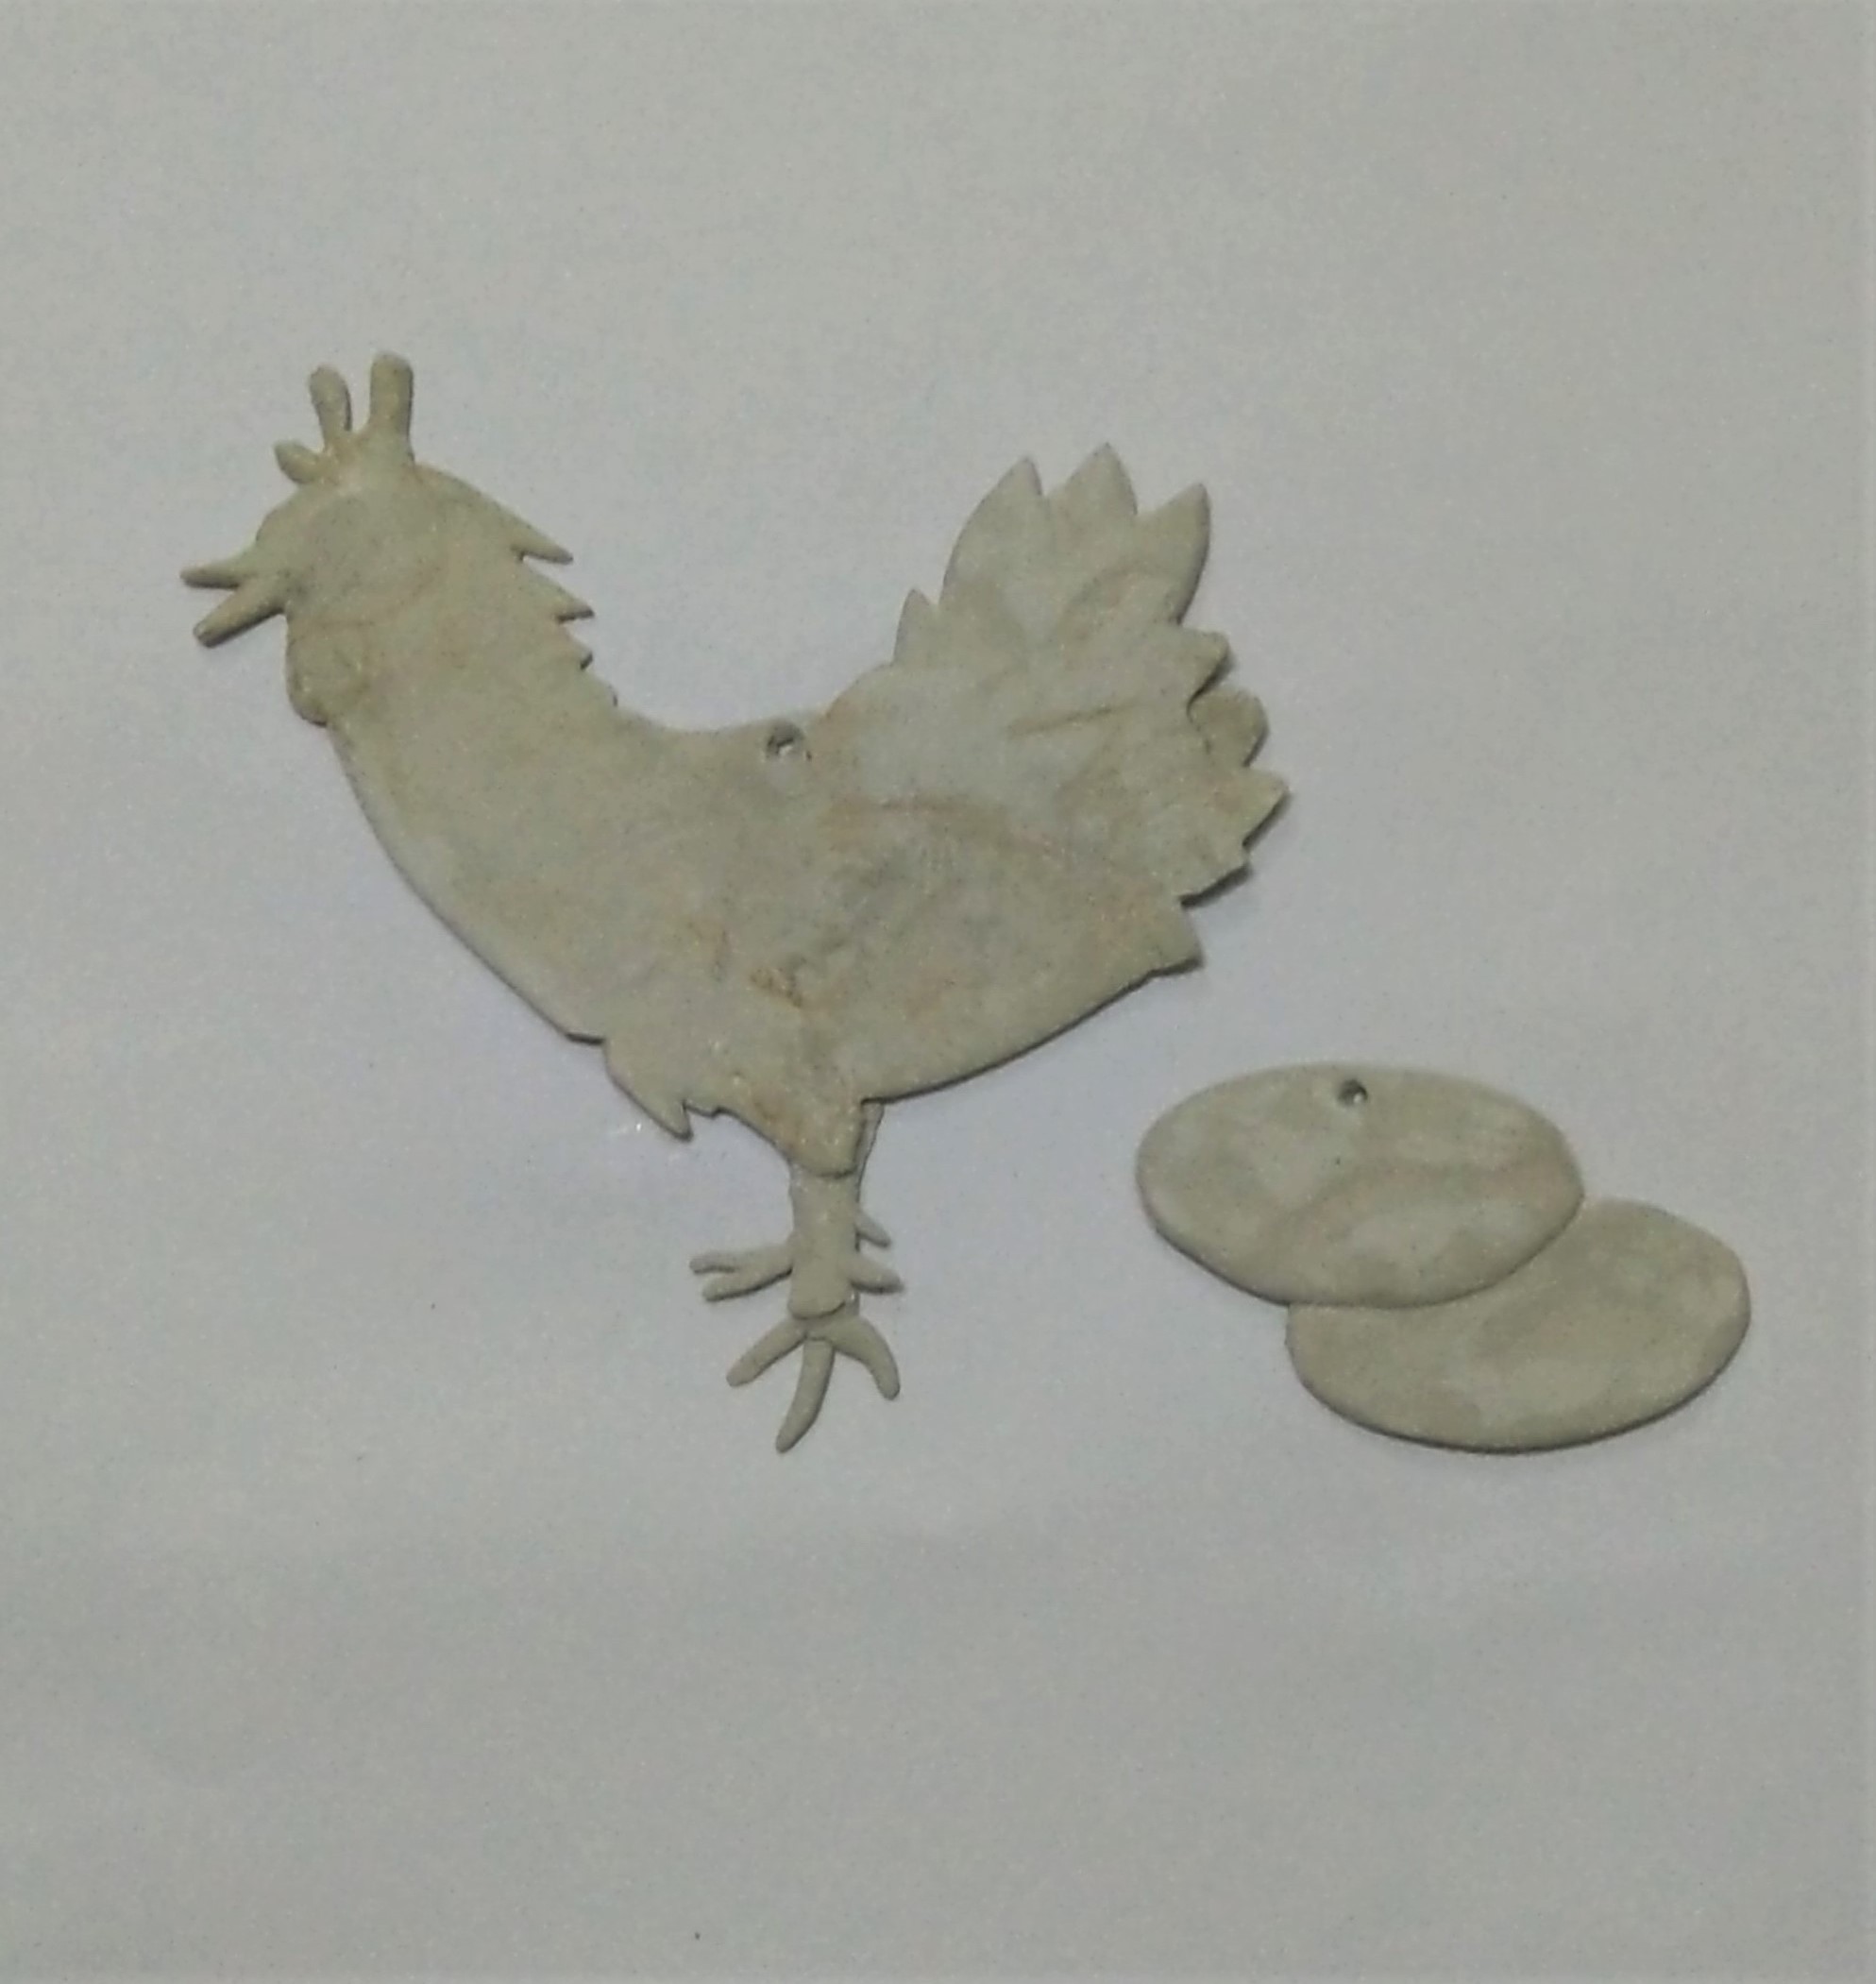
- We are going to make the hen with golden eggs.
- Take the Mouldit resin base and hardener, mix it thoroughly to make even dough.
- Take the dough, roll it to make the slab with a rolling pin.
- Mark and cut the hen and the eggs out of it.
- Pierce the holes towards the top, to attach them to the tapestry.
- Let it dry completely.
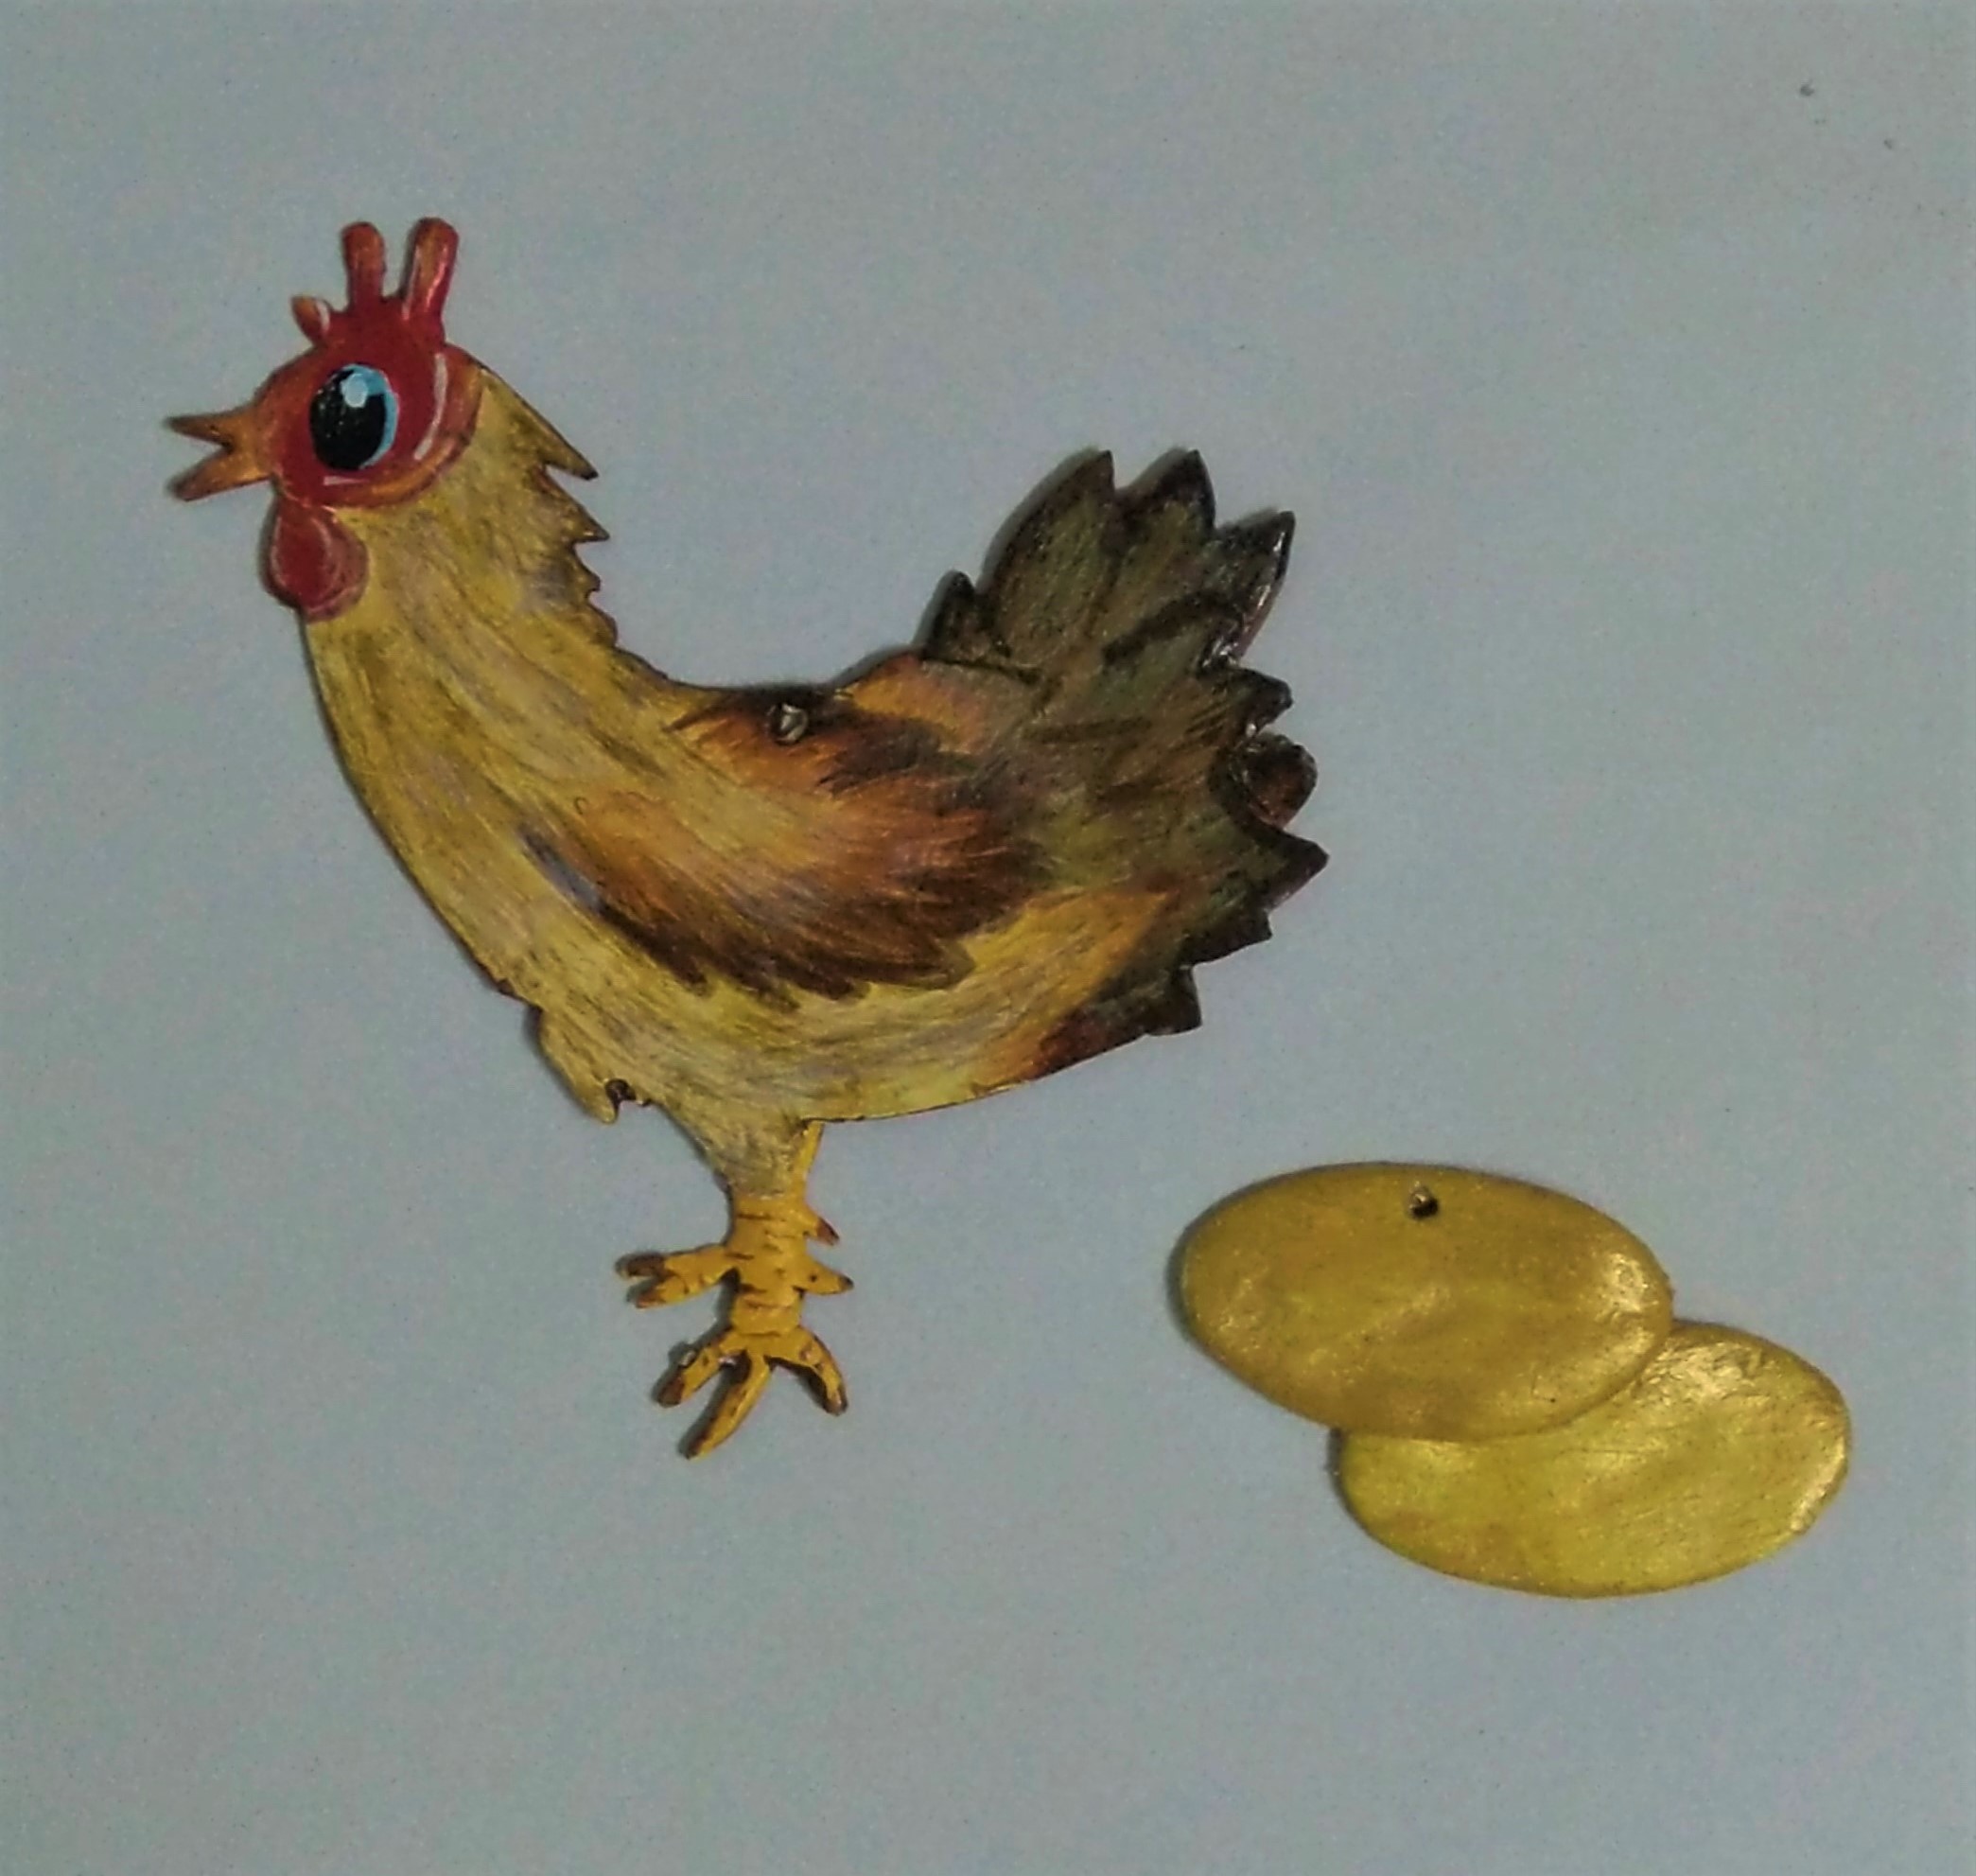
- Paint the hen and the eggs with Acrylic Colours Burnt Sienna 01, Black 02, Crimson 04, Golden Yellow 09, Lemon Yellow 11 and Pearl Metallic Gold 352.
- Leave it to dry.
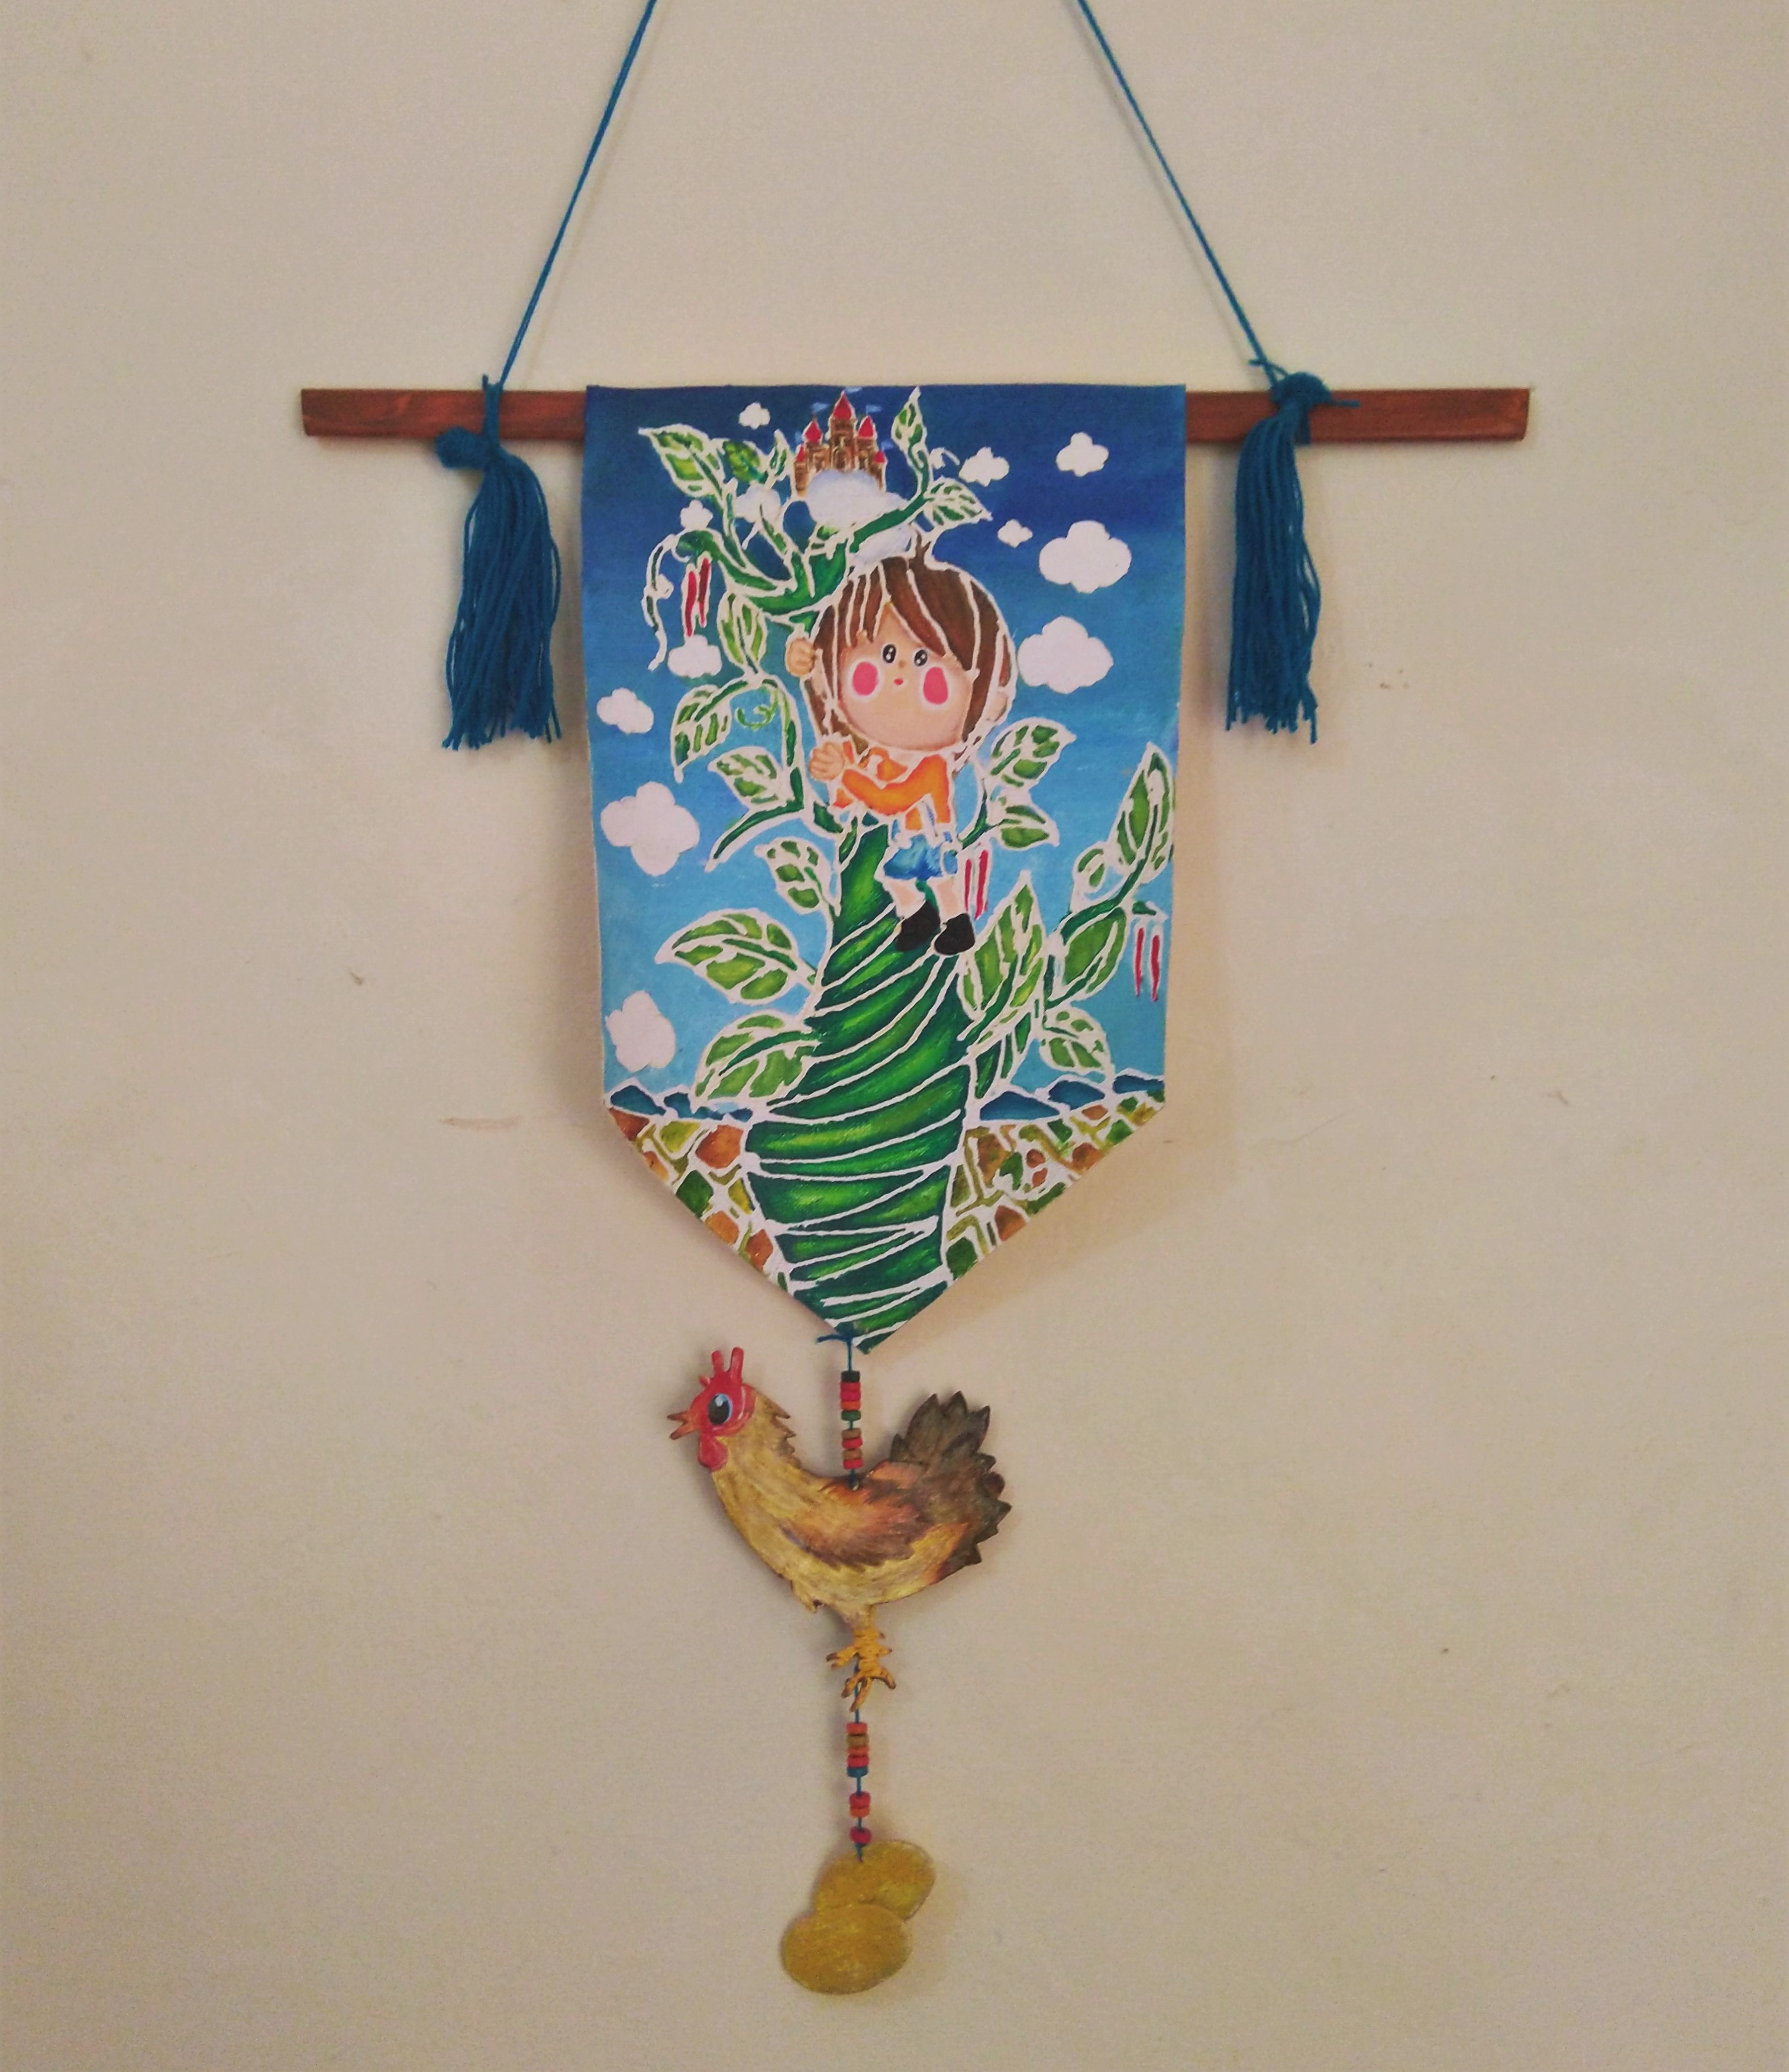
- Take the canvas sheet attach and stick the sheet on the round wooden stick using Fabric Glue.
- Let it dry.
- Attach the blue woolen thread, pass the thread through the pierced holes to attach the hen and eggs, the readymade blue colour woolen tassels and the colourful wooden beads aesthetically towards the triangular end of the sheet.
- Refer to the image.


 +91 99676 55545