Mouldit Planter


You Will Need:
Fevicryl Acrylic Colours Burnt Sienna 01, Black 02, Chrome Yellow 03, Dark Brown 05, Sap Green 21, White 27, Fevicryl Acrylic Colours Pearl Metallic Gold 352, Bronze 355, Fevicryl Mouldit, Fevicryl Fabric Glue, Fine Art Brushes, Clay Carving Tools, Rolling Pin, Plastic Bag, Masking Tape, Clay Carving Tools, Paper Cutter, Colour Palette, Water Container
Product Used:

Description :
How amazing this planter is! Made in entirety with Fevicryl Mouldit this is super fun to make too. Read more to learn the process.
STEP 1 : Make the base
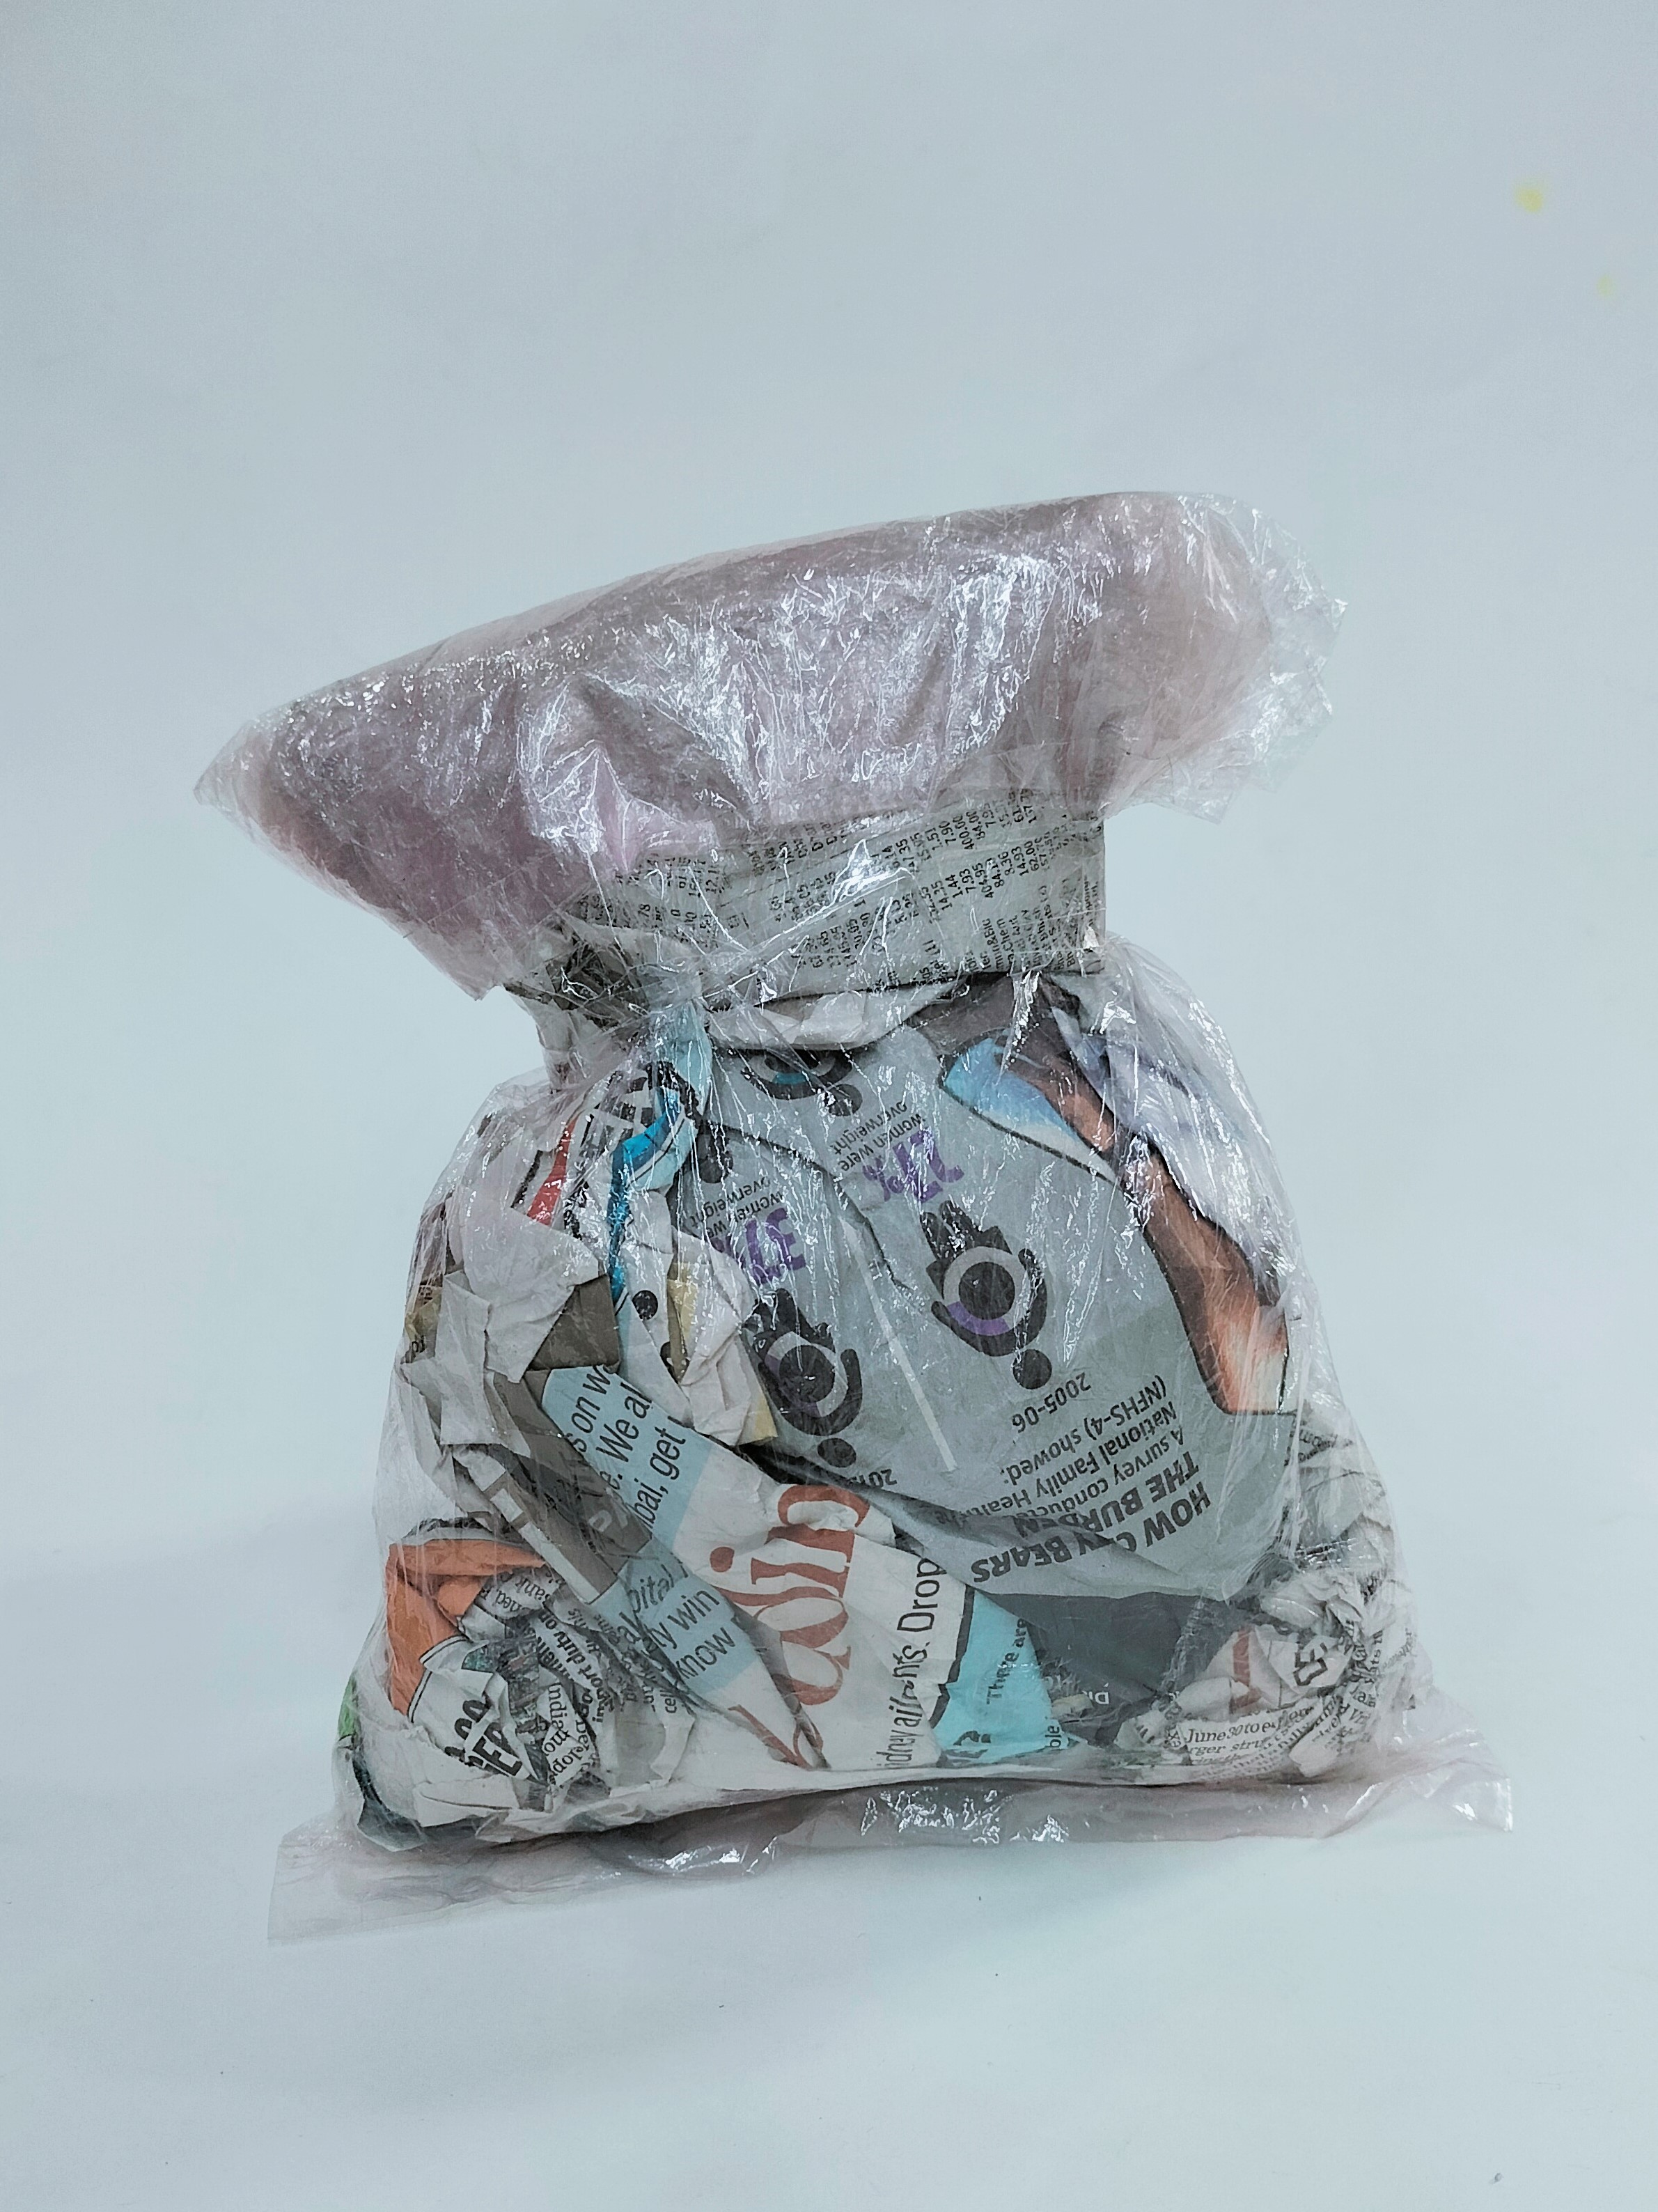
- Make a bag shape using plastic bag and news paper.
- Take a plastic bag filled up with the crumpled news papers and fasten the mouth of the bag with masking tape further to make a mould for the bag.
STEP 2 : Mix Mouldit
- Take Mouldit resin base and hardener, mix it thoroughly to make even dough.
STEP 3 : Roll the dough
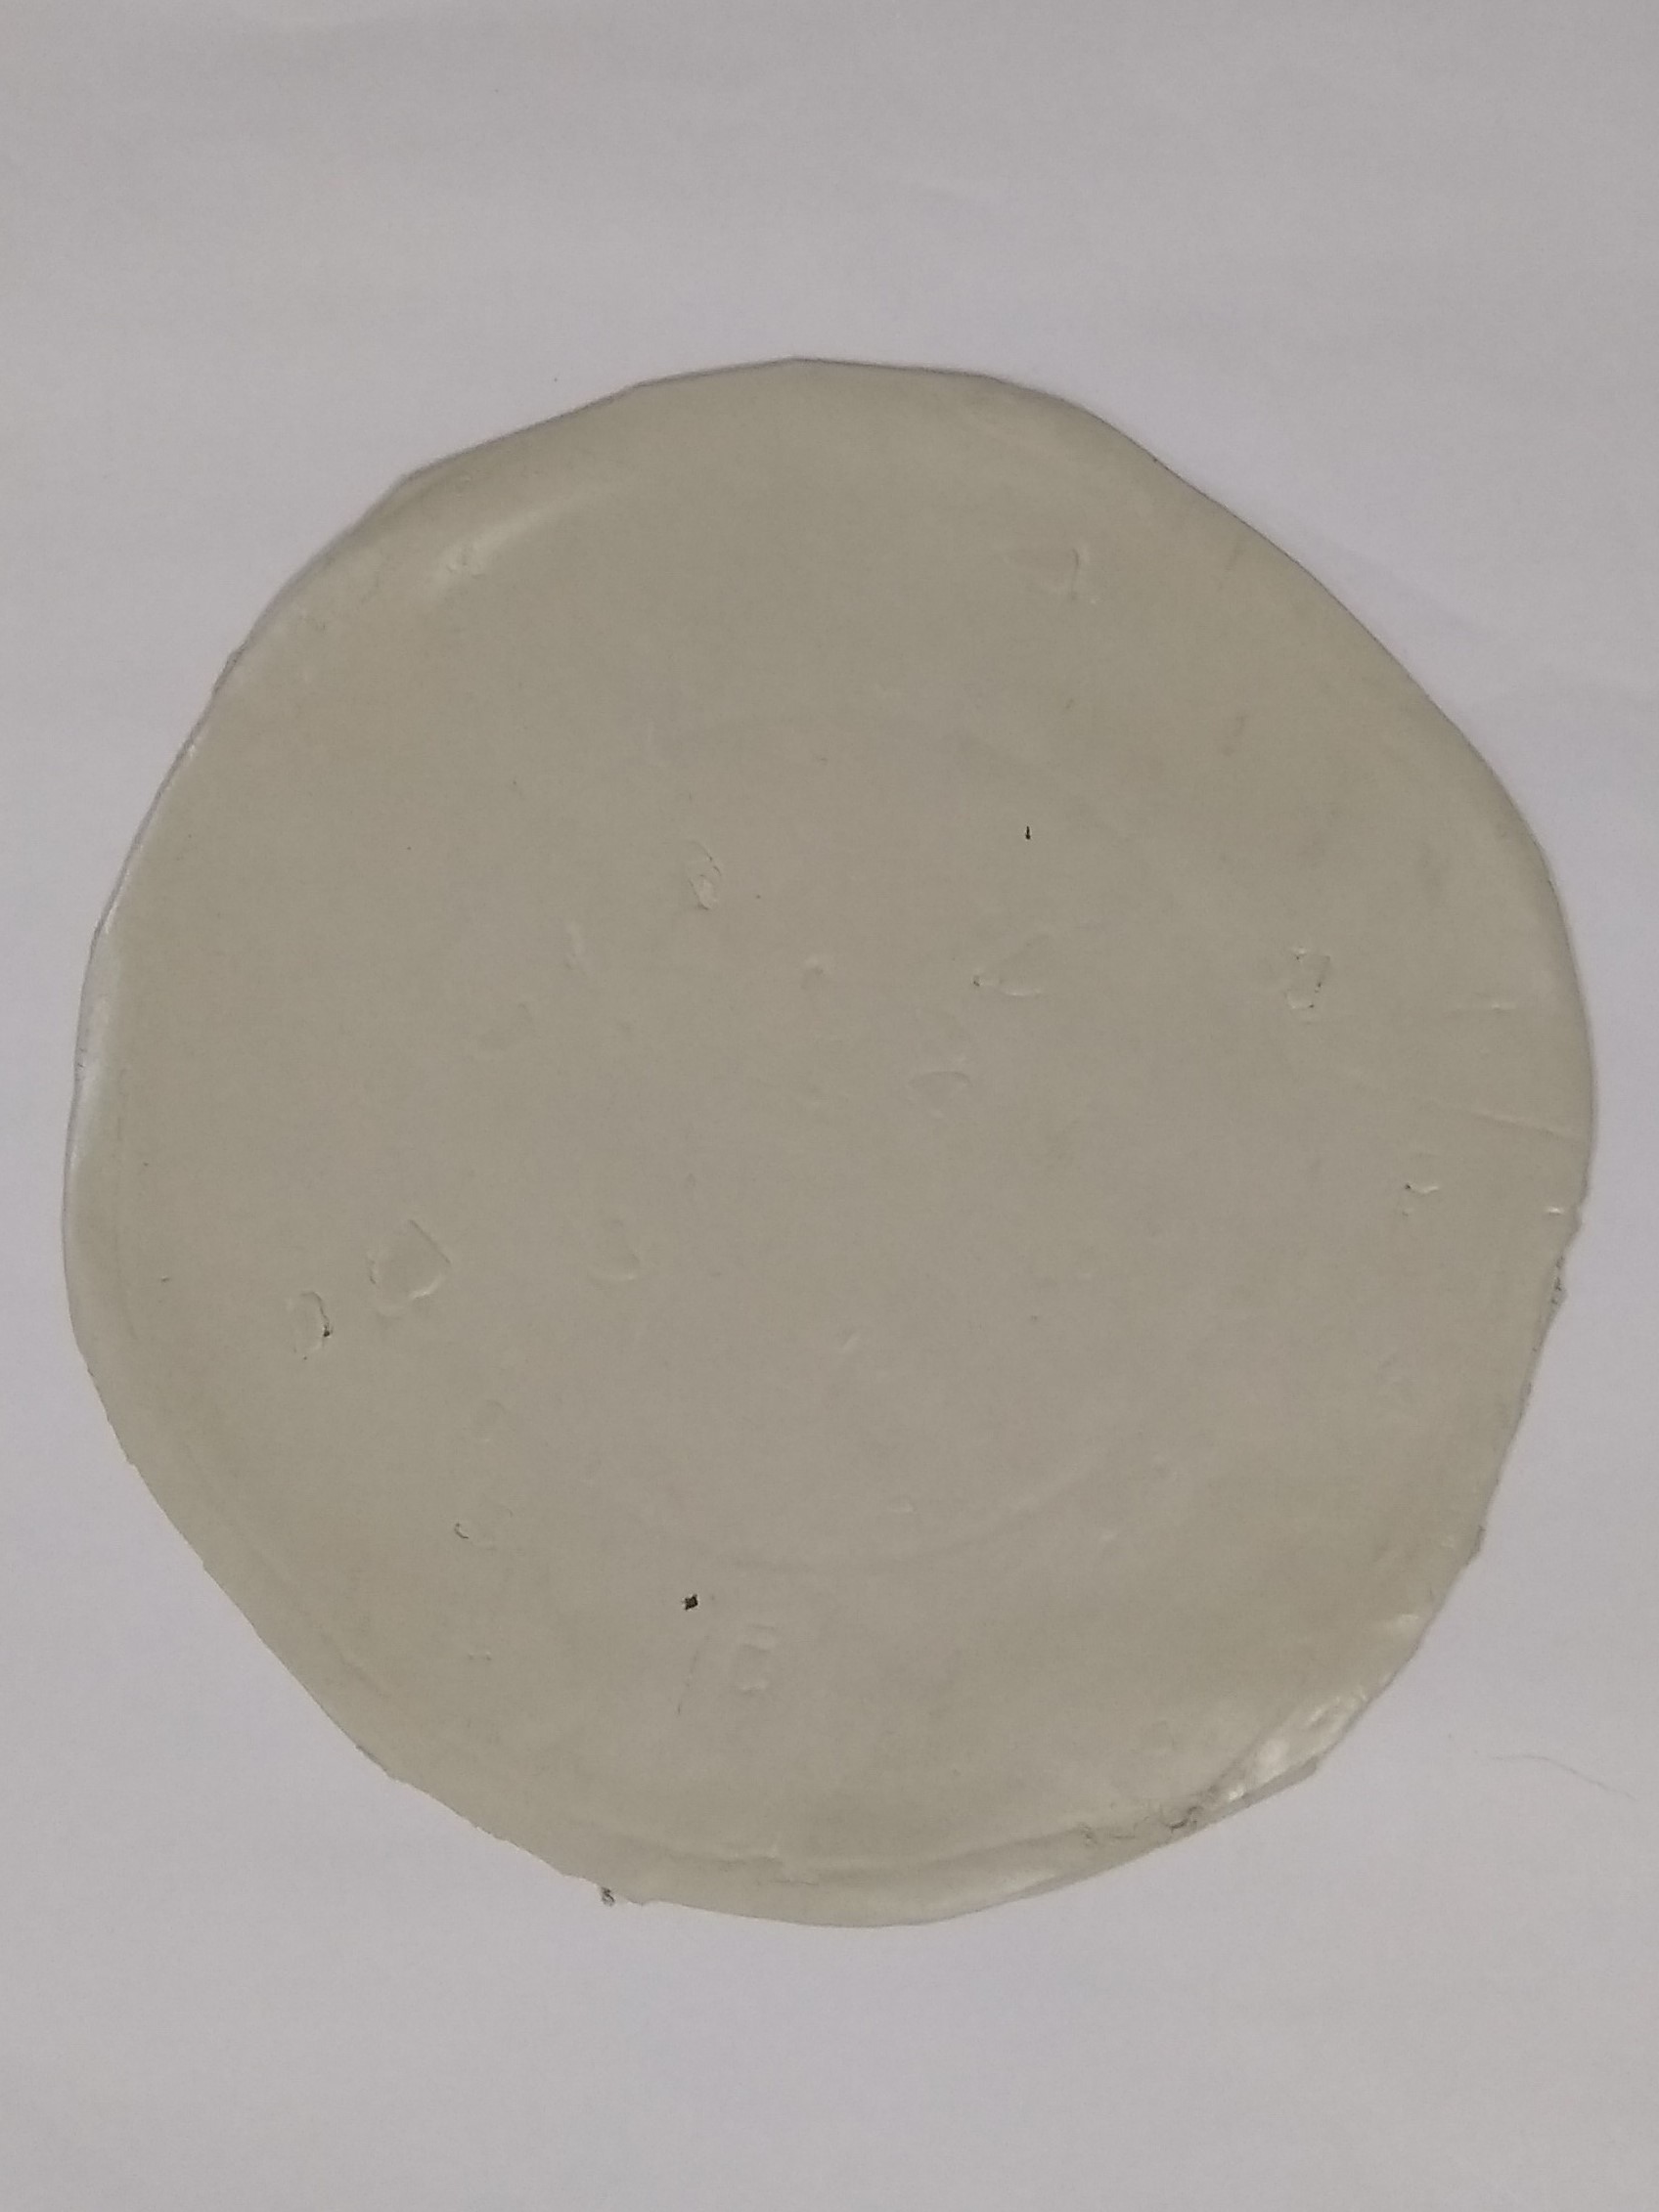
- Take the dough, roll it to make the medium thin slab with rolling pin.
STEP 4 : Mould the bag
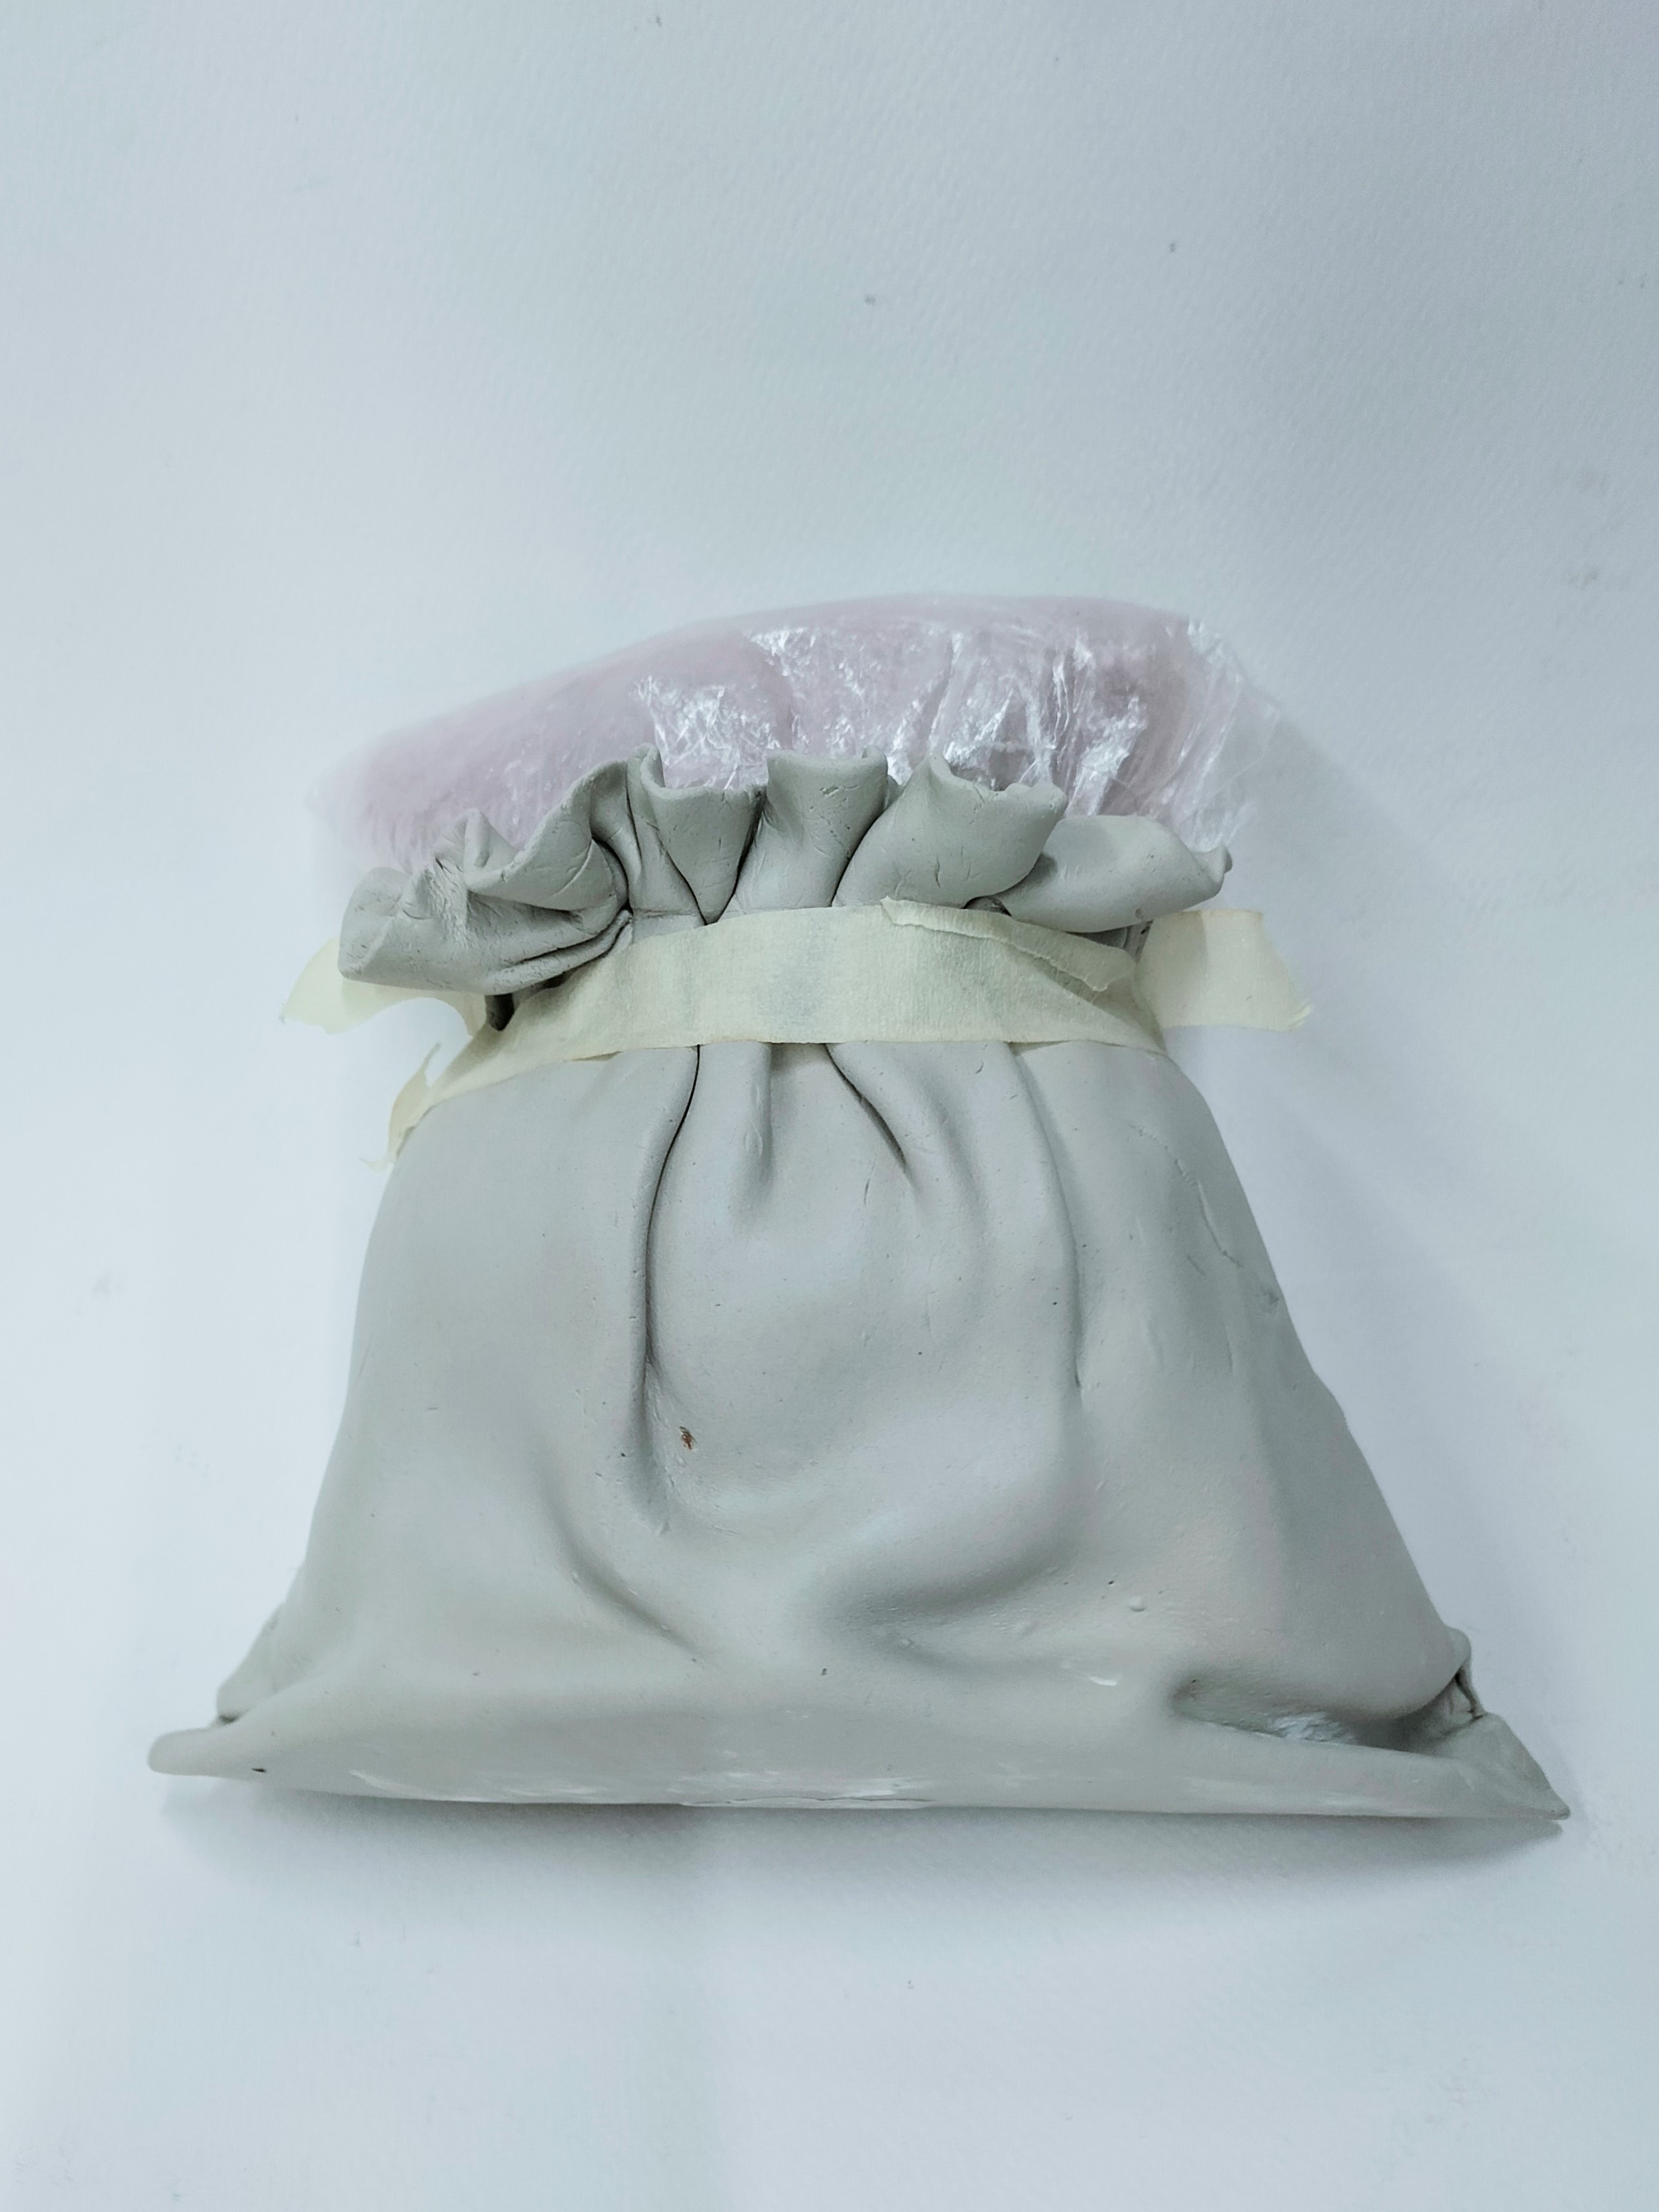
- Take the rolled slab, place it around the plastic bag to give away a shape to the clay slab.
- Fasten the mouth of the slab with masking tape.
- Refer to the image.
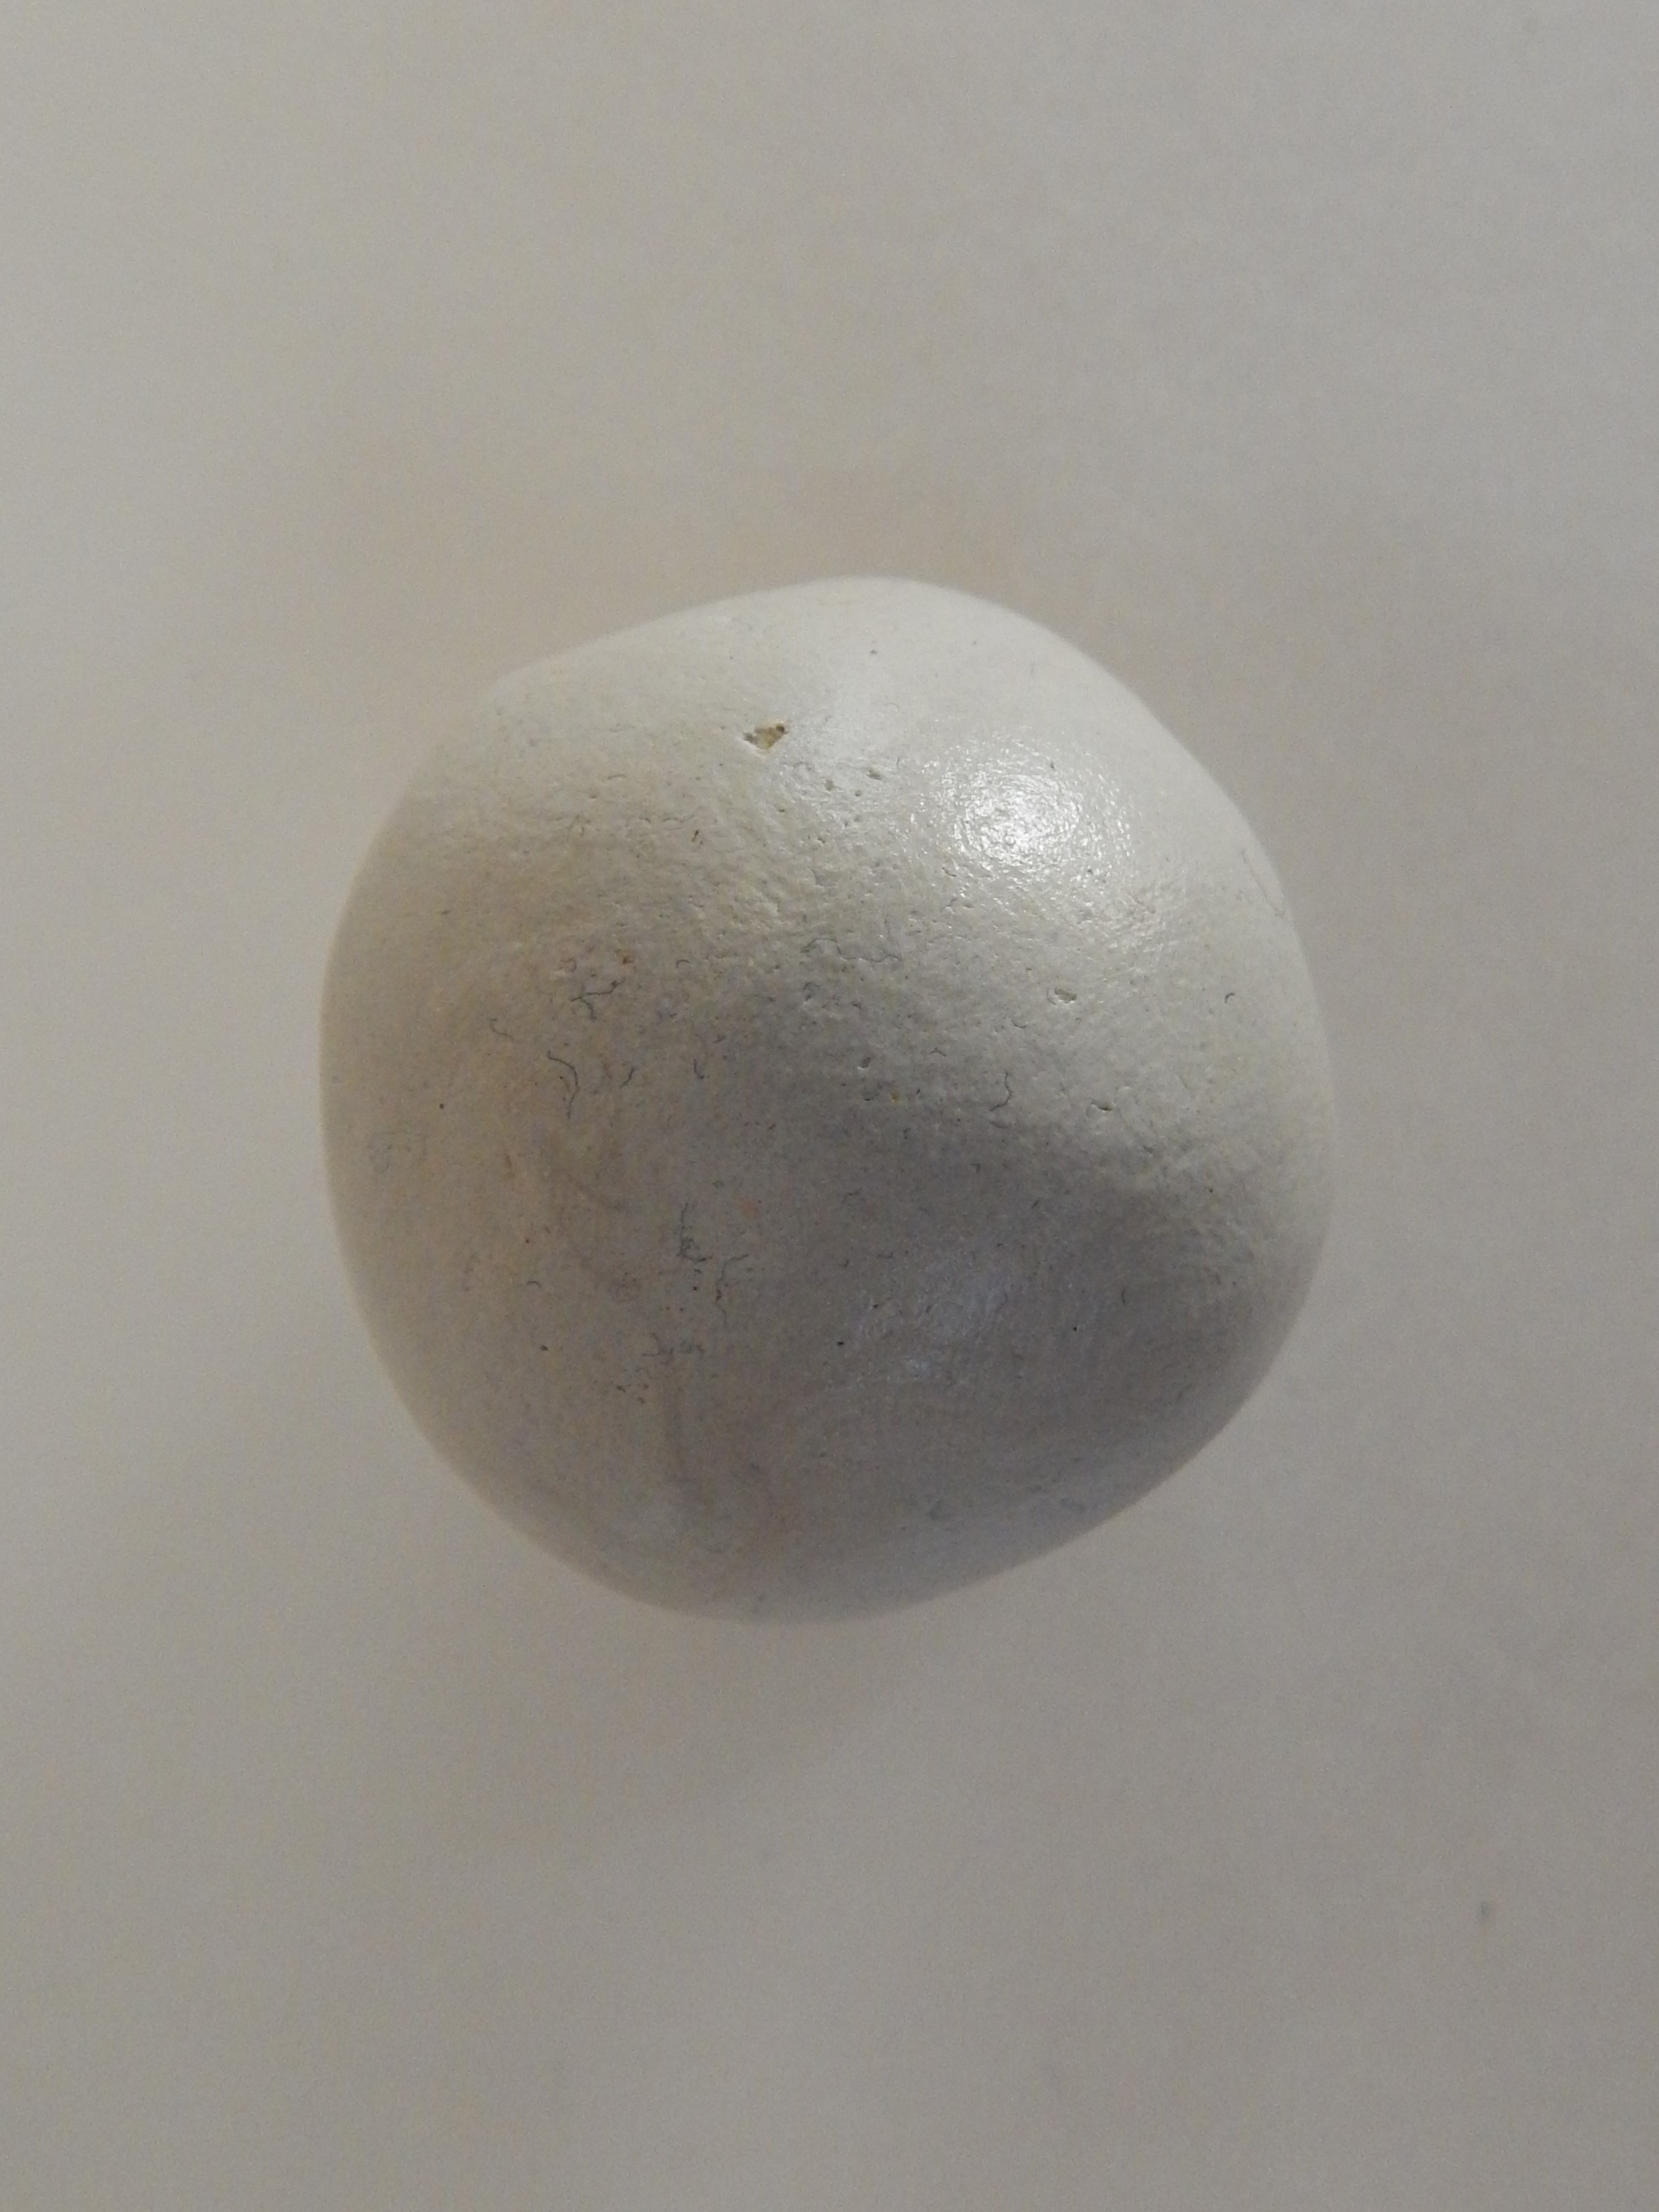
STEP 5 : Taking out the mould
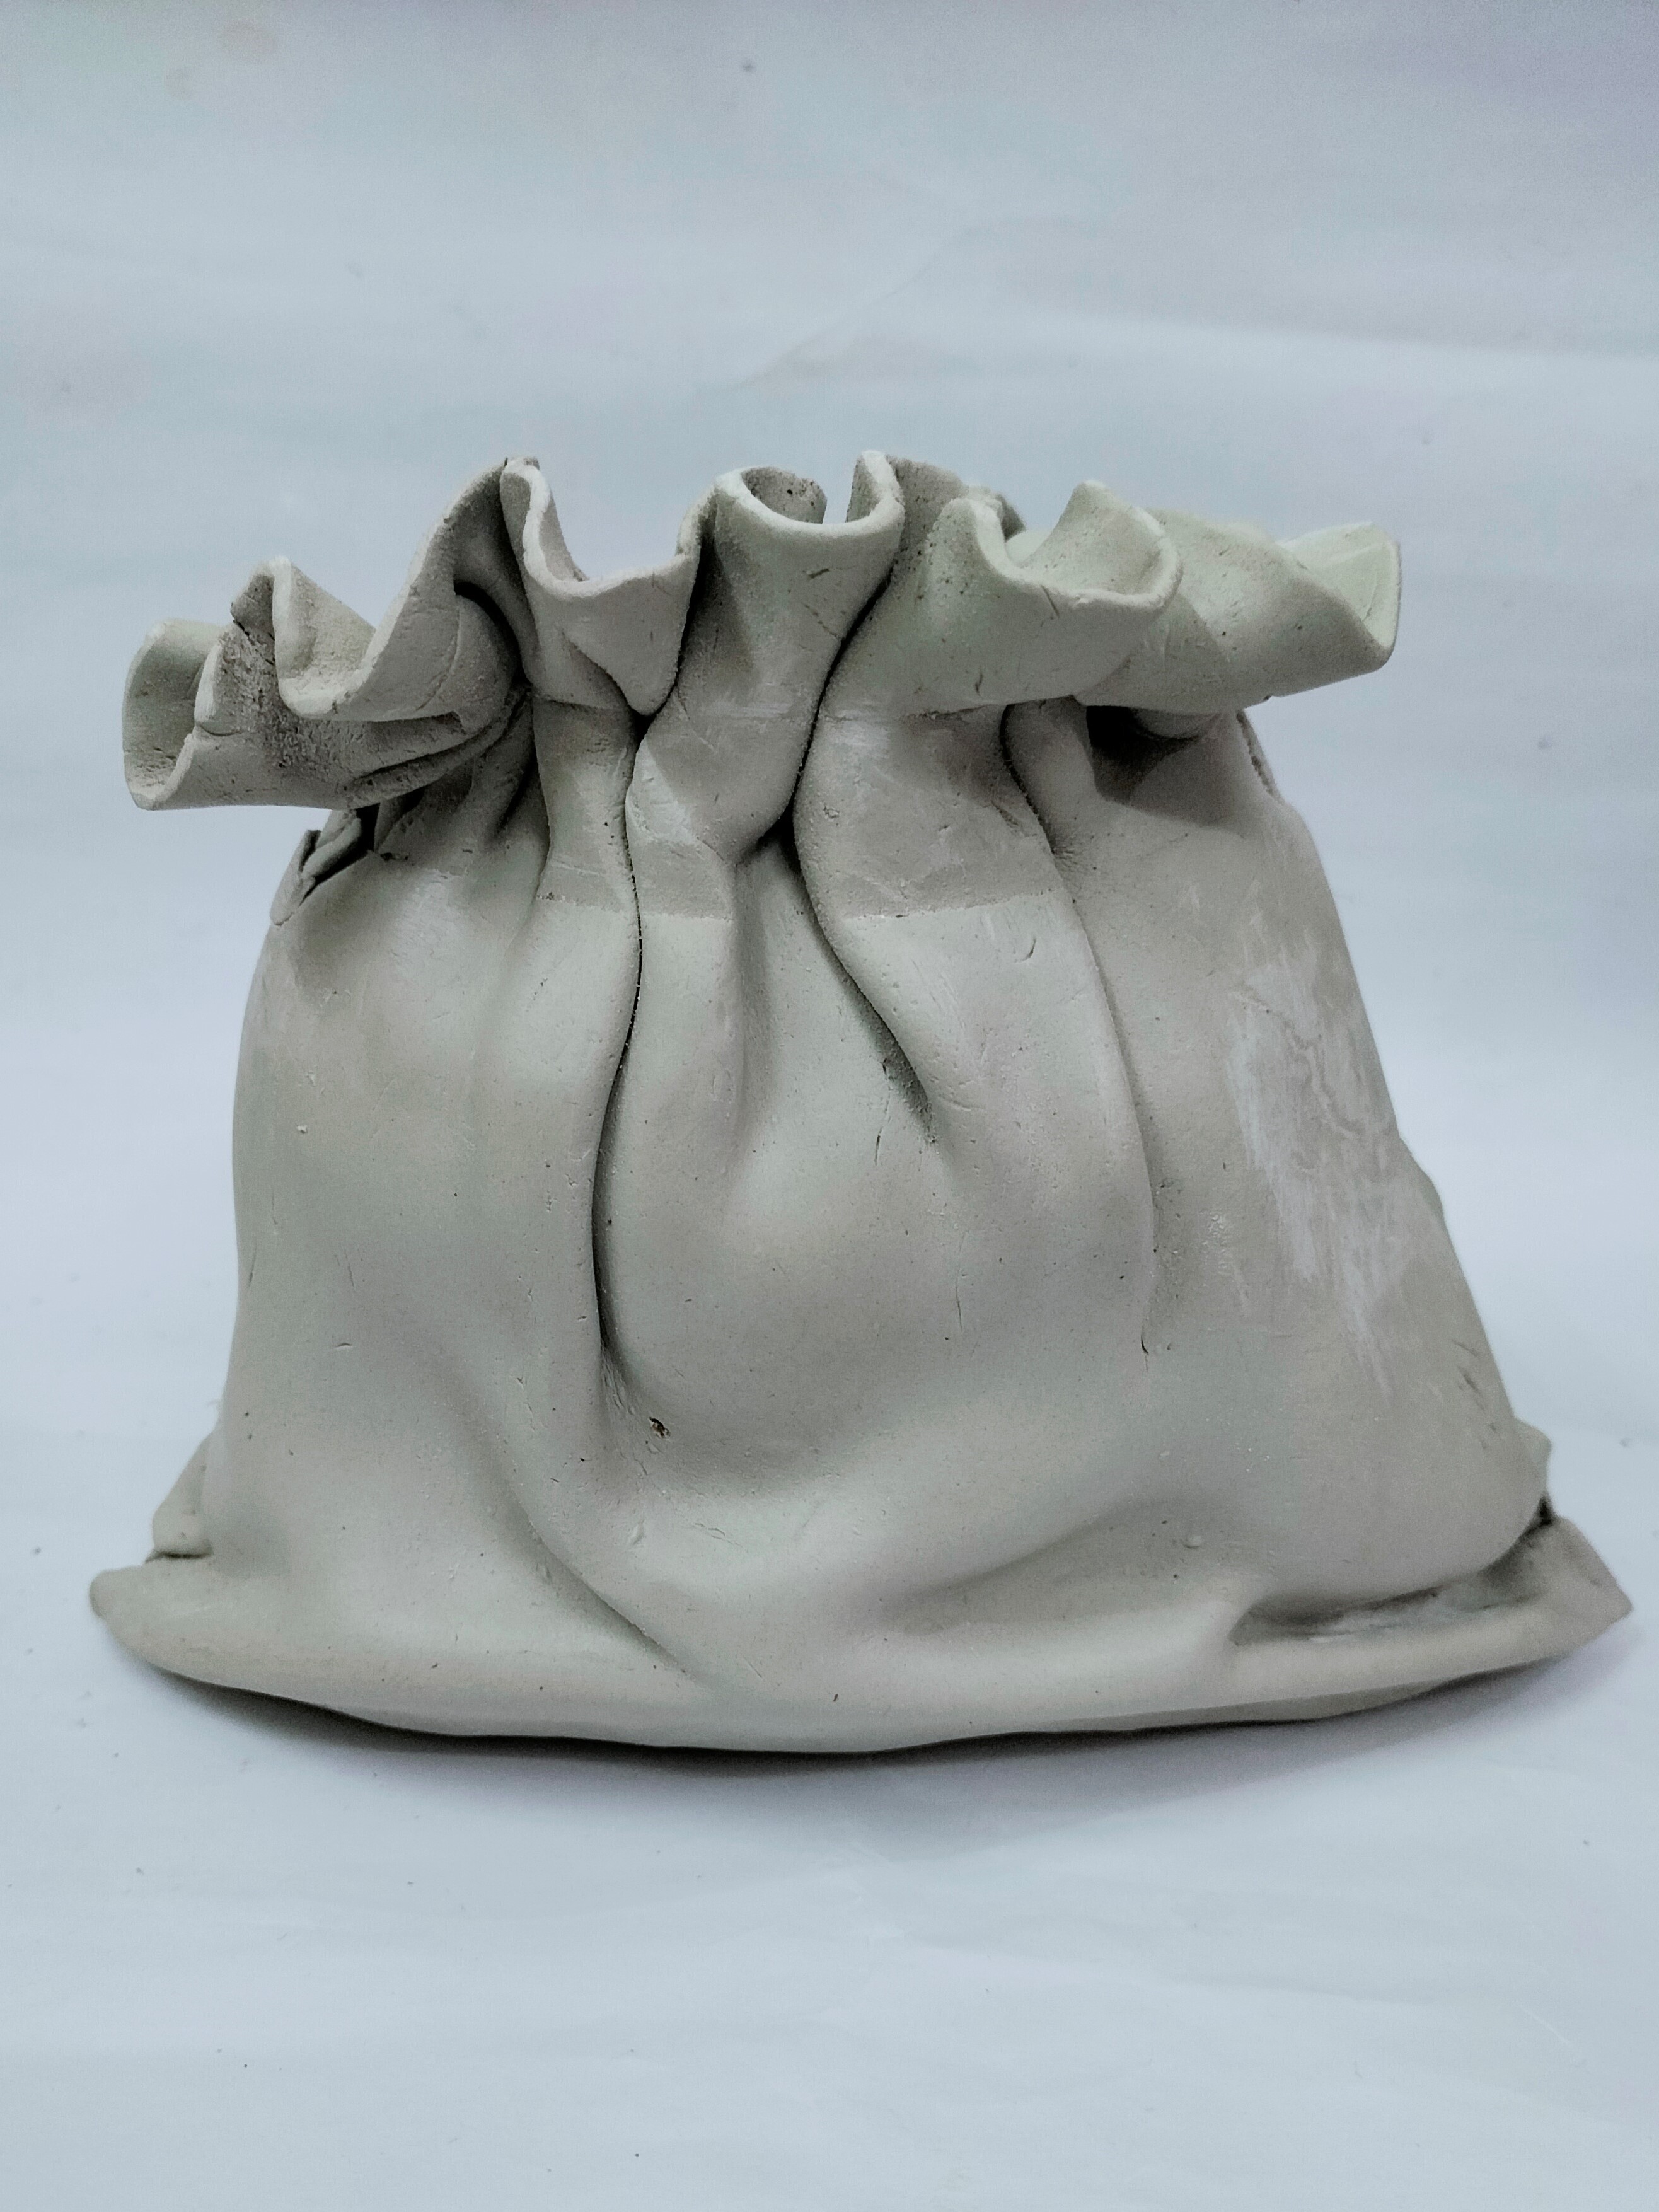
- Let the bag dry completely.
- Remove the plastic bag and the masking tape.
- You will get the shape of the clay bag
- Refer to the image.
STEP 6 : Make a flower
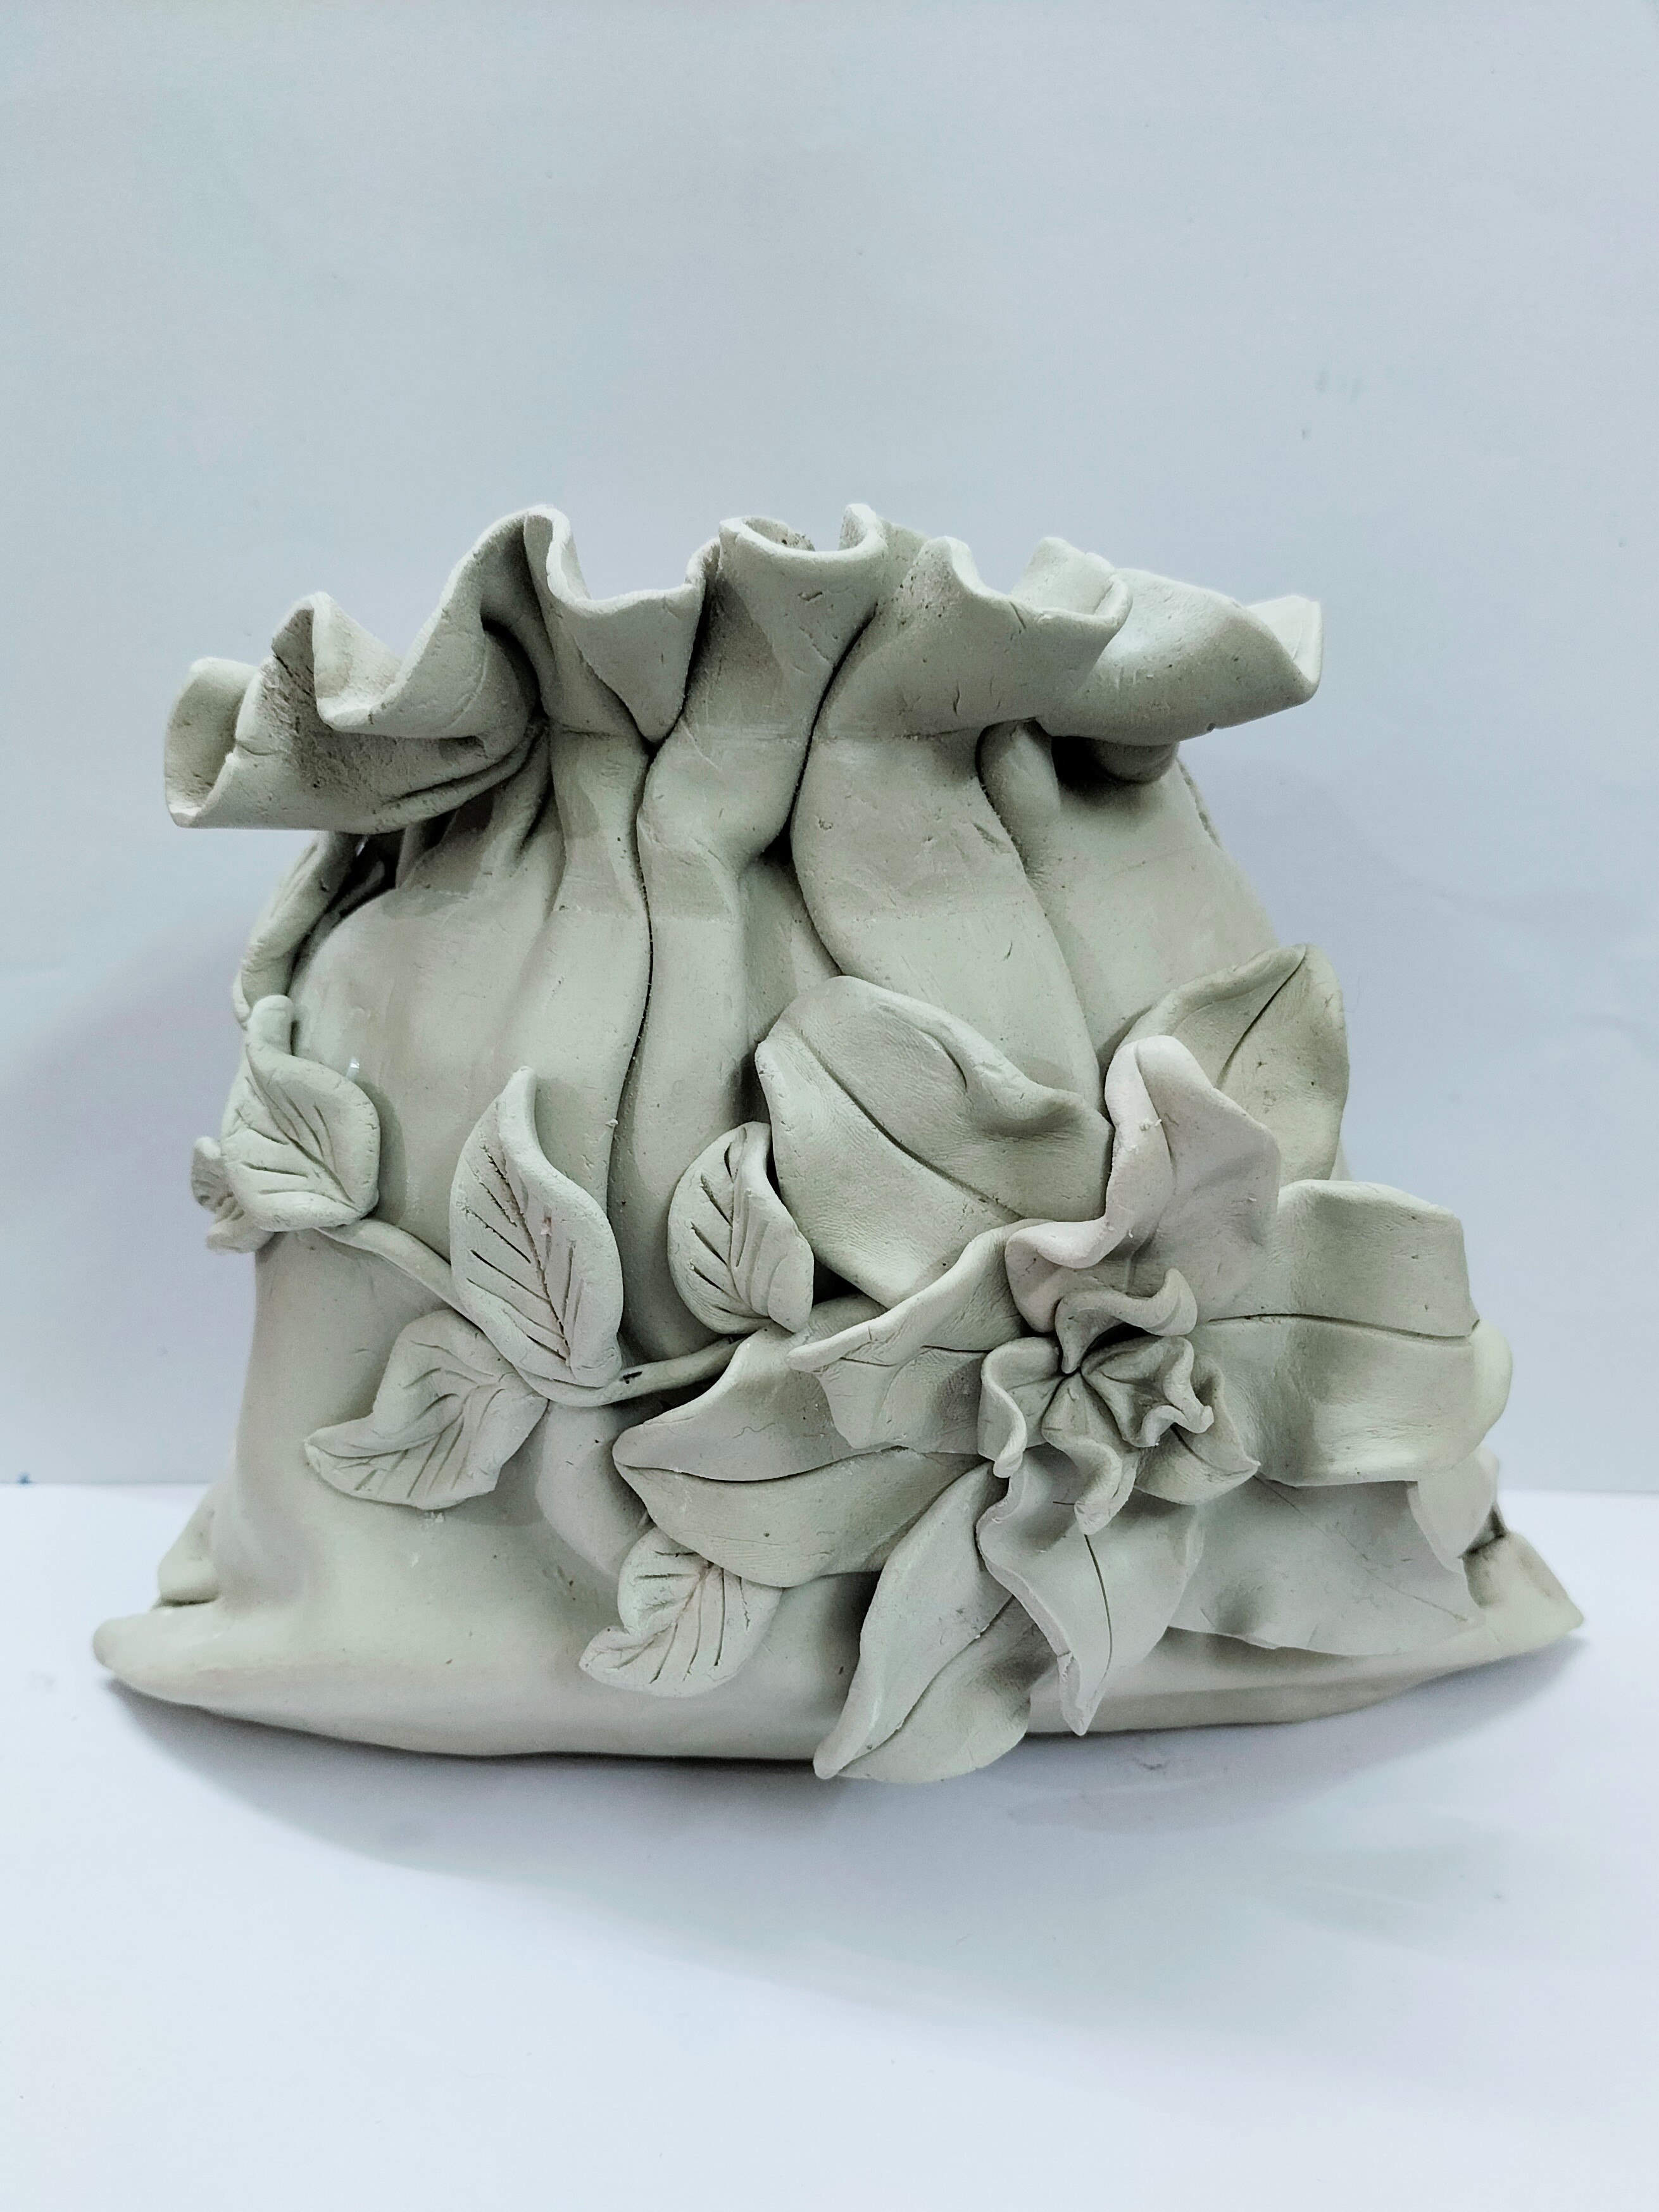
- Take some clay to make a big flower like lily with the leaves and creeper on it using clay carving tools and Fabric Glue for sticking.
- Let it dry completely.
STEP 7 : Finishing
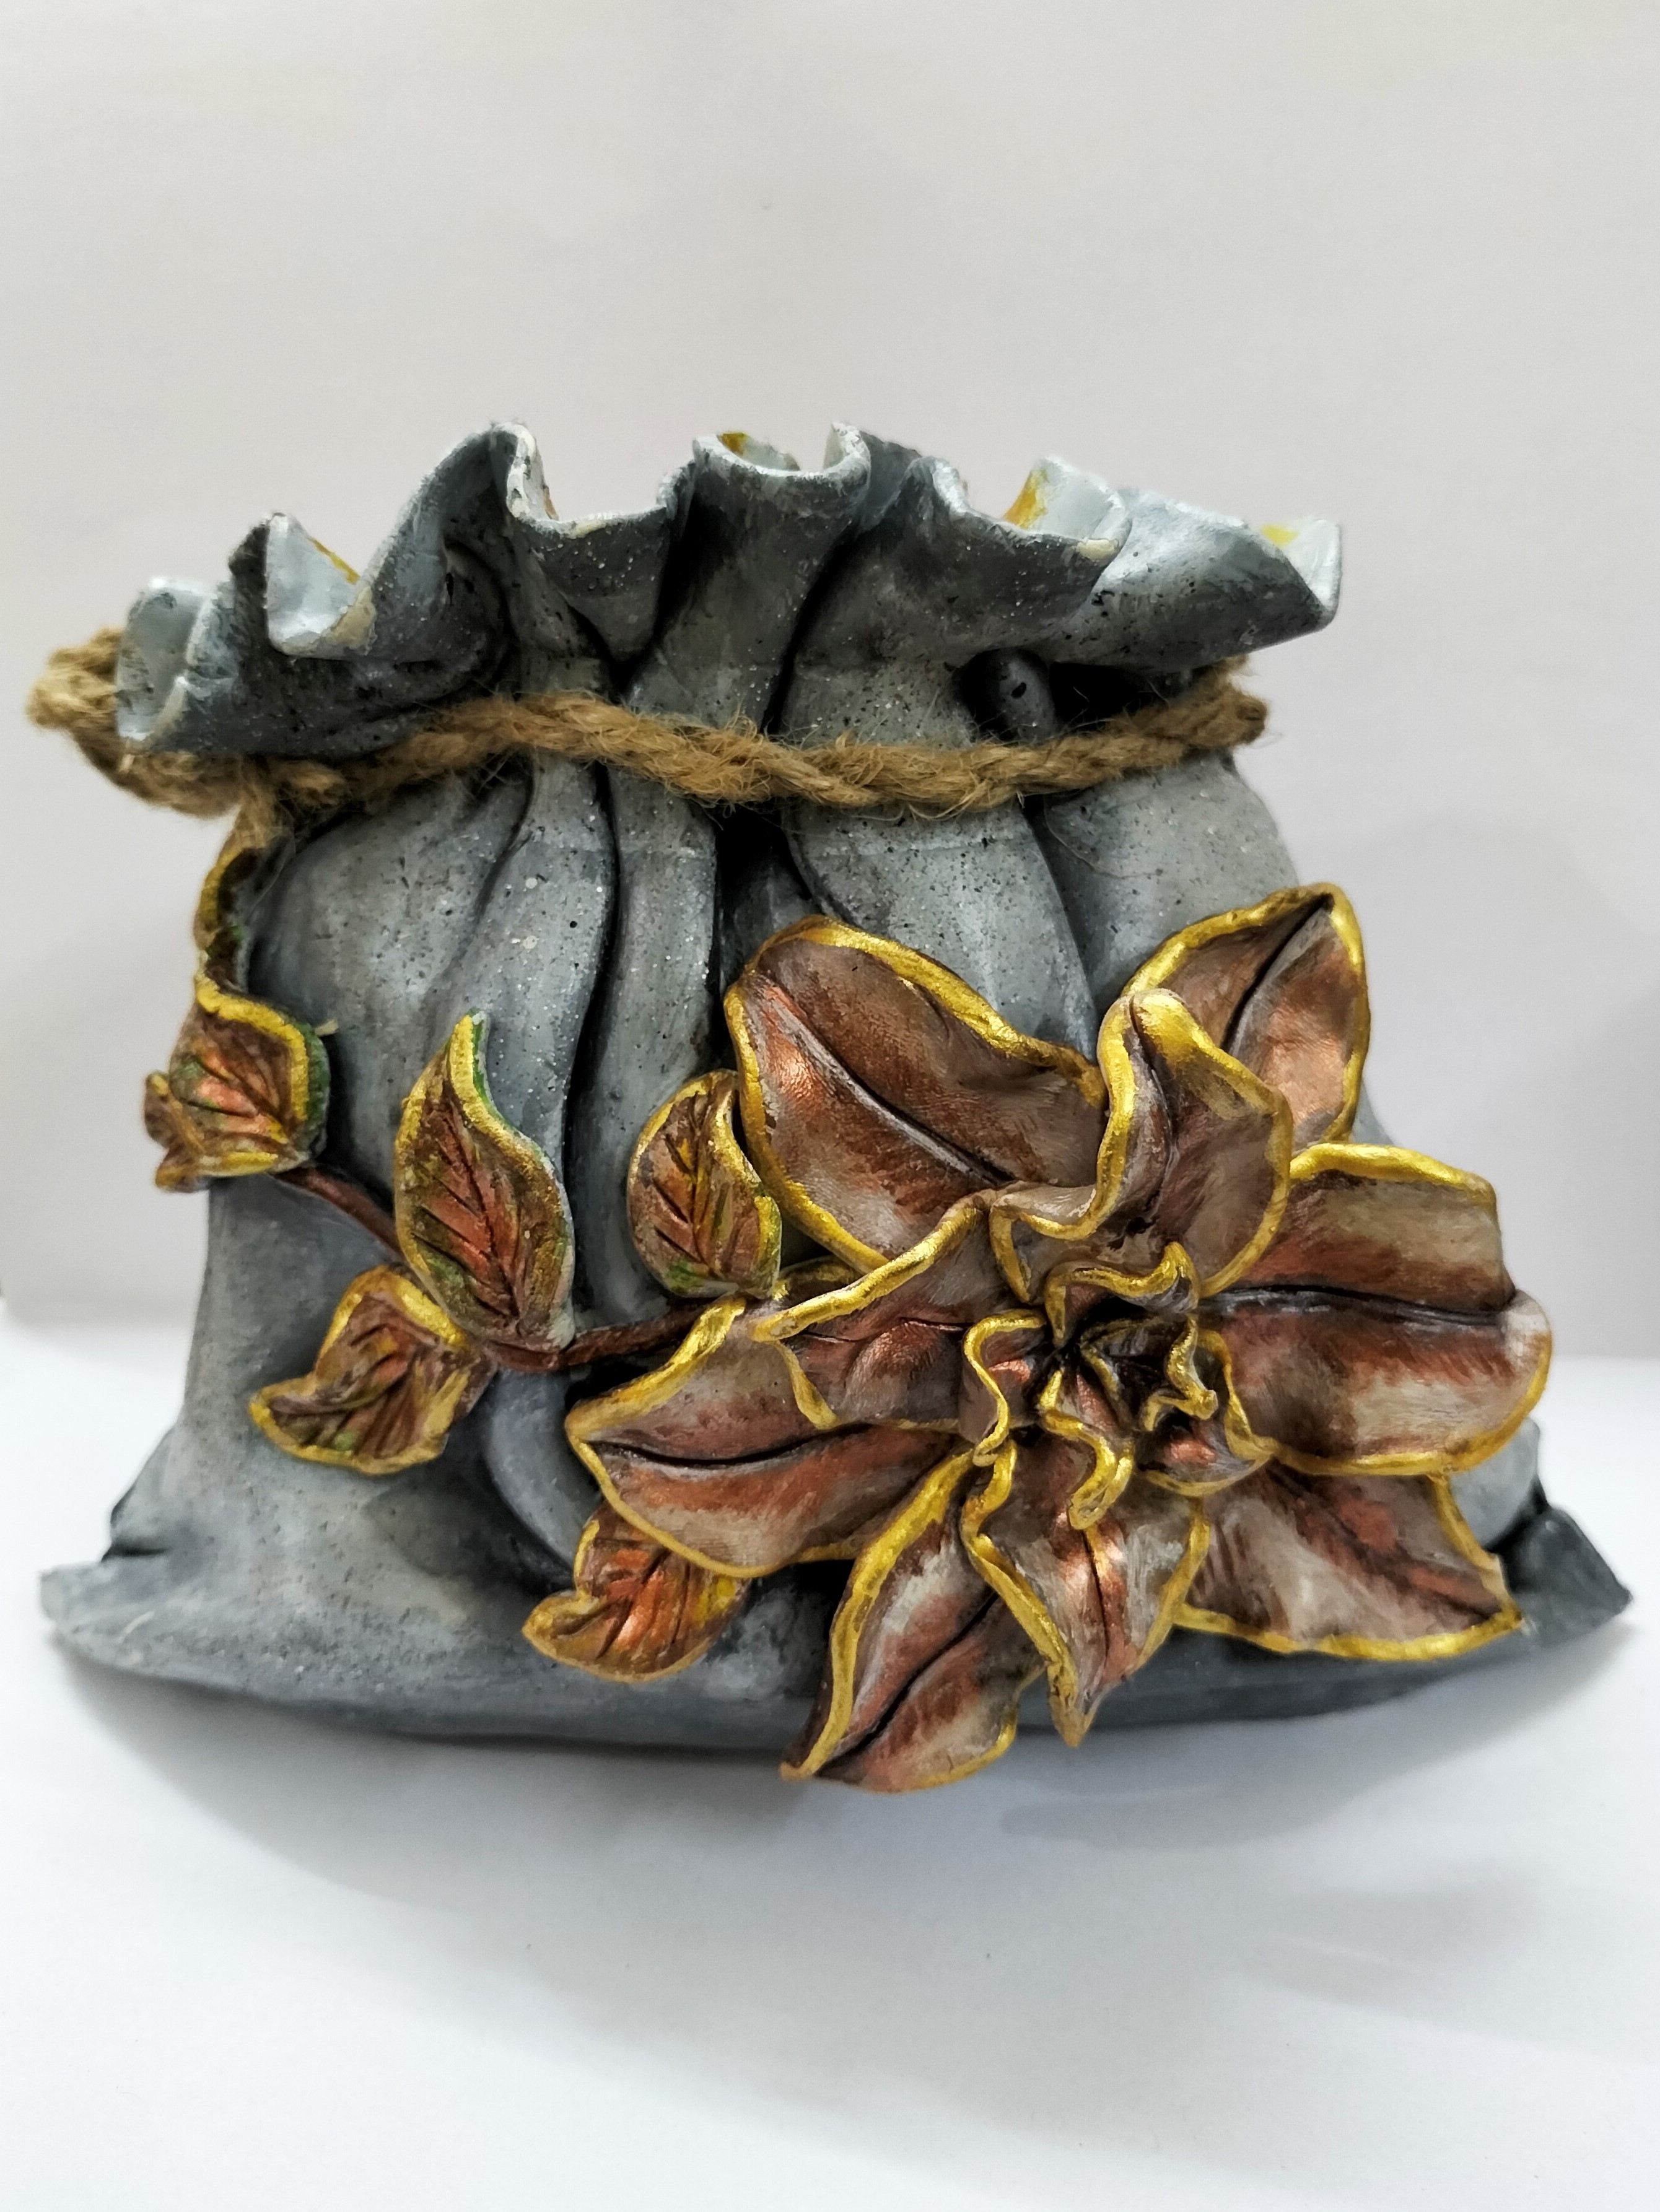
- Paint the bag, the flower and the creeper with Acrylic Colours Burnt Sienna 01, Black 02, Chrome Yellow 03, Dark Brown 05, Sap Green 21, White 27, Pearl Metallic Gold 352 and Bronze 355.
- Let it dry.
- Take jute yarn to make the cords for the bag towards the mouth.
- Refer to the image.
- Your planter holder is ready.


 +91 99676 55545