Ganesh Decoration With Peacock Theme
You Will Need:
Fevicryl Soft Acrylic Sparkling Pearl Colour – Dark Blue 904, Turquoise Blue 905, Violet 906, Golden Yellow 907, Emerald Green 908, Light Green 909, Fevicryl Soft Acrylic Colour – Maroon 214, Dark Green 206, Turquoise Blue 222, Mauve 215, Cerulean Blue 232, Ultramarine Blue2 23, Pink 218, Fevicryl Liquid Embroidery Cone Pearl - Green 304, Pearl Blue 305, Pearl Lilac 307, Pearl Metallic Gold 352, Fevicryl No Stitch Fabric Glue, Fevicol MR, Fine Art Painting Brush, Fevicryl Non Sticky Shilpkar, Fine Art Canvas Roll, Colour Palette
Description :
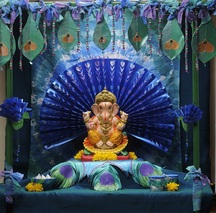
A beautiful Way to welcome Ganesha this season, with a peacock theme decor. These bright, shiny shades of greens and blues bring a cool, peaceful feeling to the whole set up. The material used are eco friendly and recyclable and makes it more special due to the personal touch in the process of creation.
STEP 1
Mix Shilpkar Resin Base and Hardener to form an even white dough.
Roll the dough with the rolling pin into a thin slab to make 7 peacock feathers
The smallest feather in the centre measures about 5” long with 3 feathers on either sides in growing sizes
Cut the peacock feathers
Bend the end of the feather to form a loop
Let them dry
Stick blue pear shaped beads towards the tip of the feather, strung in a wire and a little Shilpakar dough
Let it dry
Divide the feather into two parts vertically. Paint one part by mixing Sparkling Pearl Colour – Light Green and Dark Green and the other in Light Green and Turquoise Blue.
Let it dry
Mix Sparkling Pearl Colour – Golden Yellow and Maroon to paint the centre of the feather and leave it to dry
Add strokes of Liquid Embroidery - Pearl Blue, Pearl Green and Pearl Lilac to create the feather design and leave it dry
Outline the yellow section with Liquid Embroidery Pearl Metallic - Gold and stick the dark green pear shaped stone using No Stitch Fabric Glue. Let it dry
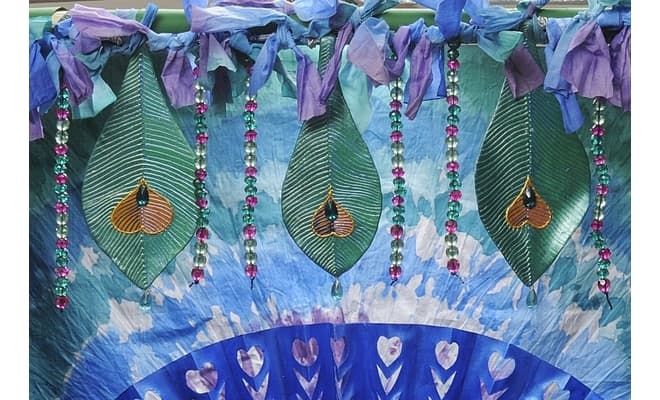
Cut strips measuring 2” x 7” from the fabric painted with horizontal tie and dye technique to make the knots and tie some beaded strings to further embellish the toran as shown in the picture.
STEP 2
Peacock Back Drop
Fold the thick white full imperial sized paper horizontally to give 14 to16 fanfolds to it for the peacock fan.
Fold the folded paper in the centre to form a bigger fan
Draw and cut the designs on each fold as shown in the picture
Stick the two edges of the paper towards the centre fold to make a fan
Paint it with sparkling Pearl Colour – Dark Blue and leave it to dry
STEP 3
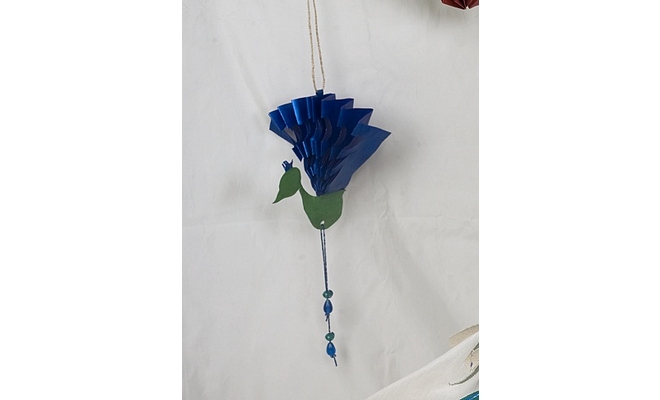
Peacock Dangler
To make the Peacock dangler draw the body of a peacock on a thick white card paper
Cut two pieces of the peacock shapes and paint using Fevicryl Sparkling Pearl Colour – Light Green. Let it dry.
Make the peacock fan as mentioned in the steps 1, 2, 3, 4 and 5 on the A4 sized paper
Sandwich the fan between the two peacock body parts
Punch a hole in the fan for a thread to hang the peacock and a hole at the base of the peacock body for a beaded thread as shown in the picture
To make the tie and dye fabric behind the peacock fan use Fevicryl Acrylic Colours - Dark Green, Turquoise Blue, Mauve, Cerulean Blue, Ultramarine Blue and Pink.
STEP 4
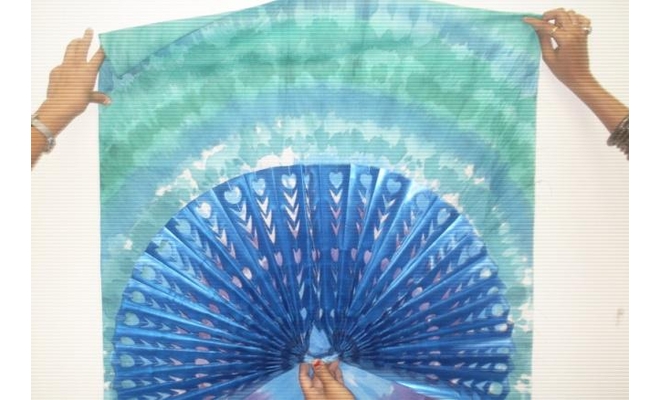
Peacock Feather Asana
Cut out a square measuring 28” x 28” from the fine art canvas roll
Fold the square diagonally from both the sides, press the crease properly and then open it to reveal the creases of the folds
Now fold it into half and then into a square and unfold it again to see the creases of the folds.
The canvas is now divided into 8 triangular sections.
Draw a peacock feather motif in one of the triangles and then trace it on the rest of the triangles.
STEP 5
Cut the extra canvas left on the top of the feathers
Divide the feathers into four different parts and paint it with Sparkling Pearl Colours – Dark Blue, Turquoise Blue, Violet, Emerald Green and Light Green as shown in the picture
Leave it dry.
Cut the upper part of the feather into fringes to make it look natural
Add streaks on feather using Fevicryl Liquid Embroidery - Pearl Blue and leave it dry
STEP 6
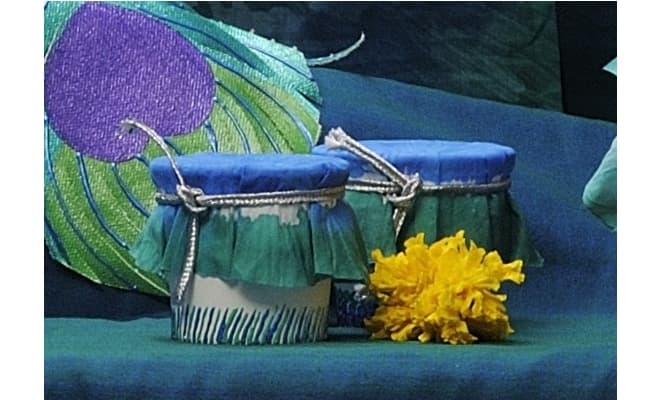
Cup for Prasad
Use the circular tie and dye technique for the cup covers
Take a circular piece of malmal cloth measuring 6” in diameter
Apply Fevicryl Acrylic Colour – Cerulean Blue, Dark Green throughout the fabric and let the colours merge.
Let it dry
Remove the threads and open the fabric
Draw diagonal strokes on the base of the paper cup with Liquid Embroidery - Pearl Green and Pearl Blue
You can also dip the ear buds into Fevicryl 3D Cone Outliner- Pearl Green, Pearl Blue and dab the same to make the designs
Cover the mouths of the cups using the fabric pieces and tie them using thick silver laces
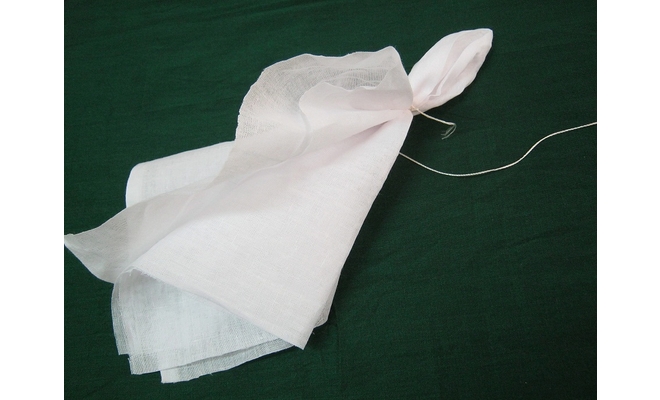
Method for Circular Tie and Dye Technique
STEP 7
Take a malmal fabric in the size you desire
Wet the malmal fabric thoroughly
Strain out the extra water and leave it to semi-dry
Fold it two times to form a square
Hold the centre of the fabric and tie threads at a distance of 1 and ½” throughout the fabric
Tie the threads tightly
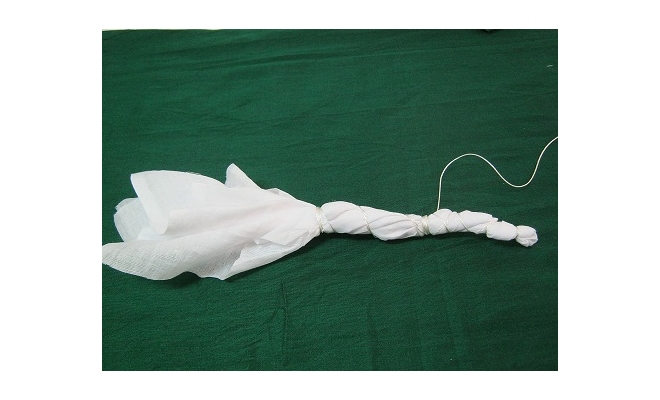
STEP 8
Continue tying it till you cover the full cloth with the thread
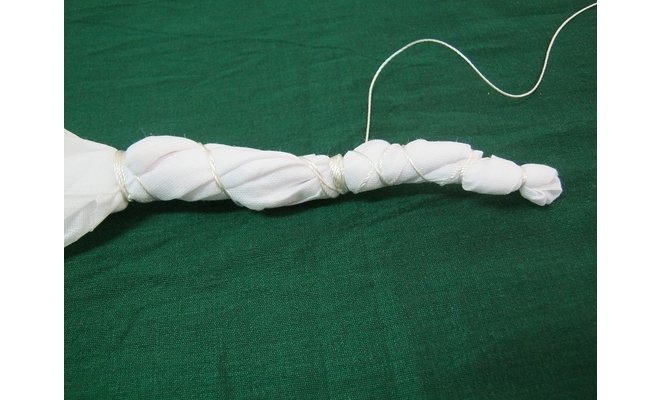
STEP 9
It will look like this when you finish tying it
STEP 10
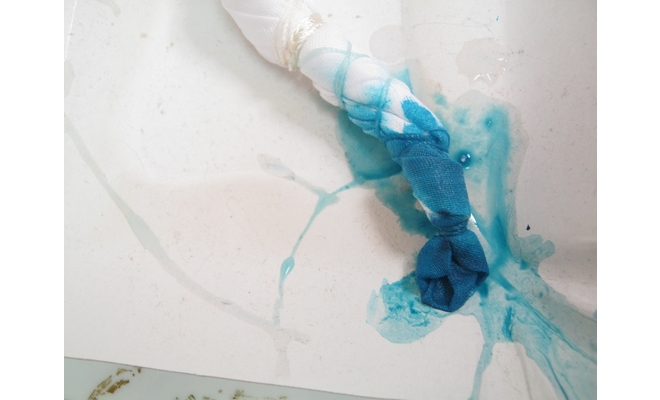
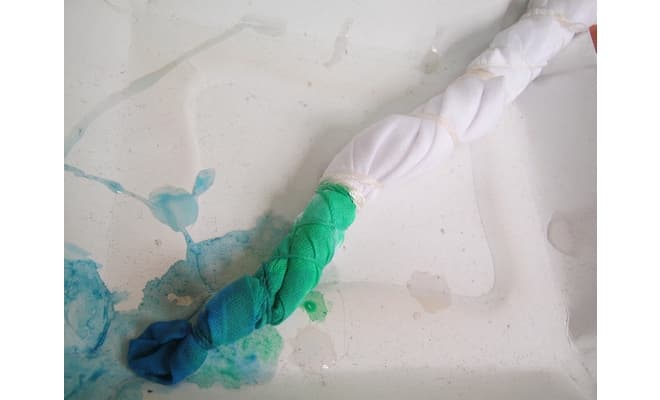
Apply Fevicryl Acrylic Colours on the fabric with a brush and let them merge
Let it semi dry
STEP 11
Cut out the threads and open the fabric and dry it completely


 +91 99676 55545