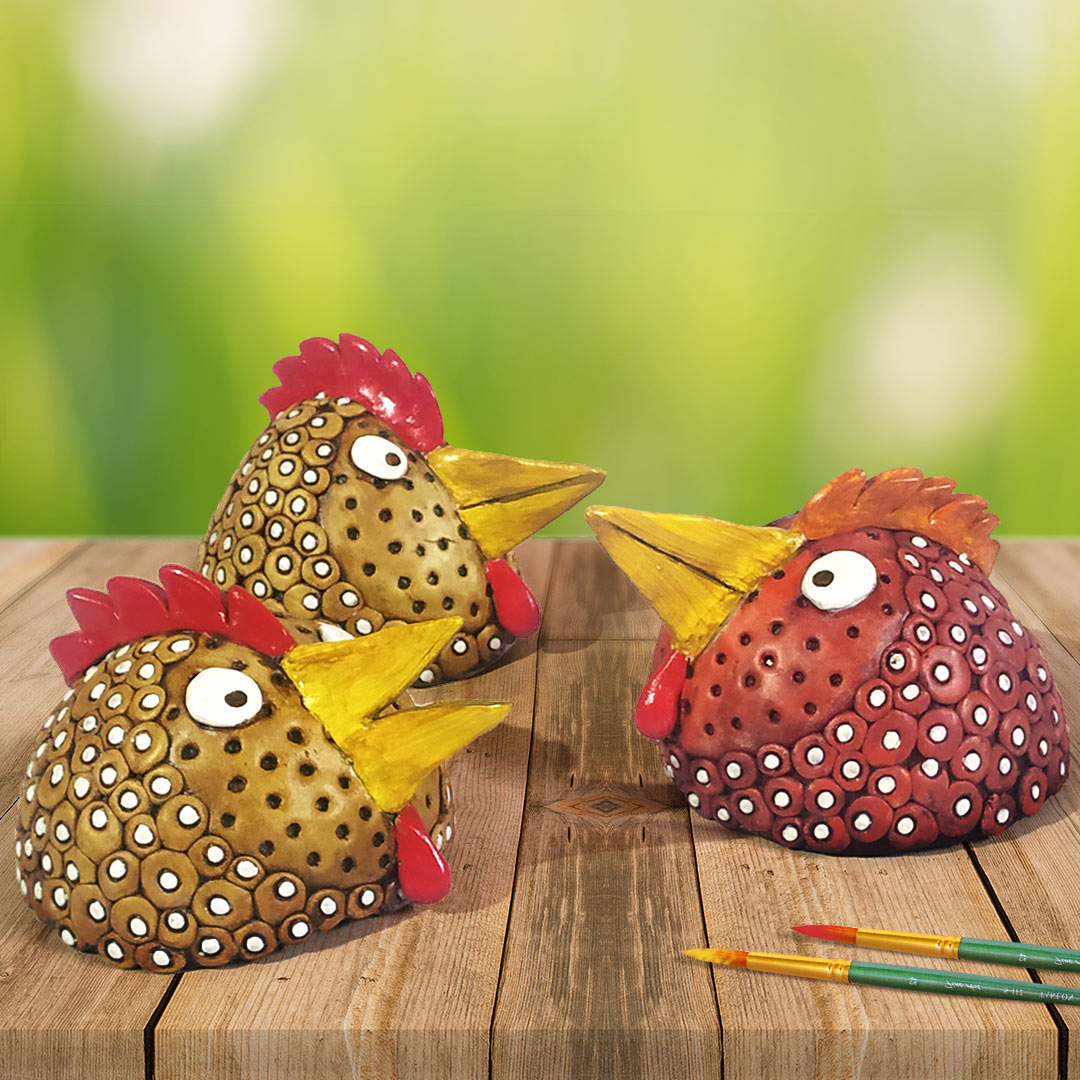
Coconut Shell Roosters
You Will Need:
Fevicryl Acrylic Colours Burnt Sienna 01, Black 02, Crimson 04, Orange 17, Yellow Ochre 26, White 27, Fevicryl Mouldit, Fevicryl Fabric Glue, Fine Art Brushes, Rolling Pin, Clay Carving Tools, Paper Cutter, Used Coconut Shells, Colour Palette, Water Container
Description :
Can you even imagine that these cute li’l roosters have been made using coconut shell? With a bit of imagination and Fevicryl Mouldit create eclectic décor pieces for your space.
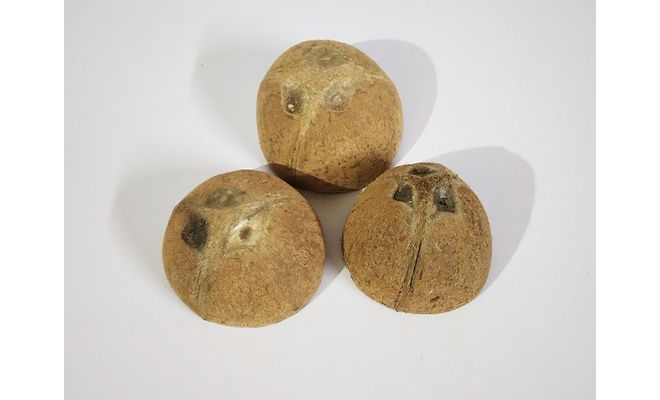
• We are going to make roosters with Mouldit using coconut shell. • Take a few coconut shells. • Rub the surface with polish paper. • Refer to the image.
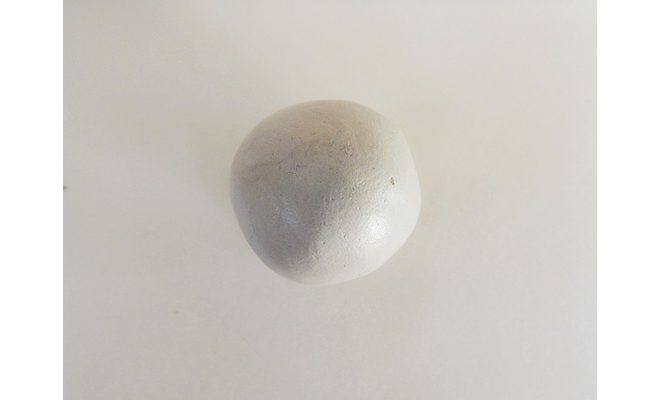
• We are going to build the structure of the rooster’s head on the shell with Mouldit. • Take Mouldit resin base and hardener; mix it thoroughly to make even dough.
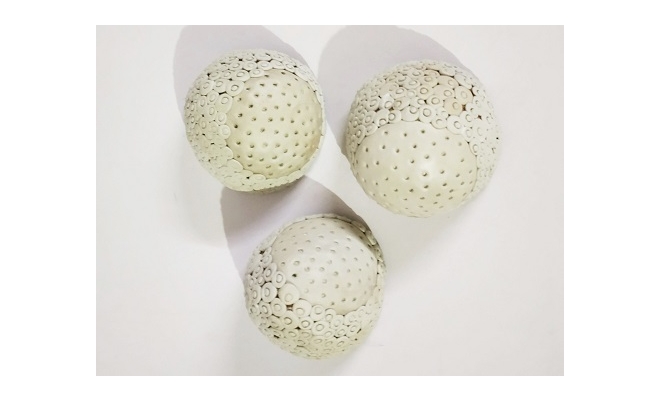
• Take the dough, roll it to make a medium thick slab with a rolling pin. • Cover the shells with the slab using Fabric Glue. • Take some dough to make the small flat round shapes to depict the feathers. • Stick small flat circles on the ¾ area on the covered shell using Fabric Glue. • Let it dry. • Create dotted texture on the rest of the area on the shell with a tooth pick as well as the texture with refill on small fat circles. • Refer to the image.
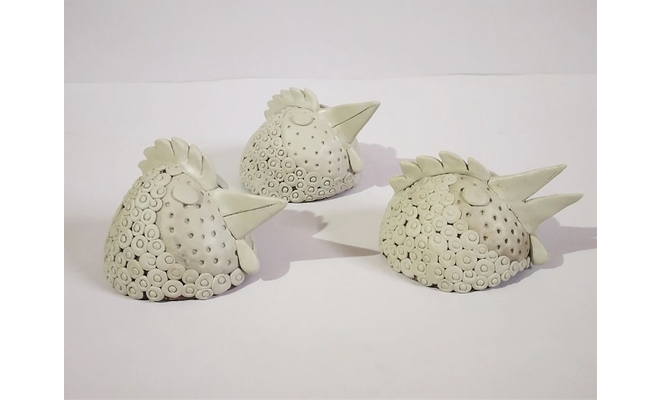
• Take some dough to make the comb (crown of the rooster called), the beak and the wattles with clay by sticking it using Fabric Glue. • Leave it to dry completely.

• Paint the rooster with little earthy colours in rustic manner using Acrylic Colours Burnt Sienna 01, Black 02, Crimson 04, Orange 17, Yellow Ochre 26 and White 27. • Let it dry completely. • Your rooster head will look like this.


 +91 99676 55545