Anchoring


You Will Need:
Fevicryl Acrylic Colours Burnt Sienna 01, Black 02, White 27, Sky Blue 63, Teal Blue 68, Fevicryl Mouldit, Fevicryl Fabric Glue, Fine Art Brushes, Earring Attachments, Clay Carving Tools, Silver Chain, Cobbler Thread, Colour Palette, Water Container
Product Used:


Description :
Create unique boat and anchor earrings using Mouldit and Acrylic Colours, adding a nautical touch to your accessory collection. This project combines clay crafting with painting and jewelry-making techniques for a stylish and personalized look.
STEP 1 : Prepare the Clay and Make Shapes

- Create earrings resembling boats and anchors using Mouldit resin base and hardener.
- Mix the two components to form an even dough and shape it into a boat.
STEP 2 : Make the mast
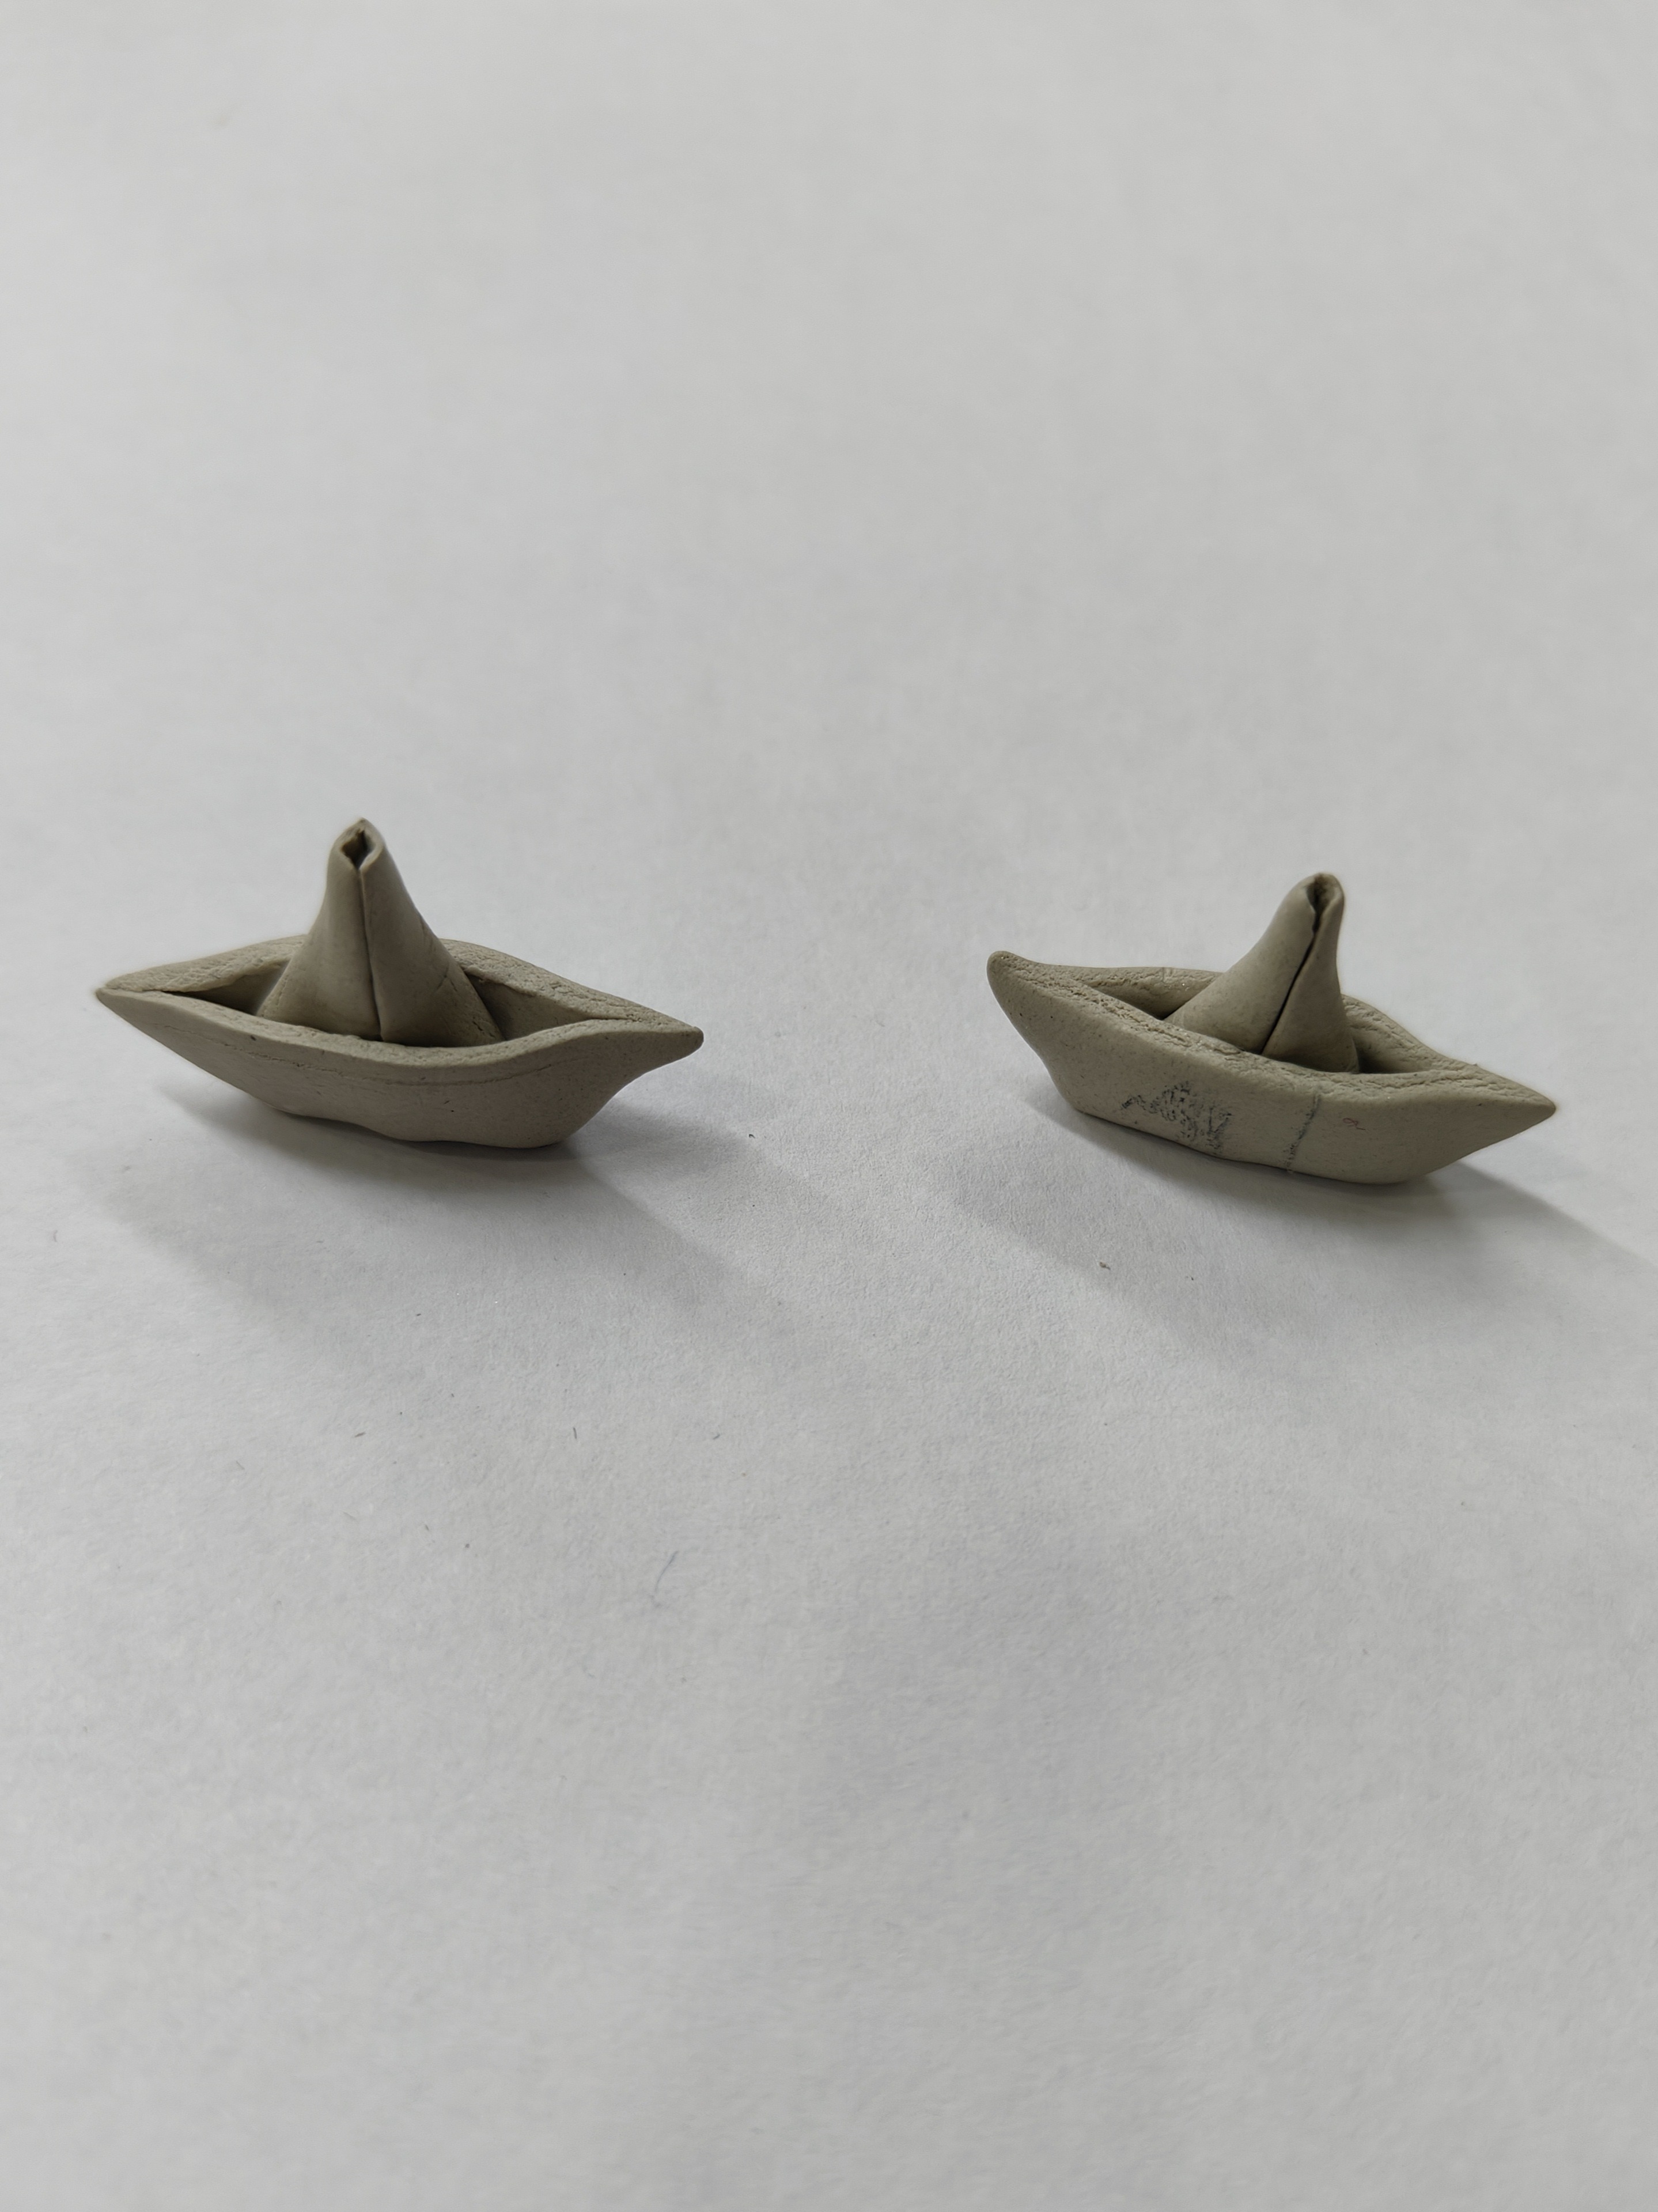
- Shape some clay to create the mast of the boat and attach it inside the boat using Fabric Glue.
- Pierce a hole at the base of the boat for later attachment. Let it dry.
STEP 3 : Build the Anchor Shape
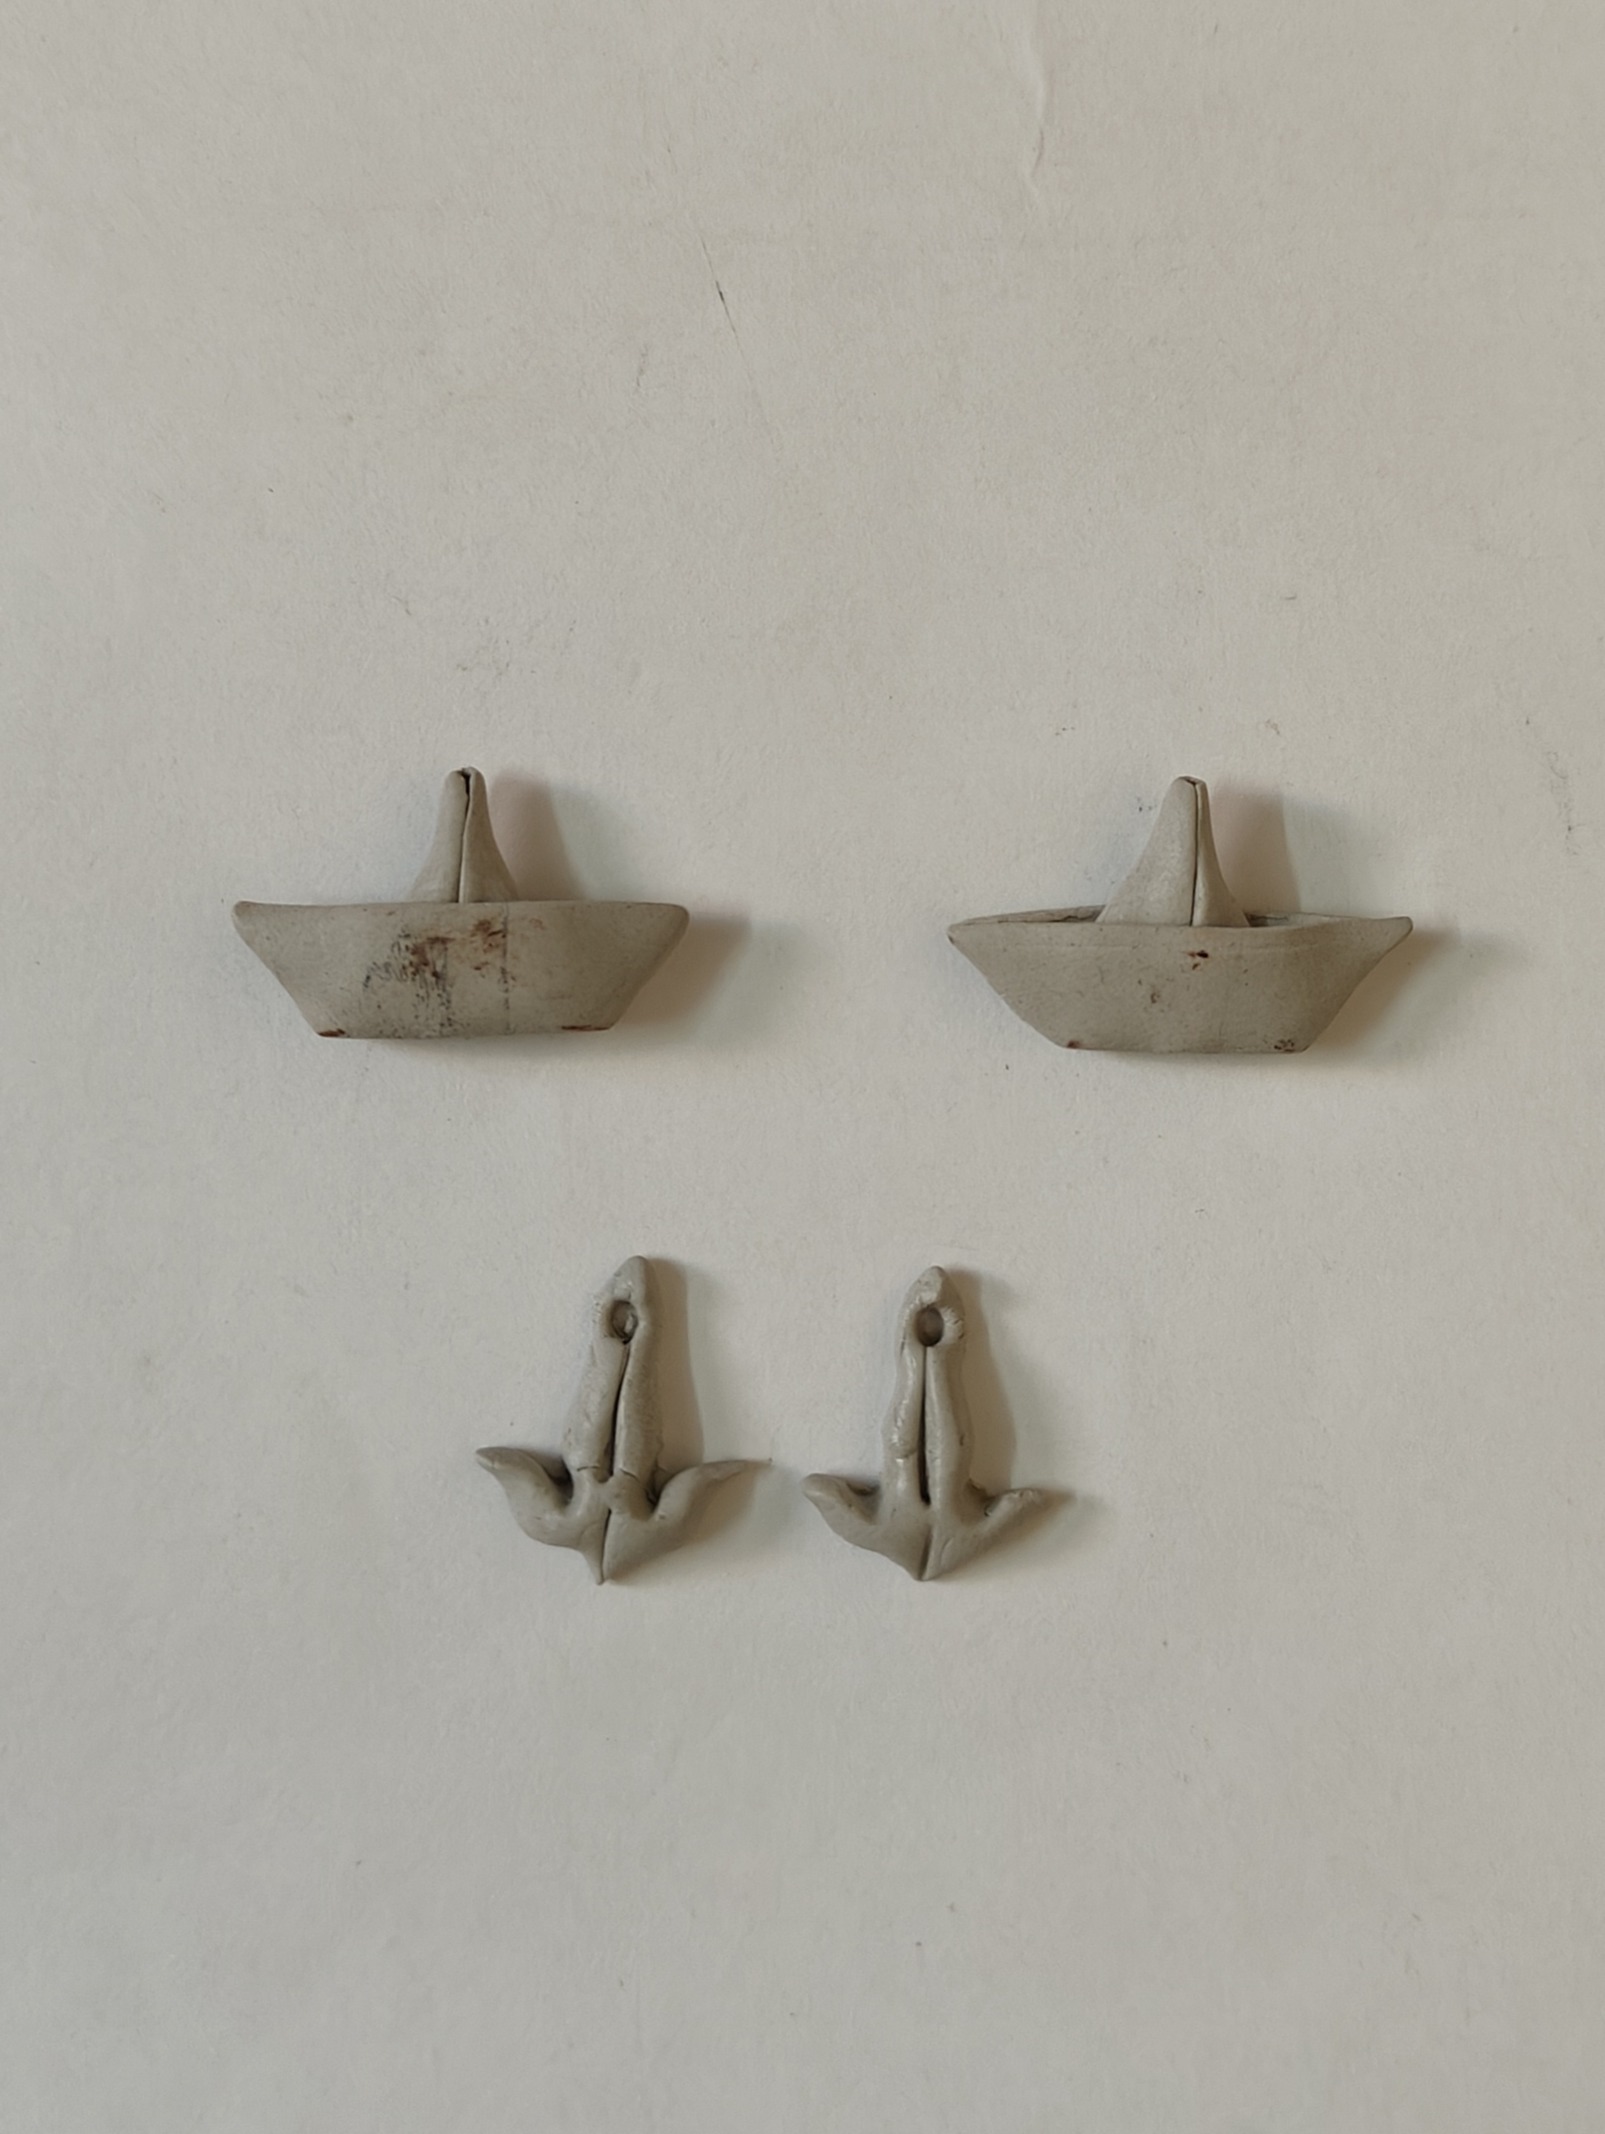
- Shape clay into an anchor using clay carving tools and a small amount of Fabric Glue.
- Allow it to dry.
STEP 4 : Paint the Boat and Anchor

- Paint both the boat and the anchor using Fevicryl Acrylic Colours Burnt Sienna 01, Black 02, White 27, Sky Blue 63, and Teal Blue 68. Let the paint dry.
STEP 5 : Prepare the Attachments
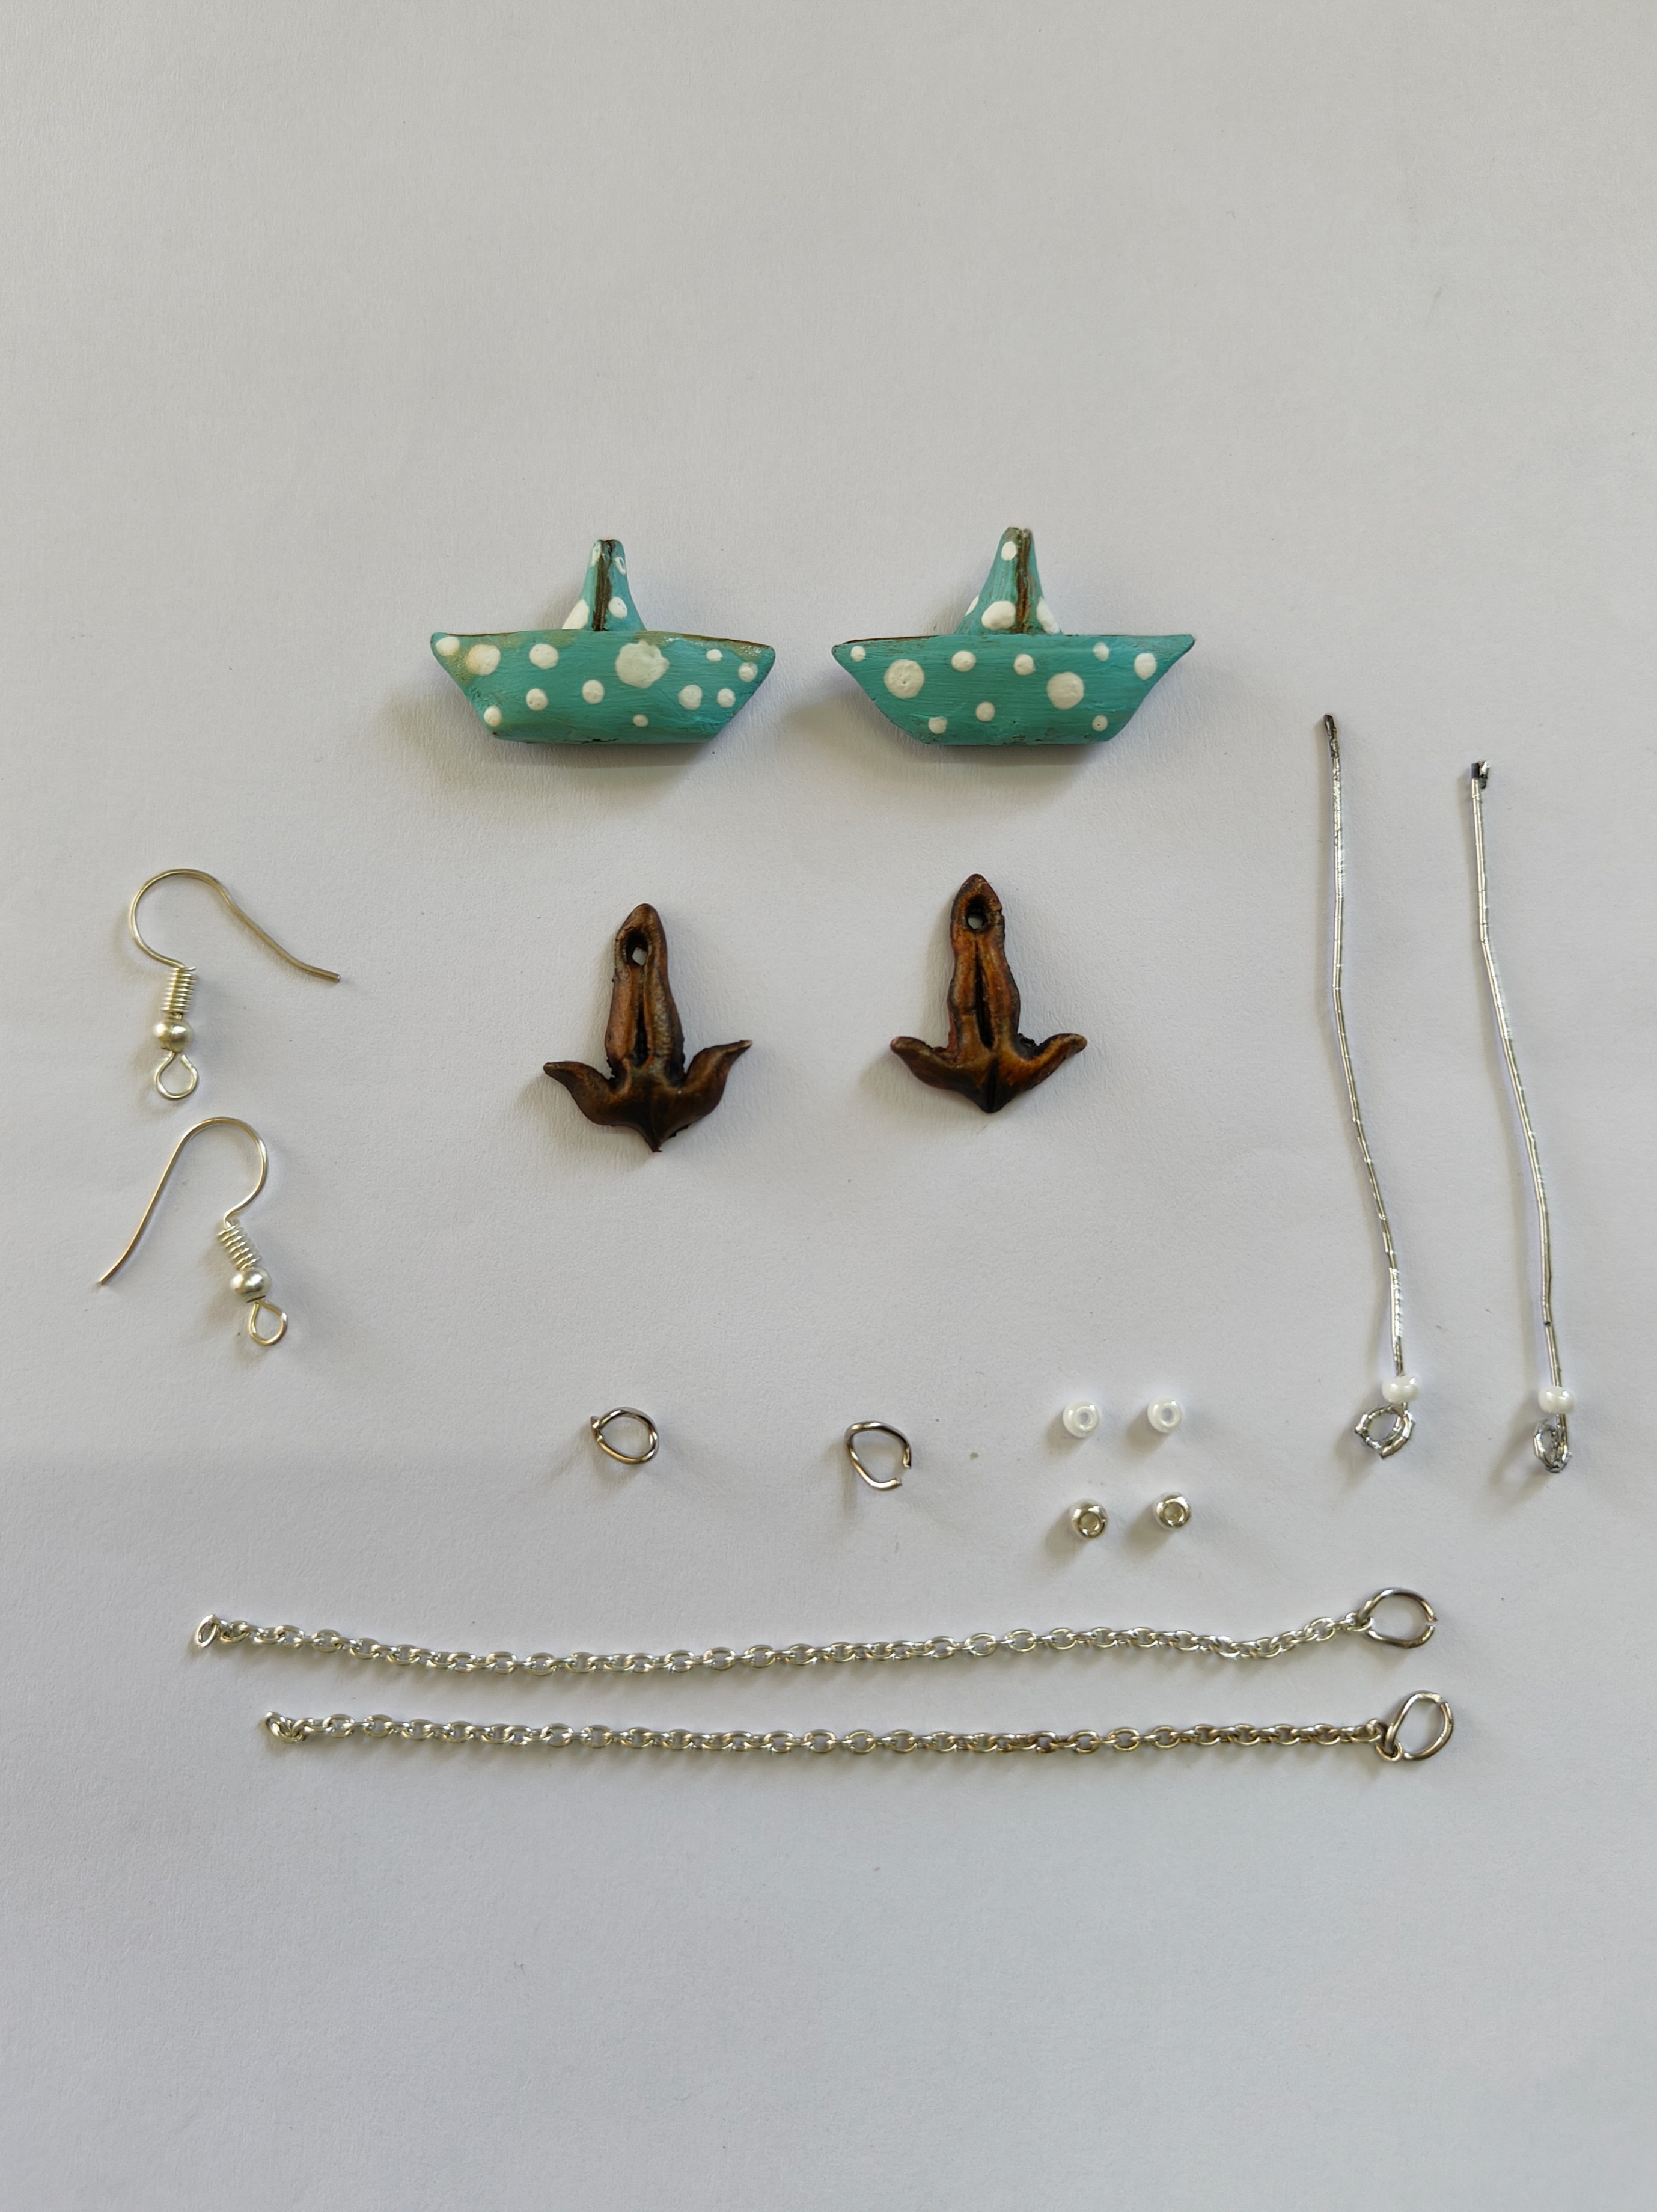
- Gather earring attachments such as hooks, metal wire, pearls, and silver chain to complete the earrings.
STEP 6 : Finishing Touches for the Attachments
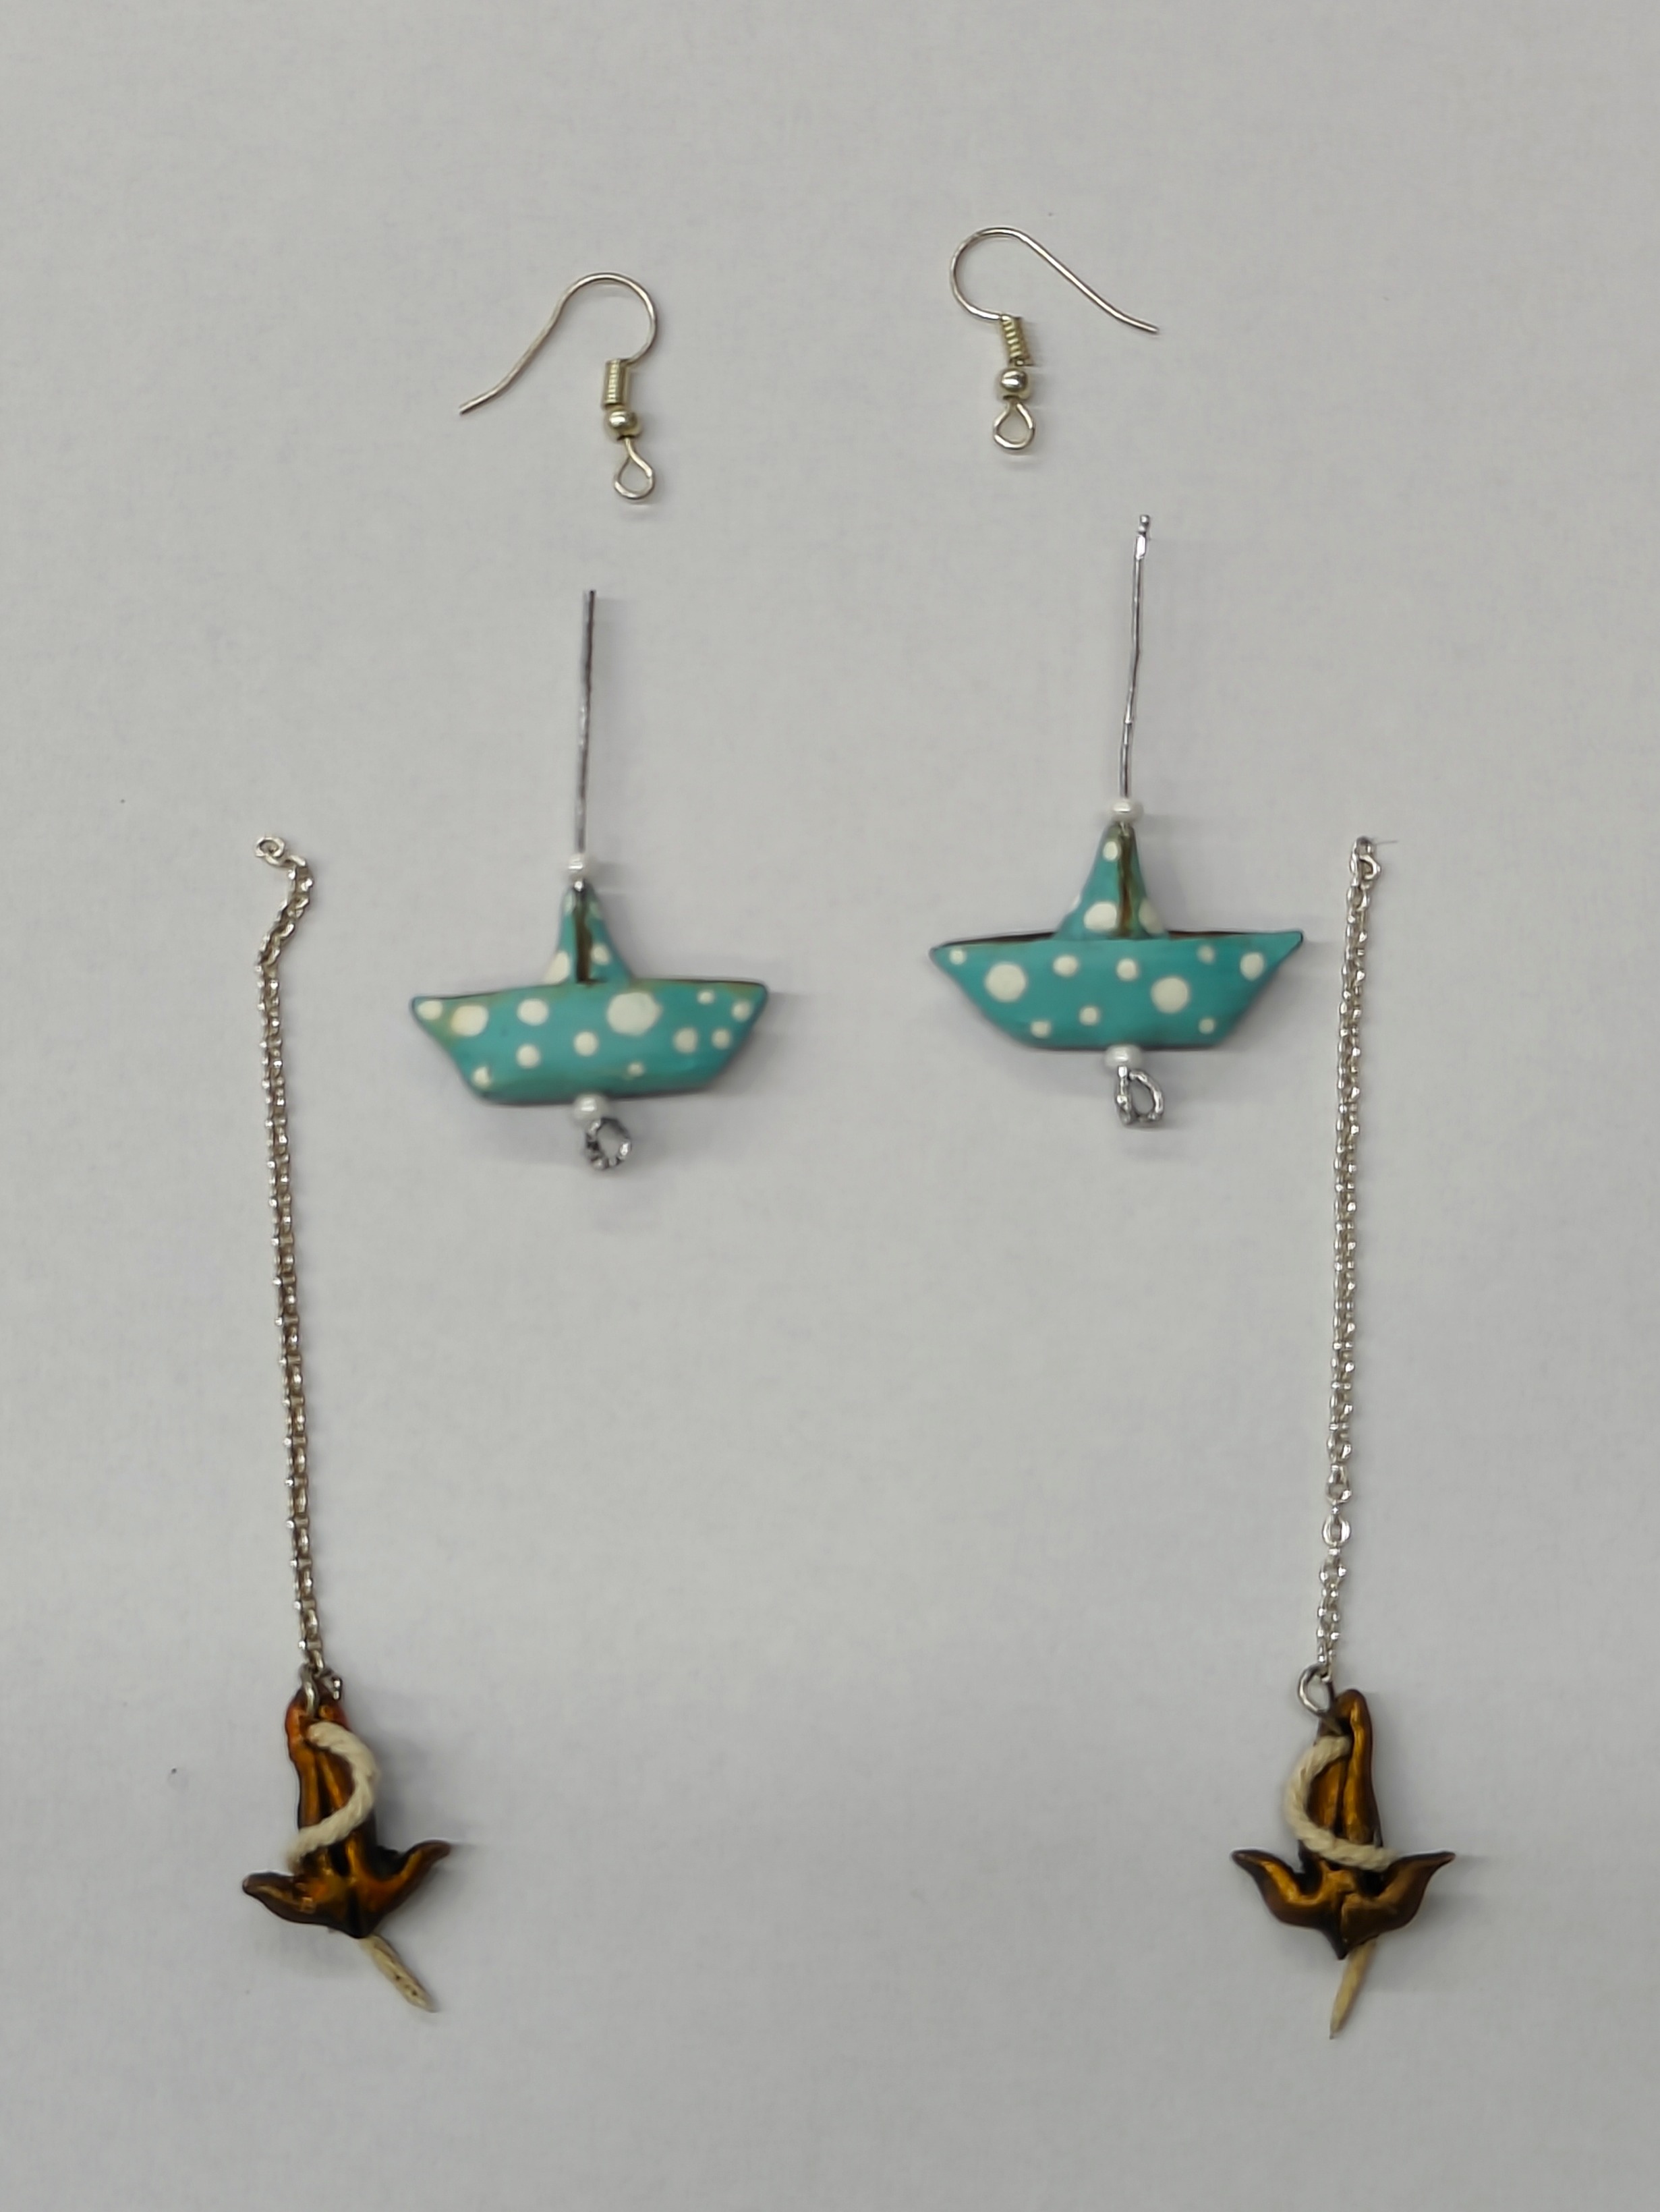
- Thread the metal wire with a pearl through the mast of the boat to the base, securing the pearl with a loop.
- Attach the metal chain to the anchor.
- Use thread to depict the anchor's rope by adhering it to the anchor with Fabric Glue. Let it dry.
STEP 7 : Final look
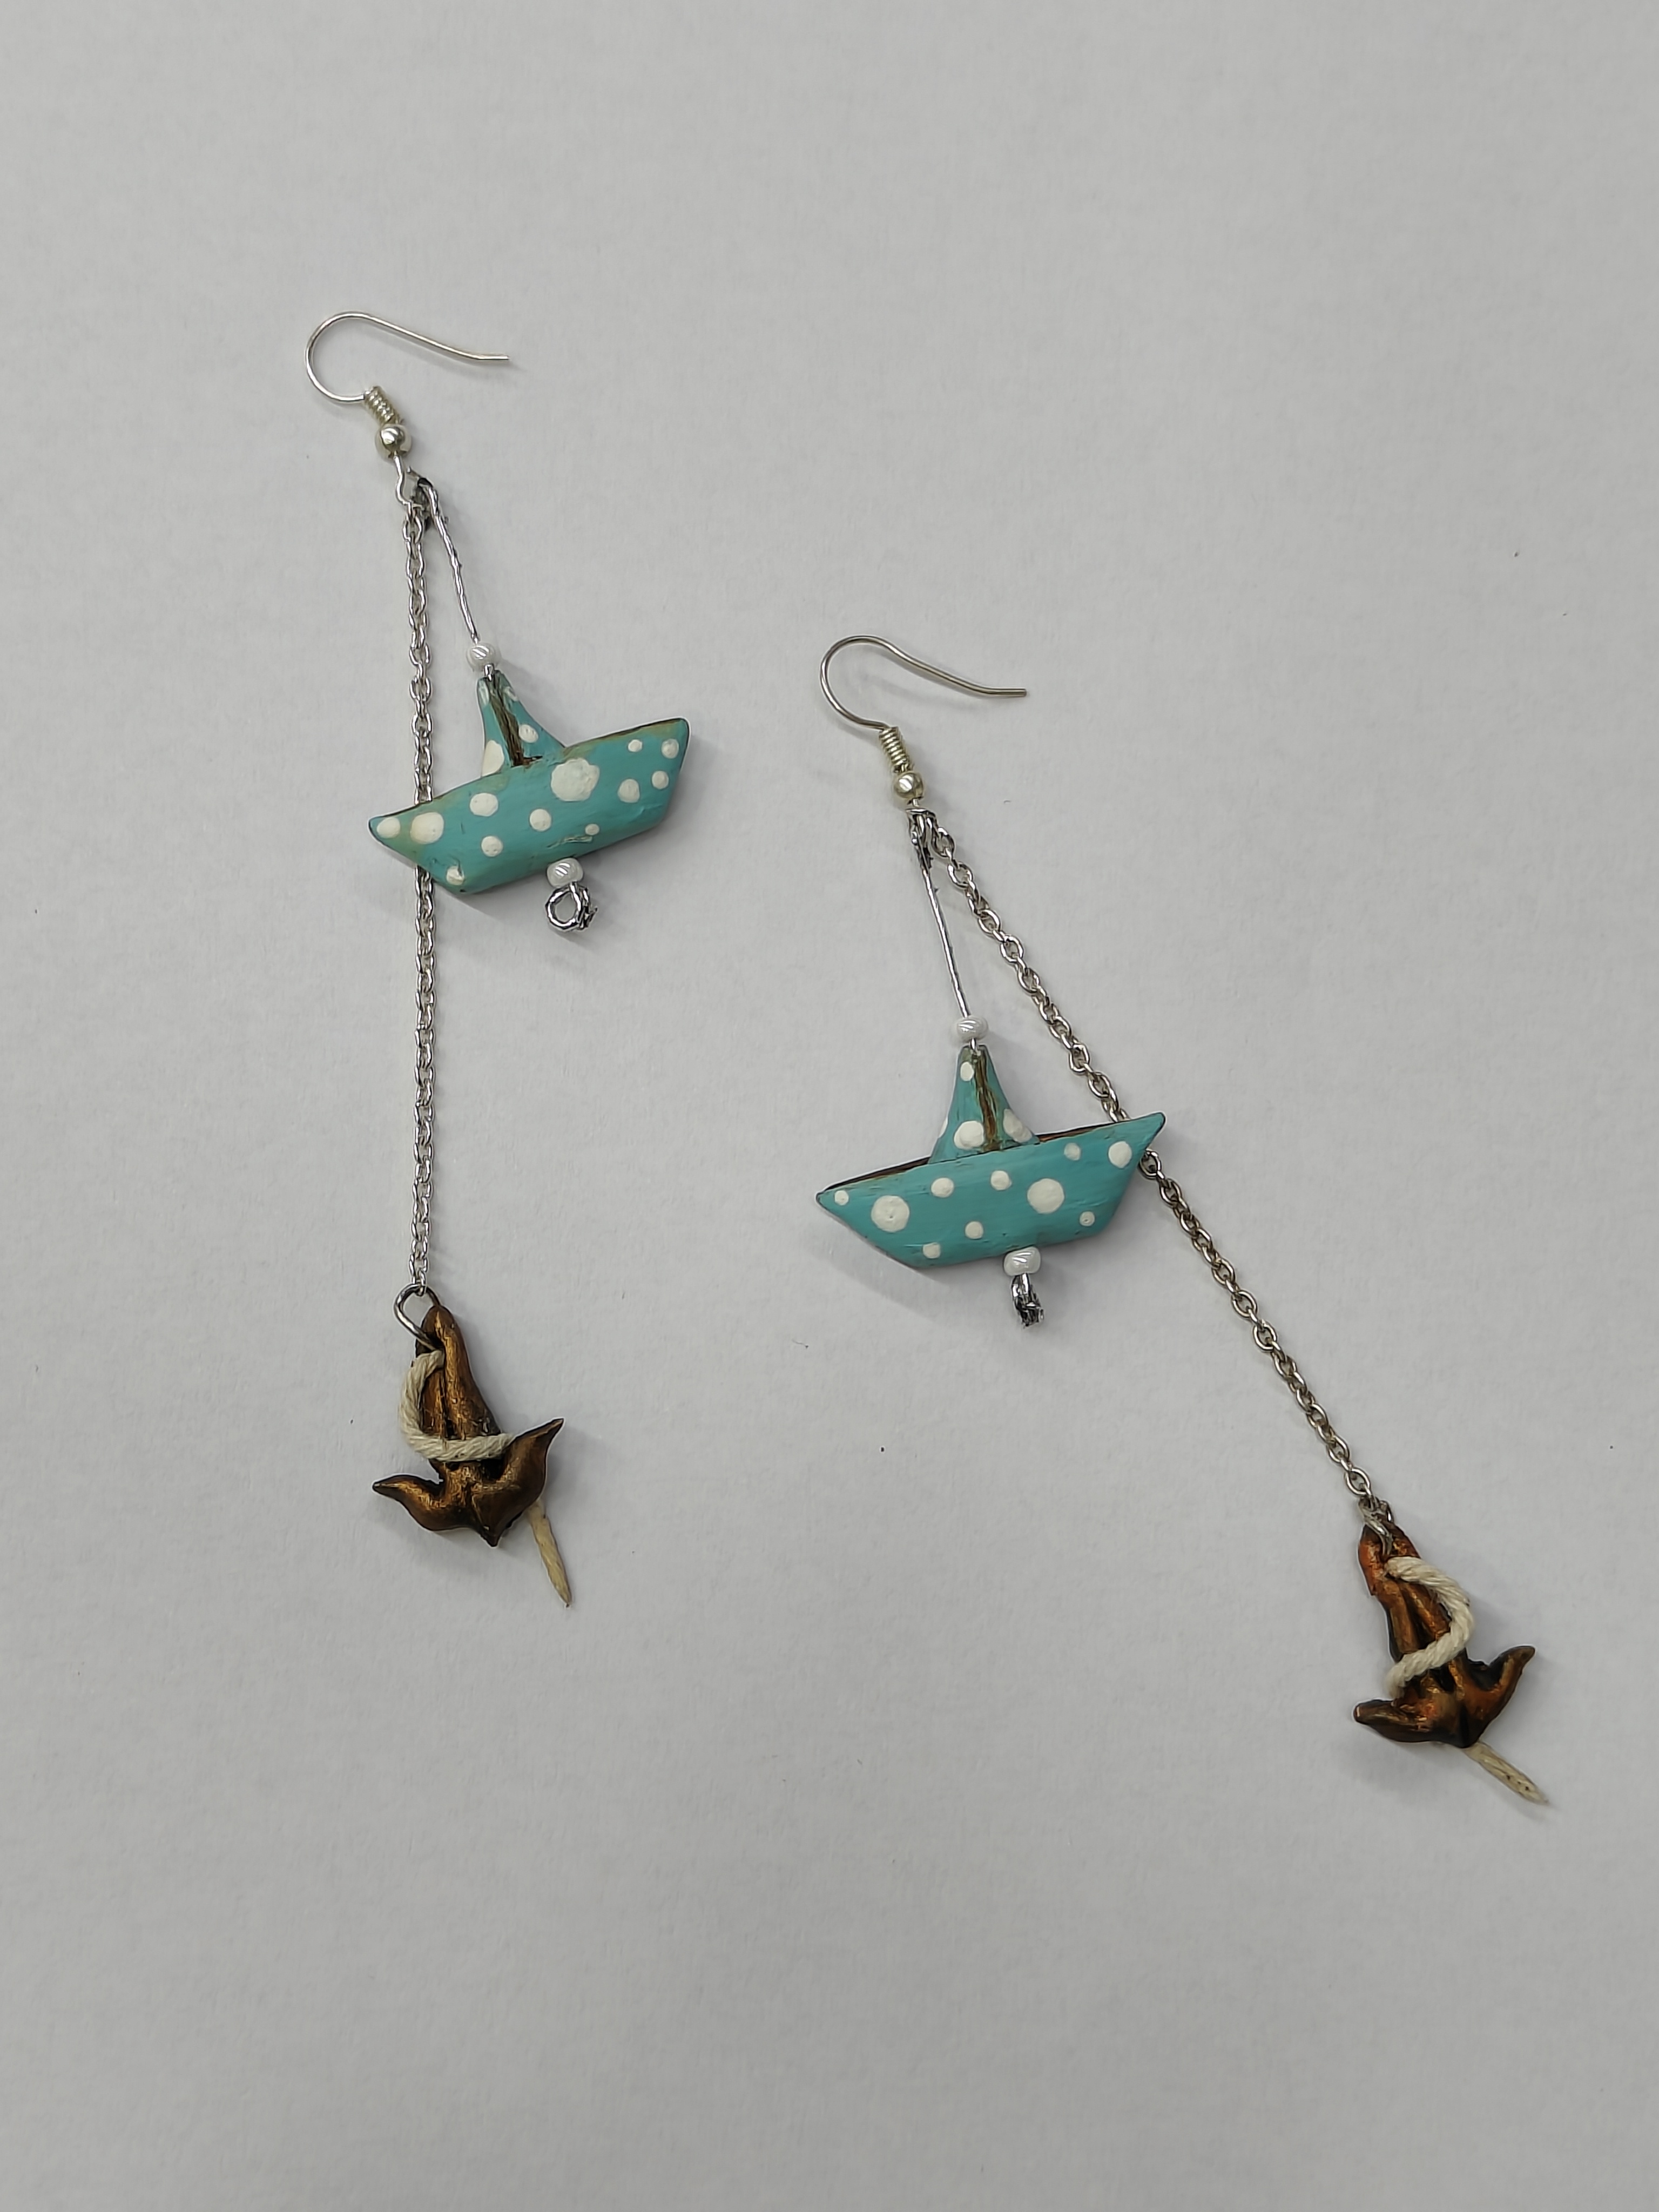
- Attach the anchor to the boat and add hooks to make the earrings wearable.
- Admire the final look of your unique nautical-themed earrings!


 +91 99676 55545